![]()
Atomic Data is a modular specification for sharing, modifying and modeling graph data. It combines the ease of use of JSON, the connectivity of RDF (linked data) and the reliability of type-safety.

Atomic Data uses links to connect pieces of data, and therefore makes it easier to connect datasets to each other - even when these datasets exist on separate machines.
AtomicServer
AtomicServer is an open source, powerful graph database + headless CMS. It's the reference implementation for the Atomic Data specification, written in Rust.
Atomic Data Core
Atomic Data has been designed with the following goals in mind:
- Give people more control over their data
- Make linked data easier to use
- Make it easier for developers to build highly interoperable apps
- Make standardization easier and cheaper
Atomic Data is Linked Data, as it is a strict subset of RDF.
It is type-safe (you know if something is a string, number, date, URL, etc.) and extensible through Atomic Schema, which means that you can re-use or define your own Classes, Properties and Datatypes.
The default serialization format for Atomic Data is JSON-AD, which is simply JSON where each key is a URL of an Atomic Property.
These Properties are responsible for setting the datatype (to ensure type-safety) and setting shortnames (which help to keep names short, for example in JSON serialization) and descriptions (which provide semantic explanations of what a property should be used for).
Read more about Atomic Data Core
Atomic Data Extended
Atomic Data Extended is a set of extra modules (on top of Atomic Data Core) that deal with data that changes over time, authentication, and authorization.
- Commits communicate state changes. These Commits are signed using cryptographic keys, which ensures that every change can be audited. Commits are also used to construct a history of versions.
- Agents are Users that enable authentication. They are Resources with their own Public and Private keys, which they use to identify themselves.
- Collections: querying, filtering, sorting and pagination.
- Paths: traverse graphs.
- Hierarchies used for authorization and keeping data organized. Similar to folder structures on file-systems.
- Invites: create new users and provide them with rights.
- WebSockets: real-time updates.
- Endpoints: provide machine-readable descriptions of web services.
- Files: upload, download and metadata for files.
Tools & libraries
- Browser app atomic-data-browser (demo on atomicdata.dev)
- Build a react app using typescript & react libraries. Start with the react template on codesandbox
- Host your own atomic-server (powers atomicdata.dev, run with
docker run -p 80:80 -v atomic-storage:/atomic-storage joepmeneer/atomic-server) - Discover the command line tool: atomic-cli (
cargo install atomic-cli) - Use the Rust library: atomic-lib
Get involved
Make sure to join our Discord if you'd like to discuss Atomic Data with others.
Status
Keep in mind that none of the Atomic Data projects has reached a v1, which means that breaking changes can happen.
Reading these docs
This is written mostly as a book, so reading it in the order of the Table of Contents will probably give you the best experience. That being said, feel free to jump around - links are often used to refer to earlier discussed concepts. If you encounter any issues while reading, please leave an issue on Github. Use the arrows on the side / bottom to go to the next page.
Table of contents
What is Atomic Data
AtomicServer
Guides
Specification
Use Atomic Data
Acknowledgements | Newsletter | Get involved
Motivation: Why Atomic Data?
Give people more control over their data
The world wide web was designed by Tim Berners-Lee to be a decentralized network of servers that help people share information. As I'm writing this, it is exactly 30 years ago that the first website has launched. Unfortunately, the web today is not the decentralized network it was supposed to be. A handful of large tech companies are in control of how the internet is evolving, and where and how our data is being stored. The various services that companies like Google and Microsoft offer (often for free) integrate really well with their other services, but are mostly designed to lock you in. Vendor lock-in means that it is often difficult to take your information from one app to another. This limits innovation, and limits users to decide how they want to interact with their data. Companies often have incentives that are not fully aligned with what users want. For example, Facebook sorts your newsfeed not to make you satisfied, but to make you spend as much time looking at ads. They don't want you to be able to control your own newsfeed. Even companies like Apple, that don't have an ad-revenue model, still have a reason to (and very much do) lock you in. To make things even worse, even open-source projects made by volunteers often don't work well together. That's not because of bad intentions, that's because it is hard to make things interoperable.
If we want to change this, we need open tech that works really well together. And if we want that, we need to standardize. The existing standards are well-suited for documents and webpages, but not for structured personal data. If we want to have that, we need to standardize the read-write web, which includes standardizing how items are changed, how their types are checked, how we query lists, and more. I want all people to have a (virtual) private server that contains their own data, that they control. This Personal Data Store could very well be an old smartphone with a broken screen that is always on, running next to your router.
Atomic Data is designed to be a standard that achieves this. But we need more than a standard to get adoption - we need implementations. That's why I've been working on a server, various libraries, a GUI and more - all MIT licensed. If Atomic Data will be successful, there will likely be other, better implementations.
Linked data is awesome, but it is too difficult for developers in its current form
Linked data (RDF / the semantic web) enables us to use the web as a large, decentralized graph database. Using links everywhere in data has amazing merits: links remove ambiguity, they enable exploration, they enable connected datasets. But the existing specs are too difficult to use, and that is harming adoption.
At my company Ontola, we've been working with linked data quite intensely for the last couple of years. We went all-in on RDF, and challenged ourselves to create software that communicates exclusively using it. That has been an inspiring, but at times also a frustrating journey. While building our e-democracy platform Argu.co, we had to solve many RDF related problems. How to properly model data in RDF? How to deal with sequences? How to communicate state changes? Which serialization format to use? How to convert RDF to HTML, and build a front-end? We tackled some of these problems by having a tight grip on the data that we create (e.g. we know the type of data, because we control the resources), and another part is creating new protocols, formats, tools, and libraries. But it took a long time, and it was hard. It's been almost 15 years since the introduction of linked data, and its adoption has been slow. We know that some of its merits are undeniable, and we truly want the semantic web to succeed. I believe the lack of growth partially has to do with a lack of tooling, but also with some problems that lie in the RDF data model.
Atomic Data aims to take the best parts from RDF, and learn from the past to make a more developer-friendly, performant and reliable data model to achieve a truly linked web. Read more about how Atomic Data relates to RDF, and why these changes have been made.
Make standardization easier and cheaper
Standards for data sharing are great, but creating one can be very costly endeavor. Committees with stakeholders write endless documents describing the intricacies of domain models, which fields are allowed and which are required, and how data is serialized. In virtually all cases, these documents are only written for humans - and not for computers. Machine readable ways to describe data models like UML diagrams and OpenAPI specifications (also known as Swagger) help to have machine-readable descriptions, but these are still not really used by machines - they are mostly only used to generate visualizations for humans. This ultimately means that implementations of a standard have to be manually checked for compliance, which often results in small (yet important) differences that severely limit interoperability. These implementations will also often want to extend the original definitions, but they are almost always unable to describe what they have extended.
Standardizing with Atomic Data solves these issues. Atomic Data takes the semantic value of ontologies, and merges it with a machine-readable schemas. This makes standards created using Atomic Data easy to read for humans, and easy to validate for computers (which guarantees interoperability). Atomic Data has a highly standardized protocol for fetching data, which means that Atomic Schemas can link to each other, and re-use existing Properties. For developers (the people who need to actually implement and use the data that has been standardized), this means their job becomes easier. Because Properties have URLs, it becomes trivial to add new Properties that were initially not in the main specification, without sacrificing type safety and validation abilities.
Make it easier for developers to build feature-rich, interoperable apps
Every time a developer builds an application, they have to figure a lot of things out. How to design the API, how to implement forms, how to deal with authentication, authorization, versioning, search... A lot of time is essentially wasted on solving these issues time and time again.
By having a more complete, strict standard, Atomic Data aims to decrease this burden. Atomic Schema enables developers to easily share their datamodels, and re-use those from others. Atomic Commits helps developers to deal with versioning, history, undo and audit logs. Atomic Hierarchies provides an intuitive model for authorization and access control. And finally, the existing open source Atomic Data software (such as a server + database, a browser GUI, various libraries and React templates) help developers to have these features without having to do the heavy lifting themselves.
Strategy, history and roadmap for Atomic Data
We have the ambition to make the internet more interoperable. We want Atomic Data to be a commonly used specification, enabling a vast amount of applications to work together and share information. This means we need a lot of people to understand and contribute to Atomic Data. In this document, discuss the strategic principles we use, the steps we took, and the path forward. This should help you understand how and where you may be able to contribute.
Strategy for adoption
- Work on both specification and implementations (both client and server side) simultaneously to make sure all ideas are both easily explainable and properly implementable. Don't design a spec with a large committee over many months, only to learn that it has implementation issues later on.
- Create libraries whenever possible. Enable other developers to re-use the technology in their own stacks. Keep the code as modular as possible.
- Document everything. Not just your APIs - also your ideas, considerations and decisions.
- Do everything public. All code is open source, all issues are publicly visible. Allow outsiders to learn everything and start contributing.
- Make an all-in-one workspace app that stand on its own. Atomic Data may be an abstract, technical story, but we still need end-user friendly applications that solve actual problems if we want to get as much adoption as possible.
- Let realistic use cases guide API design. Don't fall victim to spending too much time for extremely rare edge-cases, while ignoring more common issues and wishes.
- Familiarity first. Make tools and specs that feel familiar, build libraries for popular frameworks, and stick to conventions whenever possible.
History
- First draft of specification (2020-06). Atomic Data started as an unnamed bundle of ideas and best practices to improve how we work with linked data, but quickly turned into a single (draft) specification. The idea was to start with a cohesive and easy to understand documentation, and use that as a stepping stone for writing the first code. After this, the code and specification should both be worked on simultaneously to make sure ideas are both easily explainable and properly implementable. Many of the earliest ideas were changed to make implementation easier.
- atomic-cli + atomic-lib (2020-07). The CLI functioned as the first platform to explore some of the most core ideas of Atomic Data, such as Properties and fetching.
atomic_libis the place where most logic resides. Written in Rust. - AtomicServer (2020-08). The server (using the same
atomic_libas the CLI) should be a fast, lightweight server that must be easy to set-up. Functions as a graph database with no dependencies. - Collections (2020-10). Allows users to perform basic queries, filtering, sorting and pagination.
- Commits (2020-11). Allow keeping track of an event-sourced log of all activities that mutate resources, which in turn allows for versioning and adding new types of indexes later on.
- JSON-AD (2021-02). Instead of the earlier proposed serialization format
.ad3, we moved to the more familiarjson-ad. - Atomic-Data-Browser (2021-02). We wanted typescript and react libraries, as well as a nice interactive GUI that works in the browser. It should implement all relevant parts of the specification.
- Endpoints (2021-03). Machine readable API endpoints (think Swagger / OpenAPI spec) for things like versioning, path traversal and more.
- Classes and Properties editable from the browser (2021-04). The data-browser is now powerful enough to use for managing the core ontological data of the project.
- Hierarchies & Invitations (2021-06). Users can set rights, structure Resources and invite new people to collaborate.
- Websockets (2021-08). Live synchronization between client and server.
- Use case: Document Editor (2021-09). Notion-like editor with real-time synchronization.
- Full-text search (2021-11). Powered by Tantivy.
- Authentication for read access (2021-11). Allows for private data.
- Desktop support (2021-12). Run Atomic-Server on the desktop, powered by Tauri. Easier install UX, system tray icon.
- File management (2021-12). Upload, download and view Files.
- Indexed queries (2022-01). Huge performance increase for queries. Allows for far bigger datasets.
- Use case: ChatRoom (2022-04). Group chat application. To make this possible, we had to extend the Commit model with a
pushaction, and allow Plugins to create new Commits. - JSON-AD Publishing and Importing (2022-08). Creating and consuming Atomic Data becomes a whole lot easier.
- @tomic/svelte (2022-12). Library for integrating Atomic Data with Svelte(Kit).
- Atomic Tables (2023-09). A powerful table editor with keyboard / copy / paste / sort support that makes it easier to model and edit data.
- Ontology Editor (2023-10). Easily create & edit Classes, Properties and Ontologies.
Where we're at
Most of the specification seems to become pretty stable. The implementations are working better every day, although 1.0 releases are still quite a bit far away. At this point, the most important thing is to get developers to try out Atomic Data and provide feedback. That means not only make it easy to install the tools, but also allow people to make Atomic Data without using any of our own tools. That's why we're now working on the JSON-AD and Atomizer projects (see below).
Roadmap
- Video(s) about Atomic Data (2024 Q1). Explain what Atomic Data is, why we're doing this, and how to get started.
- Improved document editor (2024). Better support for multi-line selection, more data types, etc.
- E-mail registration (2024 Q1). This makes it easier for users to get started, and de-emphasizes the importance of private key management, as user can register new Private Keys using their e-mail address.
- Headless CMS tooling (2024). Use Atomic-Server to host and edit data that is being read by a front-end JAMSTACK type of tool, such as NextJS or SvelteKit.
- Atomizer (tbd). Import files and automatically turn these into Atomic Data.
- Atomic-server plugins (tbd). Let developers design new features without having to make PRs in Atomic-Server, and let users install apps without re-compiling (or even restarting) anything.
- Atomic-browser plugins (tbd). Create new views for Classes.
- 1.0 release (tbd). Mark the specification, the server (tracking issue) and the browser as stable. It is possible that the Spec will become 1.0 before any implementation is stable. Read the STATUS.md document for an up-to-date list of features that are already stable.
When (not) to use Atomic Data
When should you use Atomic Data
- Flexible schemas. When dealing with structured wikis or semantic data, various instances of things will have different attributes. Atomic Data allows any kind of property on any resource.
- Open data. Atomic Data is a bit harder to create than plain JSON, for example, but it is easier to re-use and understand. It's use of URLs for properties makes data self-documenting.
- High interoperability requirements. When multiple groups of people have to use the same schema, Atomic Data provides easy ways to constrain and validate the data and ensure type safety.
- Connected / decentralized data. With Atomic Data, you use URLs to point to things on other computers. This makes it possible to connect datasets very explicitly, without creating copies. Very useful for decentralized social networks, for example.
- Auditability & Versioning. Using Atomic Commits, we can store all changes to data as transactions that can be replayed. This creates a complete audit log and history.
- JSON or RDF as Output. Atomic Data serializes to idiomatic, clean JSON as well as various RDF formats (Turtle / JSON-LD / n-triples / RDF/XML).
When not to use Atomic Data
- Internal use only. If you're not sharing structured data, Atomic Data will probably only make things harder for you.
- Big Data. If you're dealing with TeraBytes of data, you probably don't want to use Atomic Data. The added cost of schema validation and the lack of distributed / large scale persistence tooling makes it not the right choice.
- Video / Audio / 3D. These should have unique, optimized binary representations and have very strict, static schemas. The advantages of atomic / linked data do little to improve this, unless it's just for metadata.
AtomicServer and its features
AtomicServer is the reference implementation of the Atomic Data Core + Extended specification.
It was developed parallel to this specification, and it served as a testing ground for various ideas (some of which didn't work, and some of which ended up in the spec).
AtomicServer is a real-time headless CMS, graph database server for storing and sharing typed linked data. It's free, open source (MIT license), and has a ton of features:
- 🚀 Fast (less than 1ms median response time on my laptop), powered by actix-web and sled
- 🪶 Lightweight (8MB download, no runtime dependencies)
- 💻 Runs everywhere (linux, windows, mac, arm)
- 🔧 Custom data models: create your own classes, properties and schemas using the built-in Ontology Editor. All data is verified and the models are sharable using Atomic Schema
- ⚙️ Restful API, with JSON-AD responses.
- 🔎 Full-text search with fuzzy search and various operators, often <3ms responses. Powered by tantivy.
- 🗄️ Tables, with strict schema validation, keyboard support, copy / paste support. Similar to Airtable.
- 📄 Documents, collaborative, rich text, similar to Google Docs / Notion.
- 💬 Group chat, performant and flexible message channels with attachments, search and replies.
- 📂 File management: Upload, download and preview attachments.
- 💾 Event-sourced versioning / history powered by Atomic Commits
- 🔄 Real-time synchronization: instantly communicates state changes with a client. Build dynamic, collaborative apps using websockets (using a single one-liner in react or svelte).
- 🧰 Many serialization options: to JSON, JSON-AD, and various Linked Data / RDF formats (RDF/XML, N-Triples / Turtle / JSON-LD).
- 📖 Pagination, sorting and filtering queries using Atomic Collections.
- 🔐 Authorization (read / write permissions) and Hierarchical structures powered by Atomic Hierarchy
- 📲 Invite and sharing system with Atomic Invites
- 🌐 Embedded server with support for HTTP / HTTPS / HTTP2.0 (TLS) and Built-in LetsEncrypt handshake.
- 📚 Libraries: Javascript / Typescript, React, Svelte, Rust
Should you use AtomicServer?
When should you use AtomicServer
- You want a lightweight, fast, realtime and easy to use headless CMS with live updates, editors, modelling capabilities and an intuitive API
- You want realtime updates and collaboration functionality
- You want high performance: AtomicServer is incredibly fast and can handle thousands of requests per second.
- You want standalone app: no need for any external applications or dependencies (like a database / nginx).
- You want versioning or full-text search.
- You want to build a webapplication, and like working with using React or Svelte.
- You want to make (high-value) datasets as easily accessible as possible
- You want to specify and share a common vocabulary / ontology / schema for some specific domain or dataset. Example classes here.
- You want to use and share linked data, but don't want to deal with most of the complexities of RDF, SPARQL, Triple Stores, Named Graphs and Blank Nodes.
- You are interested in re-decentralizing the web or want want to work with tech that improves data ownership and interoperability.
When not to use AtomicServer
- High-throughput numerical data / numerical analysis. AtomicServer does not have aggregate queries.
- If you need high stability, look further (for now). This is beta sofware and can change.
- You're dealing with very sensitive / private data. The built-in authorization mechanisms are relatively new and not rigorously tested. The database itself is not encrypted.
- Complex query requirements. We have queries with filters and features for path traversal, but it may fall short. Check out NEO4j, Apache Jena or maybe TerminusDB.
Up next
Next, we'll get to run AtomicServer!
Setup / installation
You can run AtomicServer in different ways:
- Using docker (probably the quickest):
docker run -p 80:80 -p 443:443 -v atomic-storage:/atomic-storage joepmeneer/atomic-server - From a published binary
- Using Cargo from crates.io:
cargo install atomic-server - Manually from source
If you want to run AtomicServer locally as a developer / contributor, check out the Contributors guide.
1. Run using docker
- Run:
docker run -p 80:80 -p 443:443 -v atomic-storage:/atomic-storage joepmeneer/atomic-serverThedockerfileis located in the project root, above thisserverfolder. - See dockerhub for a list of all the available tags (e.g. the
developtag for the very latest version) - If you want to make changes (e.g. to the port), make sure to pass the relevant CLI options (e.g.
--port 9883). - If you want to update, run
docker pull joepmeneer/atomic-serverand docker should fetch the latest version. - By default, docker downloads the
latesttag. You can find other tags here.
2. Run pre-compiled binary
Get the binaries from the releases page and copy them to your bin folder.
3. Install using cargo
# Install from source using cargo, and add it to your path
# If things go wrong, check out `Troubleshooting compiling from source:` below
cargo install atomic-server --locked
# Check the available options and commands
atomic-server --help
# Run it!
atomic-server
4. Compile from source
# make sure pnpm is installed and available in path! https://pnpm.io/
pnpm --version
git clone git@github.com:atomicdata-dev/atomic-server.git
cd atomic-server/server
cargo run
If things go wrong while compiling from source:
# If cc-linker, pkg-config or libssl-dev is not installed, make sure to install them
sudo apt-get install -y build-essential pkg-config libssl-dev --fix-missing
Initial setup and configuration
- You can configure the server by passing arguments (see
atomic-server --help), or by setting ENV variables. - The server loads the
.envfrom the current path by default. Create a.envfile from the default template in your current directory withatomic-server generate-dotenv - After running the server, check the logs and take note of the
Agent SubjectandPrivate key. You should use these in theatomic-cliand atomic-data-browser clients for authorization. - A directory is made:
~/.config/atomic, which stores your newly created Agent keys, the HTTPS certificates other configuration. Depending on your OS, the actual data is stored in different locations. See use theshow-configcommand to find out where, if you need the files. - Visit
http://localhost:9883/setupto register your first (admin) user. You can use an existing Agent, or create a new one. Note that if you create alocalhostagent, it cannot be used on the web (since, well, it's local). More info and steps in getting started with the GUI.
Running using a tunneling service (easy mode)
If you want to make your -server available on the web, but don't want (or cannot) deal with setting up port-forwarding and DNS, you can use a tunneling service. It's the easiest way to get your server to run on the web, yet still have full control over your server.
- Create an account on some tunneling service, such as tunnelto.dev (which we will use here). Make sure to reserve a subdomain, you want it to remain stable.
tunnelto --port 9883 --subdomain joepio --key YOUR_API_KEYatomic-server --domain joepio.tunnelto.dev --custom-server-url 'https://joepio.tunnelto.dev' --initialize
HTTPS Setup on a VPS (static IP required)
You'll probably want to make your Atomic Data available through HTTPS on some server. You can use the embedded HTTPS / TLS setup powered by LetsEncrypt, acme_lib and rustls.
You can do this by passing these flags:
Run the server: atomic-server --https --email some@example.com --domain example.com.
You can also set these things using a .env or by setting them some other way.
Make sure the server is accessible at ATOMIC_DOMAIN at port 80, because Let's Encrypt will send an HTTP request to this server's /.well-known directory to check the keys.
The default Ports are 9883 for HTTP, and 9884 for HTTPS.
If you're running the server publicly, set these to 80 and 433: atomic-server --https --port 80 --port-https 433.
It will now initialize the certificate.
Read the logs, watch for errors.
HTTPS certificates are automatically renewed when the server is restarted, and the certs are 4 weeks or older.
They are stored in your .config/atomic/ dir.
HTTPS Setup using external HTTPS proxy
Atomic-server has built-in HTTPS support using letsencrypt, but there are usecases for using external TLS source (e.g. Traeffik / Nginx / Ingress).
To do this, users need to set these ENVS:
ATOMIC_DOMAIN=example.com
# We'll use this regular HTTP port, not the HTTPS one
ATOMIC_PORT=80
# Disable built-in letsencrypt
ATOMIC_HTTPS=false
# Since Atomic-server is no longer aware of the existence of the external HTTPS service, we need to set the full URL here:
ATOMIC_SERVER_URL=https://example.com
Using systemd to run Atomic-Server as a service
In Linux operating systems, you can use systemd to manage running processes.
You can configure it to restart automatically, and collect logs with journalctl.
Create a service:
nano /etc/systemd/system/atomic.service
Add this to its contents, make changes if needed:
[Unit]
Description=Atomic-Server
#After=network.targetdd
StartLimitIntervalSec=0[Service]

[Service]
Type=simple
Restart=always
RestartSec=1
User=root
ExecStart=/root/atomic-server
WorkingDirectory=/root/
EnvironmentFil=/root/.env

[Install]
WantedBy=multi-user.target
# start / status / restart commands:
systemctl start atomic
systemctl status atomic
systemctl restart atomic
# show recent logs, follow them on screen
journalctl -u atomic.service --since "1 hour ago" -f
AtomicServer CLI options / ENV vars
(run atomic-server --help to see the latest options)
Create, share and model Atomic Data with this graph database server. Run atomic-server without any arguments to start the server. Use --help to learn about the options.

Usage: atomic-server [OPTIONS] [COMMAND]

Commands:
  export
          Create and save a JSON-AD backup of the store
  import
          Import a JSON-AD file or stream to the store. By default creates Commits for all changes, maintaining version history. Use --force to allow importing other types of files
  generate-dotenv
          Creates a `.env` file in your current directory that shows various options that you can set
  show-config
          Returns the currently selected options, based on the passed flags and parsed environment variables
  reset
          Danger! Removes all data from the store
  help
          Print this message or the help of the given subcommand(s)

Options:
      --initialize
          Recreates the `/setup` Invite for creating a new Root User. Also re-runs various populate commands, and re-builds the index

          [env: ATOMIC_INITIALIZE=]

      --rebuild-indexes
          Re-builds the indexes. Parses all the resources. Do this when updating requires it, or if you have issues with Collections / Queries / Search

          [env: ATOMIC_REBUILD_INDEX=]

      --development
          Use staging environments for services like LetsEncrypt

          [env: ATOMIC_DEVELOPMENT=]

      --domain <DOMAIN>
          The origin domain where the app is hosted, without the port and schema values

          [env: ATOMIC_DOMAIN=]
          [default: localhost]

  -p, --port <PORT>
          The port where the HTTP app is available. Set to 80 if you want this to be available on the network

          [env: ATOMIC_PORT=]
          [default: 9883]

      --port-https <PORT_HTTPS>
          The port where the HTTPS app is available. Set to 443 if you want this to be available on the network

          [env: ATOMIC_PORT_HTTPS=]
          [default: 9884]

      --ip <IP>
          The IP address of the server. Set to :: if you want this to be available to other devices on your network

          [env: ATOMIC_IP=]
          [default: ::]

      --https
          Use HTTPS instead of HTTP. Will get certificates from LetsEncrypt fully automated

          [env: ATOMIC_HTTPS=]

      --https-dns
          Initializes DNS-01 challenge for LetsEncrypt. Use this if you want to use subdomains

          [env: ATOMIC_HTTPS_DNS=]

      --email <EMAIL>
          The contact mail address for Let's Encrypt HTTPS setup

          [env: ATOMIC_EMAIL=]

      --script <SCRIPT>
          Custom JS script to include in the body of the HTML template

          [env: ATOMIC_SCRIPT=]
          [default: ]

      --config-dir <CONFIG_DIR>
          Path for atomic data config directory. Defaults to "~/.config/atomic/""

          [env: ATOMIC_CONFIG_DIR=]

      --data-dir <DATA_DIR>
          Path for atomic data store folder. Contains your Store, uploaded files and more. Default value depends on your OS

          [env: ATOMIC_DATA_DIR=]

      --public-mode
          CAUTION: Skip authentication checks, making all data publicly readable. Improves performance

          [env: ATOMIC_PUBLIC_MODE=]

      --server-url <SERVER_URL>
          The full URL of the server. It should resolve to the home page. Set this if you use an external server or tunnel, instead of directly exposing atomic-server. If you leave this out, it will be generated from `domain`, `port` and `http` / `https`

          [env: ATOMIC_SERVER_URL=]

      --log-level <LOG_LEVEL>
          How much logs you want. Also influences what is sent to your trace service, if you've set one (e.g. OpenTelemetry)

          [env: RUST_LOG=trace]
          [default: info]
          [possible values: warn, info, debug, trace]

      --trace <TRACE>
          How you want to trace what's going on with the server. Useful for monitoring performance and errors in production. Combine with `log_level` to get more or less data (`trace` is the most verbose)

          [env: ATOMIC_TRACING=opentelemetry]
          [default: stdout]

          Possible values:
          - stdout:
            Log to STDOUT in your terminal
          - chrome:
            Create a file in the current directory with tracing data, that can be opened with the chrome://tracing/ URL
          - opentelemetry:
            Log to a local OpenTelemetry service (e.g. Jaeger), using default ports

      --slow-mode
          Introduces random delays in the server, to simulate a slow connection. Useful for testing

          [env: ATOMIC_SLOW_MODE=]

  -h, --help
          Print help information (use `-h` for a summary)

  -V, --version
          Print version information
Using the AtomicServer GUI
After running the server, open it in your browser.
By default, that's at http://localhost:9883.
Fun fact:
⚛is HTML entity code for the Atom icon: ⚛
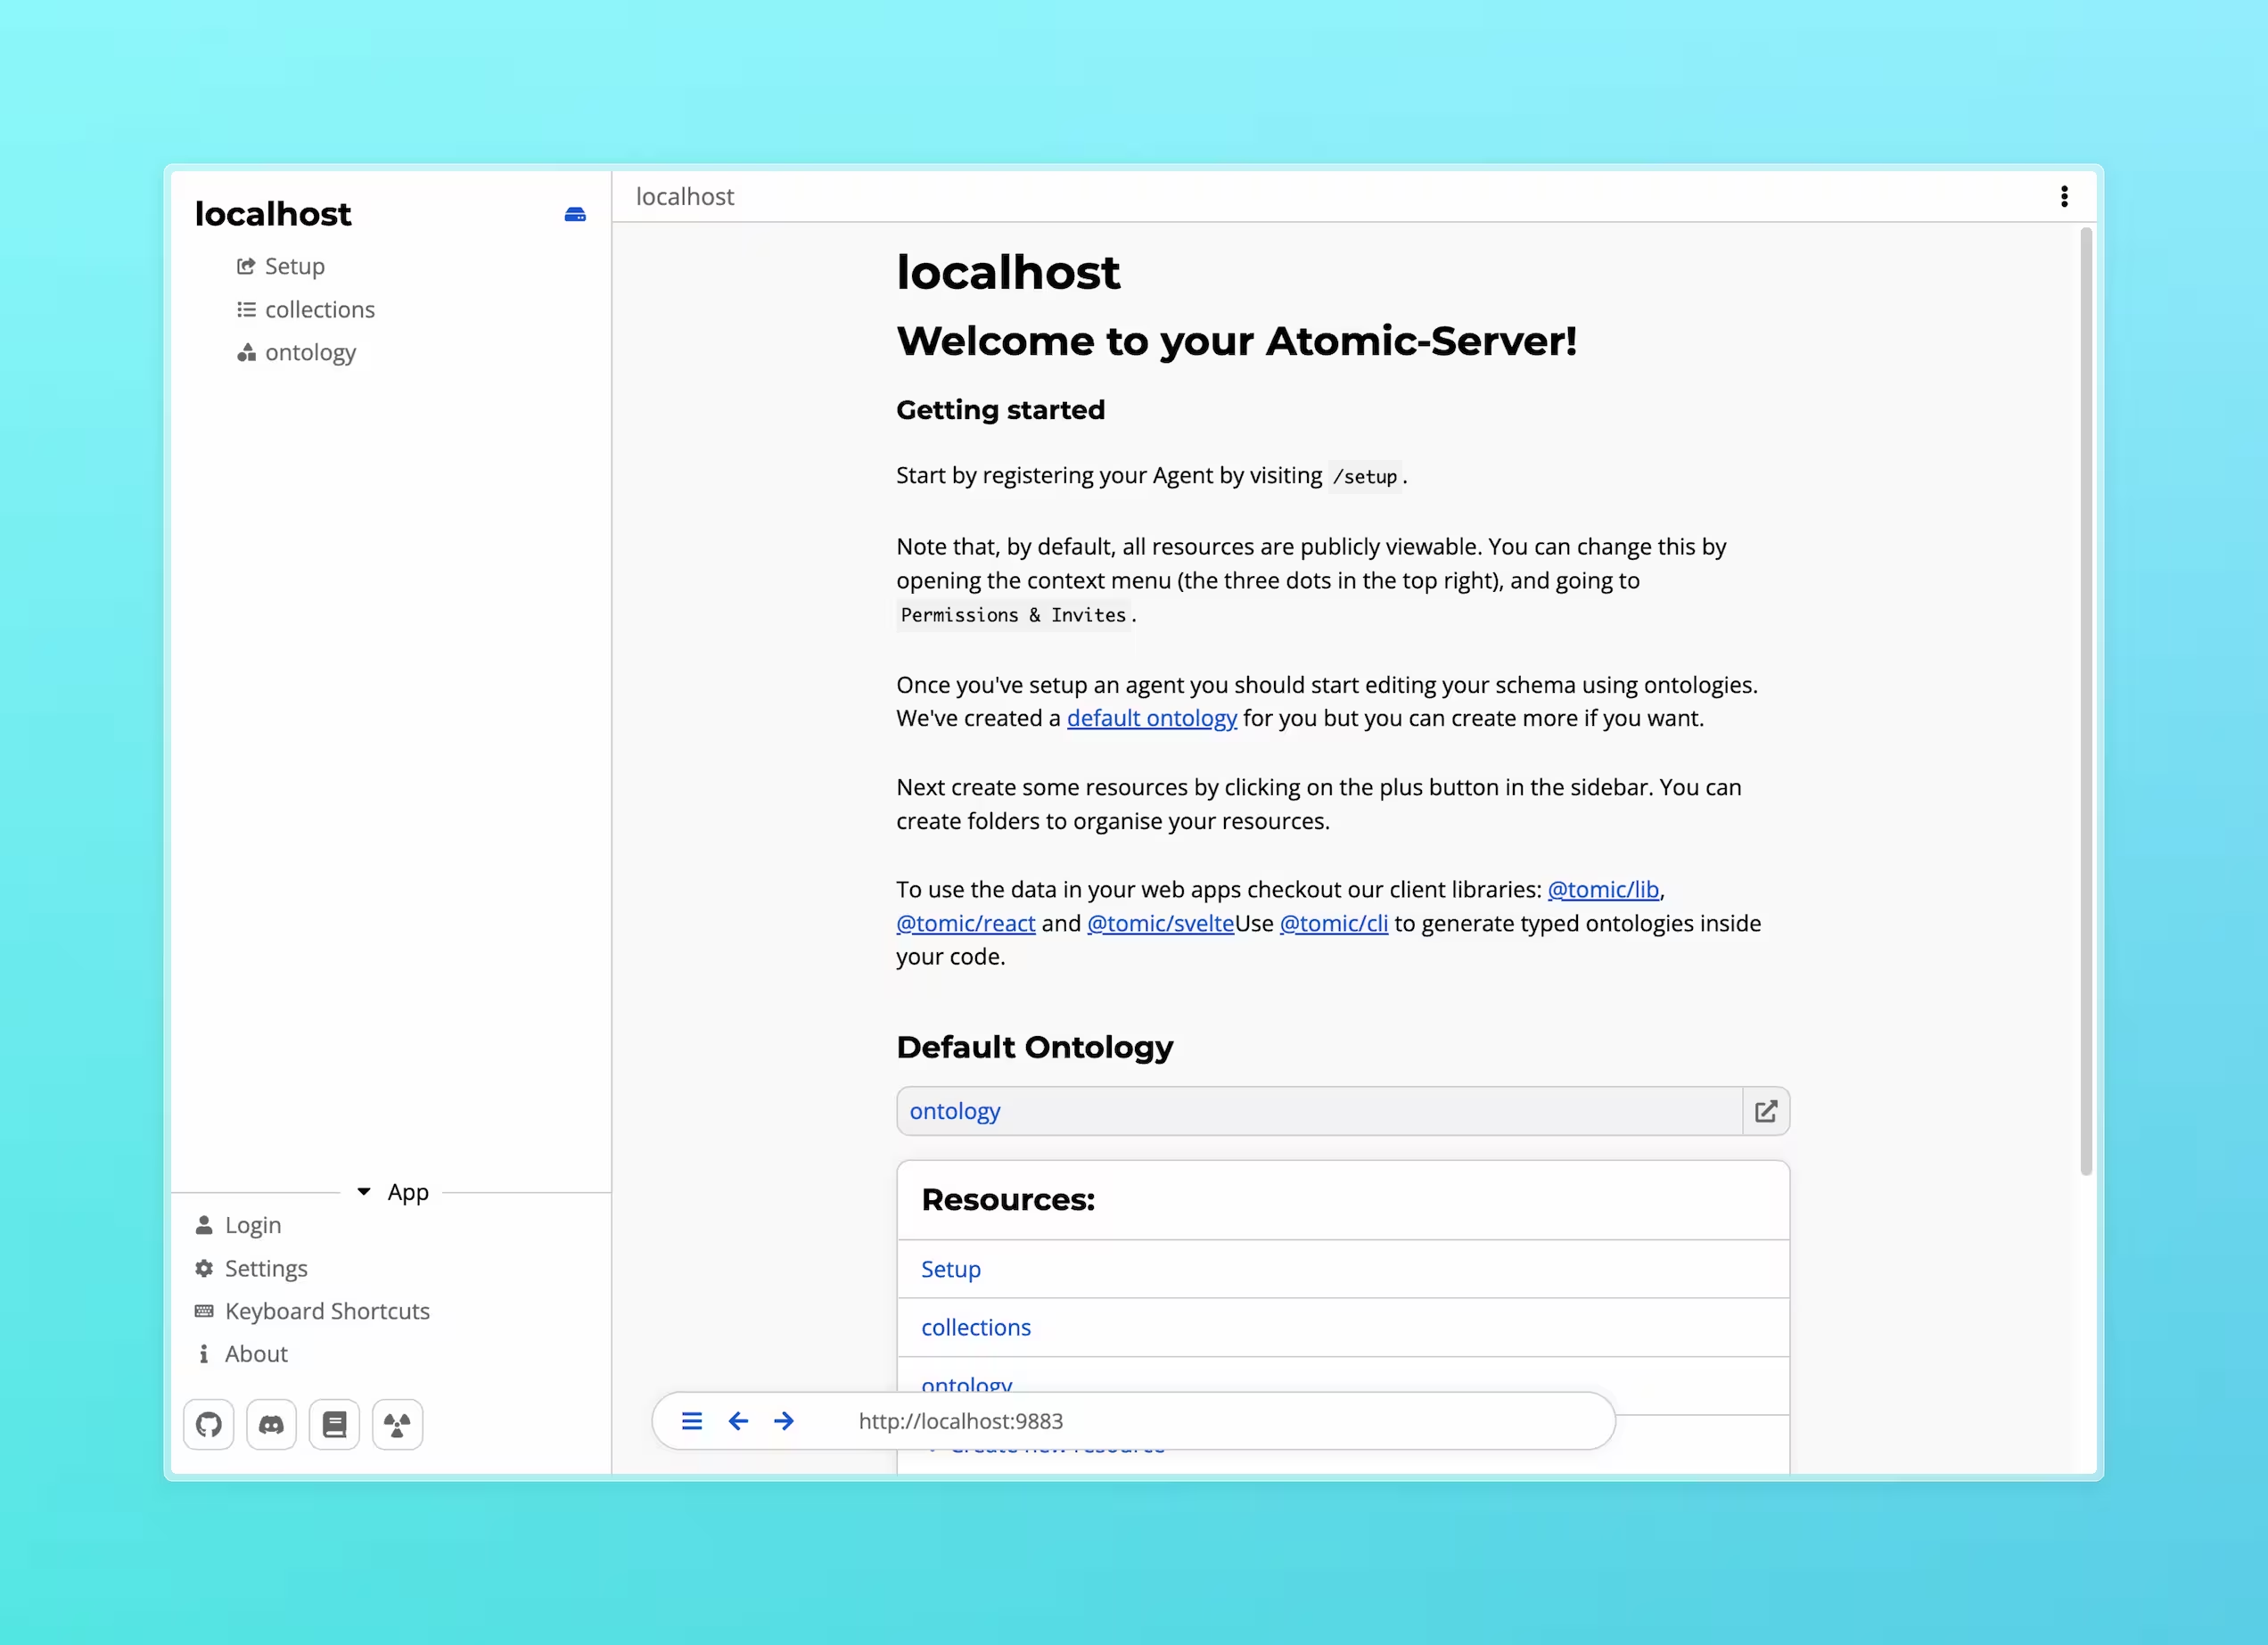
The first screen should show you your main Drive. You can think of this as the root of the server. It is the resource hosted at the root URL, effectively being the home page of your server.
In the sidebar you will see a list of resources in the current drive. At the start these will be:
- The setup invite that's used to configure the root agent.
- A resource named
collections. This is a group of collections that shows collections for all classes in the server, essentially a list of all resources. - The default ontology. Ontologies are used to define new classes and properties and show to relation between them.
Creating an agent
To create data in AtomicServer you'll need an agent. An agent is like a user account, it signs the changes (commits) you make to data so that others can verify that you made them. Agents can be used on any AtomicServer as long as they have permission to do so.
If your AtomicServer is not reachable from the outside we recommend you create an agent on a public server like atomicdata.dev as an agent created on a local server can only be used on that server. The server that hosts your agent cannot do anything on your behalf because your private key is not stored on the server. They can however delete your agent making it unusable.
To create an agent on atomicdata.dev you can use the demo invite.
If you want to create the agent on your own server you can use the /setup invite that was created when you first started the server.
Click the "Accept as new user" button and navigate to the User Settings page. Here you'll find the agent secret. This secret is what you use to login so keep it somewhere safe, like in a password manager. If you lose it you won't be able to recover your account.
Setting up the root Agent
Next, we'll set up the root Agent that has write access to the Drive.
If you've chosen to create an Agent on this server using the /setup invite, you can skip this step.
Head to the setup page by selecting it in the sidebar.
You'll see a button that either says Accept as <Your agent> or Accept as new user.
If it says 'as new user`, click on login, paste your secret in the input field and return to the invite page.
After clicking the accept button you'll be redirected to the home page and you will have write access to the Drive.
You can verify this by hovering over the description field, clicking the edit icon, and making a few changes.
You can also press the menu button (three dots, top left) and press Data view to see your agent after the write field.
Note that you can now edit every field.
The /setup-invite can only be used once use and will therefore not work anymore.
If you want to re-enable the invite to change the root agent you can start AtomicServer with the --initialize flag.
Creating your first Atomic Data
Now that everything is up and running you can start creating some resources. To create a new resource, click the + button in the sidebar. You will be presented with a list of resource types to choose from like Tables, Folders, Documents etc. You can also create your own types by using ontologies.
Tables
Tables are a way to create and group large amounts of structured data.
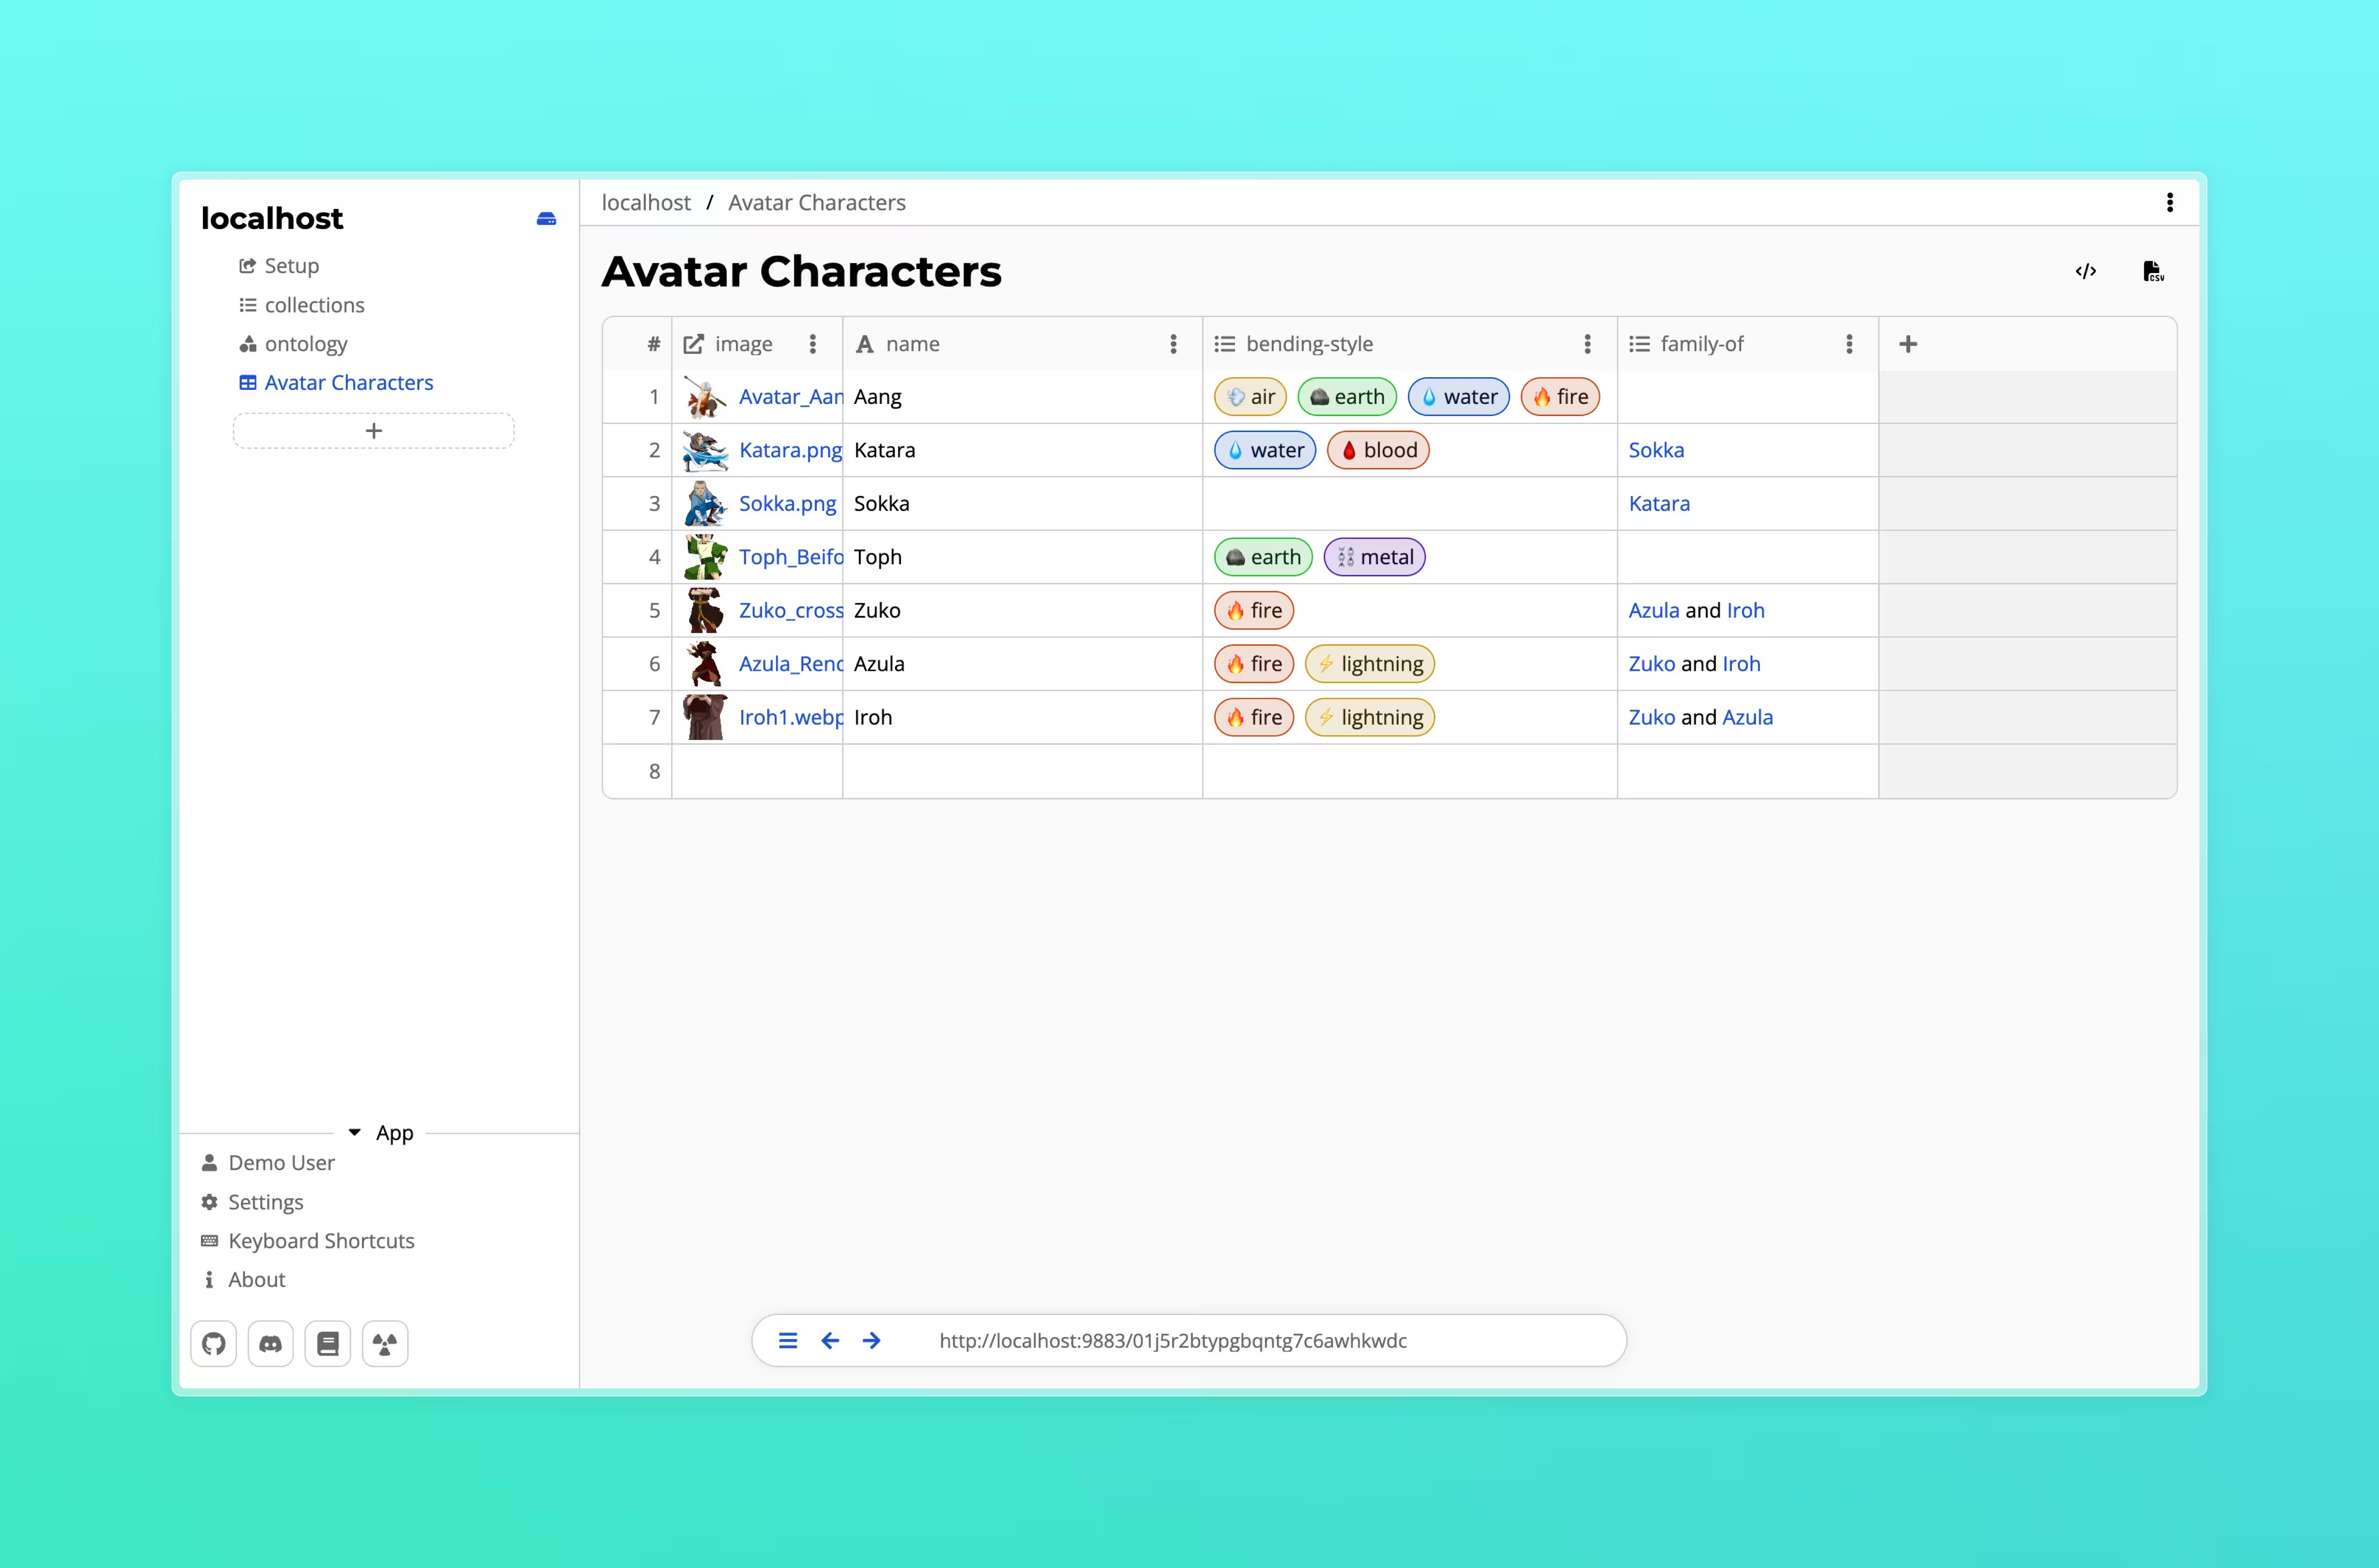
Tables consist of rows of resources that share the same parent and class. The properties of that class are represented as columns in the table. This means that each column is type-safe, a number column can not contain text data for example.
Creating a table
To create a table, click the "+" button in the sidebar or a folder and select "Table".
A dialog will appear prompting you to enter a name.
This name will be used as the title of the table as well as the name for the underlying class of the rows.
This new class will already have a name property. Using the name property as titles on your resources is a best practice as it helps with compatibility between other tools and makes your resources findable by AtomicServer's search functionality.
If you do not want to use the name property, you can remove it by clicking on the three dots in the column header and selecting "Remove".
While creating a new table you can also choose to use an existing class by selecting "Use existing class" in the dialog and selecting the desired class from the dropdown.
Classes created by tables are automatically added to the default ontology of the drive. Same goes for the columns of the table. If you chose to use an existing class, any columns created will be added to the ontology containing that class.
Features
- Rearange columns: You can drag and drop columns to rearrange them.
- Resize columns: You can resize columns by dragging the edges of the column header.
- Sort rows: Click on a column header to sort the rows by that column.
- Fast keyboard navigation: Use the arrow keys to navigate the table with hotkeys similar to Excel.
- Copy & paste multiple cells: You can copy and paste multiple cells by selecting them and using
Ctrl/Cmd + CandCtrl/Cmd + V. Pasting also works across different tables and even different applications that support HTML Table data (Most spreadsheet applications). - Export data to CSV: You can export the data of a table to a CSV file by clicking the "Export" button in the top right.
API
The API of AtomicServer uses Atomic Data.
All Atomic Data resources have a unique URL, which can be fetched using HTTP. Every single Class, Property or Endpoint also is a resource, which means you can visit these in the browser! This effectively makes most of the API browsable and self-documenting.
Every individual resource URL can be fetched using a GET request using your favorite HTML tool or library.
You can also simply open every resource in your browser!
If you want some specific representation (e.g. JSON), you will need to add an Accept header to your request.
# Fetch as JSON-AD (de facto standard for Atomic Data)
curl -i -H "Accept: application/ad+json" https://atomicdata.dev/properties/shortname
# Fetch as JSON-LD
curl -i -H "Accept: application/ld+json" https://atomicdata.dev/properties/shortname
# Fetch as JSON
curl -i -H "Accept: application/json" https://atomicdata.dev/properties/shortname
# Fetch as Turtle / N3
curl -i -H "Accept: text/turtle" https://atomicdata.dev/properties/shortname
Endpoints
The various Endpoints in AtomicServer can be seen at /endpoints of your local instance.
These include functionality to create changes using /commits, query data using /query, get /versions, or do full-text search queries using /search.
Typically, you pass query parameters to these endpoints to specify what you want to do.
Libraries or API?
You can use the REST API if you want, but it's recommended to use one of our libraries.
How to create and publish a JSON-AD file
JSON-AD is the default serialization format of Atomic Data. It's just JSON, but with some extra requirements.
Most notably, all keys are links to Atomic Properties. These Properties must be actually hosted somewhere on the web, so other people can visit them to read more about them.
Ideally, in JSON-AD, each Resource has its own @id.
This is the URL of the resource.
This means that if someone visits that @id, they should get the resource they are requesting.
That's great for people re-using your data, but as a data provider, implementing this can be a bit of a hassle.
That's why there is a different way that allows you to create Atomic Data without manually hosting every resource.
Creating JSON-AD without hosting individual resources yourself
In this section, we'll create a single JSON-AD file containing various resources. This file can then be published, shared and stored like any other.
The goal of this preparation, is to ultimately import it somewhere else. We'll be importing it to Atomic-Server. Atomic-Server will create URLs for every single resource upon importing it. This way, we only deal with the JSON-AD and the data structure, and we let Atomic-Server take care of hosting the data.
Let's create a BlogPost.
We know the fields that we need: a name and some body.
But we can't use these keys in Atomic Data, we should use URLs that point to Properties.
We can either create new Properties (see the Atomic-Server tutorial), or we can use existing ones, for example by searching on AtomicData.dev/properties.
Setting the first values
{
  "https://atomicdata.dev/properties/name": "Writing my first blogpost",
  "https://atomicdata.dev/properties/description": "Hi! I'm a blogpost. I'm also machine readable!",
}
Adding a Class
Classes help others understanding what a Resource's type is, such as BlogPost or Person. In Atomic Data, Resources can have multiple classes, so we should use an Array, like so:
{
  "https://atomicdata.dev/properties/name": "Writing my first blogpost",
  "https://atomicdata.dev/properties/description": "Hi! I'm a blogpost. I'm also machine readable!",
  "https://atomicdata.dev/properties/isA": ["https://atomicdata.dev/classes/Article"],
}
Adding a Class helps people to understand the data, and it can provide guarantees to the data users about the shape of the data: they now know which fields are required or recommended. We can also use Classes to render Forms, which can be useful when the data should be edited later. For example, the BlogPost item
Using exsisting Ontologies, Classes and Ontologies
Ontologies are groups of concepts that describe some domain. For example, we could have an Ontology for Blogs that links to a bunch of related Classes, such as BlogPost and Person. Or we could have a Recipy Ontology that describes Ingredients, Steps and more.
At this moment, there are relatively few Classes created in Atomic Data. You can find most on atomicdata.dev/classes.
So possibly the best way forward for you, is to define a Class using the Atomic Data Browser's tools for making resources.
Multiple items
If we want to have multiple items, we can simply use a JSON Array at the root, like so:
[{
  "https://atomicdata.dev/properties/name": "Writing my first blogpost",
  "https://atomicdata.dev/properties/description": "Hi! I'm a blogpost. I'm also machine readable!",
  "https://atomicdata.dev/properties/isA": ["https://atomicdata.dev/classes/Article"],
},{
  "https://atomicdata.dev/properties/name": "Another blogpost",
  "https://atomicdata.dev/properties/description": "I'm writing so much my hands hurt.",
  "https://atomicdata.dev/properties/isA": ["https://atomicdata.dev/classes/Article"],
}]
Preventing duplication with localId
When we want to publish Atomic Data, we also want someone else to be able to import it. An important thing to prevent, is data duplication. If you're importing a list of Blog posts, for example, you'd want to only import every article once.
The way to preventing duplication, is by adding a localId.
This localId is used by the importer to find out if it has already imported it before.
So we, as data producers, need to make sure that our localId is unique and does not change!
We can use any type of string that we like, as long as it conforms to these requirements.
Let's use a unique slug, a short name that is often used in URLs.
{
  "https://atomicdata.dev/properties/name": "Writing my first blogpost",
  "https://atomicdata.dev/properties/description": "Hi! I'm a blogpost. I'm also machine readable!",
  "https://atomicdata.dev/properties/isA": ["https://atomicdata.dev/classes/Article"],
  "https://atomicdata.dev/properties/localId": "my-first-blogpost",
}
Describing relationships between resources using localId
Let's say we also want to describe the author of the BlogPost, and give them an e-mail, a profile picture and some biography.
This means we need to create a new Resource for each Author, and again have to think about the properties relevant for Author.
We'll also need to create a link from BlogPost to Author, and perhaps the other way around, too.
Normally, when we link things in Atomic Data, we can only use full URLs.
But, since we don't have URLs yet for our Resources, we'll need a different solution.
Again, this is where we can use localId!
We can simply refer to the localId, instead of some URL that does not exist yet.
[{
  "https://atomicdata.dev/properties/name": "Writing my first blogpost",
  "https://atomicdata.dev/properties/description": "Hi! I'm a blogpost. I'm also machine readable!",
  "https://atomicdata.dev/properties/author": "jon",
  "https://atomicdata.dev/properties/isA": ["https://atomicdata.dev/classes/Article"],
  "https://atomicdata.dev/properties/localId": "my-first-blogpost"
},{
  "https://atomicdata.dev/properties/name": "Another blogpost",
  "https://atomicdata.dev/properties/description": "I'm writing so much my hands hurt.",
  "https://atomicdata.dev/properties/author": "jon",
  "https://atomicdata.dev/properties/isA": ["https://atomicdata.dev/classes/Article"],
  "https://atomicdata.dev/properties/localId": "another-blogpost"
},{
  "https://atomicdata.dev/properties/name": "Jon Author",
  "https://atomicdata.dev/properties/isA": ["https://atomicdata.dev/classes/Person"],
  "https://atomicdata.dev/properties/localId": "jon"
}]
Importing data using Atomic Sever
Press the import button in the resource menu (at the bottom of the screen).
Then you paste your JSON-AD in the text area, and press import.
AtomicServer FAQ & Troubleshooting
I can't find my question, I need support
- Create an issue on github or join the discord!
Do I need NGINX or something?
No, AtomicServer has its own HTTPS support. Just pass a --https flag!
Can / should I create backups?
You should.
Run atomic-server export to create a JSON-AD backup in your ~/.config/atomic/backups folder.
Import them using atomic-server import -p ~/.config/atomic/backups/${date}.json.'
You could also copy all folders atomic-server uses. To see what these are, see atomic-server show-config.
I lost the key / secret to my Root Agent, and the /setup invite is no longer usable! What now?
You can run atomic-server --initialize to recreate the /setup invite. It will be reset to 1 usage.
How do I migrate my data to a new domain?
There are no helper functions for this, but you could atomic-server export your JSON-AD, and find + replace your old domain with the new one.
This could especially be helpful if you're running at localhost:9883 and want to move to a live server.
How do I reset my database?
atomic-server reset
How do I make my data private, yet available online?
You can press the menu icon (the three dots in the navigation bar), go to sharing, and uncheck the public read right.
See the Hierarchy chapter in the docs on more info of the authorization model.
Items are missing in my Collections / Search results
You might have a problem with your indexes.
Try rebuilding the indexes using atomic-server --rebuild-index.
Also, if you can, recreate and describe the indexing issue in the issue tracker, so we can fix it.
I get a failed to retrieve error when opening
Try re-initializing atomic server atomic-server --initialize.
Can I embed AtomicServer in another application?
Yes. This is what I'm doing with the Tauri desktop distribution of AtomicServer.
Check out the desktop code for an example!
I want to use my own authorization. How do I do that?
You can disable all authorization using --public-mode.
Make sure AtomicServer is not publicly accessible, because this will allow anyone to read any data.
Where is my data stored on my machine?
It depends on your operating system, because some data is temporary, others are configuration files, and so forth. Run atomic-server show-config to see the used paths. You can overwrite these if you want, see --help.
https://user-images.githubusercontent.com/2183313/139728539-d69b899f-6f9b-44cb-a1b7-bbab68beac0c.mp4
Client libraries for Atomic Data
Libraries and clients (all MIT licenced) that work great with atomic-server:
- Typescript / javascript library: @tomic/lib
- React library: @tomic/react
- Type CLI (npm): @tomic/cli for generating TS types from ontologies
- Svelte library: @tomic/svelte
- Client CLI (rust): atomic-cli for fetching & editing data
- Rust library: atomic-lib powers
atomic-serverandatomic-cli, and can be used in other Rust projects (docs.rs) - Raycast Extension: full-text search
Want to add to this list? Some ideas for tooling
This document contains a set of ideas that would help achieve that success. Open a PR and edit this file to add your project!
Atomic Companion
A mobile app for granting permissions to your data and signing things. See github issue.
- Show a notification when you try to log in somewhere with your agent
- Notifications for mentions and other social items
- Check uptime of your server
Atomizer (data importer and conversion kit)
- Import data from some data source (CSV / SQL / JSON / RDF), fill in the gaps (mapping / IRI creation / datatypes) an create new Atoms
- Perhaps a CLI, library, GUI or a combination of all of these
Atomic Preview
- A simple (JS) widget that can be embedded anywhere, which converts an Atomic Graph into an HTML view.
- Would be useful for documentation, and as a default view for Atomic Data.
- Use
@tomic/reactand@tomic/libto get started
Atomic-Dart + Flutter
Library + front-end app for browsing / manipulating Atomic Data on mobile devices.
Javscript SKDs
If you want to work with data from your AtomicServer you can use the following libraries.
@tomic/lib
Core JS library for AtomicServer, handles data fetching, parsing, storing, signing commits, setting up websockets and full-text search and more.
@tomic/react
React hooks for fetching and subscribing to AtomicServer data.
@tomic/svelte
Svelte functions for fetching and subscribing to AtomicServer data.
@tomic/cli
Generate Typescript types from your AtomicServer ontologies.
@tomic/lib: The Atomic Data library for typescript/javascript
Core typescript library for fetching data, handling JSON-AD parsing, storing data, signing Commits, setting up WebSockets and full-text search and more.
Runs in most common JS contexts like the browser, node, bun etc.
Installation
npm install @tomic/lib
TL;DR
Create a Store
import { Store, Agent, core } from '@tomic/lib';

const store = new Store({
  // You can create a secret from the `User settings` page using the AtomicServer UI
  agent: Agent.fromSecret('my-secret-key'),
  // Set a default server URL
  serverUrl: 'https://my-atomic-server.dev',
});
Fetching a resource and reading its data
// When the class is known.
const resource = await store.getResource<Person>('https://my-atomic-server.dev/some-resource');
const job = resource.props.job;

// When the class is unknown
const resource = await store.getResource('https://my-atomic-server.dev/some-resource');
const job = resource.get(myOntology.properties.job);
Editing a resource
resource.set(core.properties.description, 'Hello World');

// Commit the changes to the server.
await resource.save();
Creating a new resource
const newResource = await store.newResource({
  isA: myOntology.classes.person,
  propVals: {
    [core.properties.name]: 'Jeff',
  },
});

// Commit the new resource to the server.
await newResource.save();
Subscribing to changes
// --------- Subscribe to changes (using websockets) ---------
const unsub = store.subscribe('https://my-atomic-server.dev/some-resource', resource => {
  // This callback is called each time a change is made to the resource on the server.
  // Do something with the changed resource...
});
What's next?
Next check out Store to learn how to set up a store and fetch data. Or read the Generated Typedocs
If you rather want to see a step-by-step guide on how to use the library in a project check out the Astro + AtomicServer Guide
Store
The Store class is a central component in the @tomic/lib library that provides a convenient interface for managing and interacting with atomic data resources. It allows you to fetch resources, subscribe to changes, create new resources, perform full-text searches, and more.
Setting up a store
Creating a store is done with the Store constructor.
const store = new Store();
It takes an object with the following options
| Name | Type | Description |
|---|---|---|
| serverUrl | string | URL of your atomic server |
| agent | Agent | (optional) The agent the store should use to fetch resources and to sign commits when editing resources, defaults to a public agent |
const store = new Store({
  serverUrl: 'https://my-atomic-server.com',
  agent: Agent.fromSecret('my-agent-secret'),
});
NOTE
You can always change or set both the serverUrl and agent at a later time usingstore.setServerUrl()andstore.setAgent()respectively.
One vs Many Stores
Generally in a client application with one authenticated user, you'll want to have a single instance of a Store that is shared throughout the app.
This way you'll never fetch resources more than once while still receiving updates via websocket messages.
If store is used on the server however, you might want to consider creating a new store for each request as a store can only have a single agent associated with it and changing the agent will reauthenticate all websocket connections.
Fetching resources
NOTE:
If you're using atomic in a frontend library like React or Svelte there might be other ways to fetch resources that are better suited to those libraries. Check @tomic/react or @tomic/svelte
Fetching resources is generally done using the store.getResource() method.
const resource = await store.getResource('https://my-resource-subject');
getResource takes the subject of the resource as a parameter and returns a promise that resolves to the requested resource.
The store will cache the resource in memory and subscribe to the server for changes to the resource, subsequent requests for the resource will not fetch over the network but return the cached version.
Subscribe to changes
Atomic makes it easy to build real-time applications. When you subscribe to a subject you get notified every time the resource changes on the server.
store.subscribe('https://my-resource-subject', myResource => {
  // do something with the changed resource.
  console.log(`${myResource.title} changed!`);
});
Unsubscribing
You should not forget to unsubscribe your listeners as this can lead to a growing memory footprint (just like DOM event listeners).
To unsubscribe you can either use the returned unsubscribe function or call store.unsubscribe(subject, callback).
const unsubscribe = store.subscribe(
  'https://my-resource-subject',
  myResource => {
    // ...
  },
);

unsubscribe();
const callback = myResource => {
  // ...
};

store.subscribe('https://my-resource-subject', callback);

store.unsubscribe('https://my-resource-subject', callback);
Creating new resources
Creating resources is done using the store.newResource method.
It takes an options object with the following properties:
| Name | Type | Description |
|---|---|---|
| subject | string | (optional) The subject the new resource should have, by default a random subject is generated |
| parent | string | (optional) The parent of the new resource, defaults to the store's serverUrl |
| isA | string | string[] | (optional) The 'type' of the resource. determines what class it is. Supports multiple classes. |
| propVals | Record<string, JSONValue> | (optional) Any additional properties you want to set on the resource. Should be an object with subjects of properties as keys |
// Basic:
const resource = await store.newResource();

await resource.save();
// With options:
import { core } from '@tomic/lib';

const resource = await store.newResource({
  parent: 'https://myatomicserver.com/some-folder',
  isA: 'https://myatomicserver.com/article',
  propVals: {
    [core.properties.name]: 'How to create new resources',
    [core.properties.description]: 'lorem ipsum dolor sit amet',
    'https://myatomicserver.com/written-by':
      'https://myatomicserver.com/agents/superman',
  },
});

await resource.save();
Generating random subjects
In some cases you might need a subject before you have created the resource with that subject.
To generate a random subject, use the store.createSubject() method.
This method generates a new subject with the current serverURL as hostname and a random lowercased ULID string as the path.
The method also allows you to pass a parent subject to generate a subject under that parent.
const subject = store.createSubject();
// Result: https://myserver.com/01hw30e1w6t9y0y5aqg0aghhf4


// With parent subject
const subject = store.createSubject(parent.subject);
Keep in mind that subjects never change once they are set, even if the parent changes. This means you can't reliably infer the parent from the subject.
Full-Text Search
AtomicServer comes included with a full-text search API. Using this API is very easy in @tomic/lib.
const results = await store.search('lorem ipsum');
To further refine your query you can pass an options object with the following properties:
| Name | Type | Description |
|---|---|---|
| include | boolean | (optional) If true sends full resources in the response instead of just the subjects |
| limit | number | (optional) The max number of results to return, defaults to 30. |
| parents | string[] | (optional) Only include resources that have these given parents somewhere as an ancestor |
| filters | Record<string, string> | (optional) Only include resources that have matching values for the given properties. Should be an object with subjects of properties as keys |
Example: search AtomicServer for all files with 'holiday-1995' in their name:
import { core, server } from '@tomic/lib';

const results = store.search('holiday-1995', {
  filters: {
    [core.properties.isA]: server.classes.file,
  },
});
Preloading resources
Sometimes you might want to prefetch a resource and all the resources it depends on ahead of time.
For example when using @tomic/react or @tomic/svelte on the server.
This can be done using the store.preloadResourceTree() method.
The method takes a subject and an object representing a tree of referenced resources that need to be preloaded.
// Preload a blog post, its header image, the author and the author's profile image
await store.preloadResourceTree('https://myapp.com/my-blog-post', {
  [myOntology.properties.headerImage]: true,
  [myOntology.properties.author]: {
    [myOntology.properties.profileImage]: true,
  },
});
The tree does not have to be complete and can contain any property, this way you can preload any resource even if you're not sure of what type it might be.
(Advanced) Fetching resources in render code
NOTE:
The following is mostly intended for library authors.
When building frontends it is often critical to render as soon as possible, waiting for requests to finish leads to a sluggish UI.
Store provides the store.getResourceLoading method that immediately returns an empty resource with resource.loading set to true.
You can then subscribe to the subject and rerender when the resource changes.
// some component in a hypothetical framework
function renderSomeComponent(subject: string) {
  const resource = store.getResourceLoading(subject);

  store.subscribe(subject, () => {
    rerender();
  });

  return (
    <div>
      <h1>{resource.loading ? 'loading...' : resource.title}</h1>
      <p> other UI that does not rely on the resource being ready</p>
    </div>
  );
}
For a real-world example check out how we use it inside @tomic/react useResource hook
Events
Store emits a few types of events that your app can listen to.
To listen to these events use the store.on method.
import { StoreEvents } from '@tomic/lib';

store.on(StoreEvents.Error, error => {
  notifyErrorReportingServer(error);
});
The following events are available
| Event ID | Handler type | Description |
|---|---|---|
StoreEvents.ResourceSaved | (resource: Resource) => void | Fired when any resource was saved |
StoreEvents.ResourceRemoved | (resource: Resource) => void | Fired when any resource was deleted |
StoreEvents.AgentChanged | (agent: Agent) => void | Fired when a new agent is set on the store |
StoreEvents.Error | (error: Error) => void | Fired when store encounters an error |
Agents
An agent is an authenticated identity that can interact with Atomic Data resources. All writes in AtomicServer are signed by an agent and can therefore be proven to be authentic. Read more about agents in the Atomic Data specification.
Creating an Agent instance
Creating an agent can be done in two ways, either by using the Agent constructor or by using the Agent.fromSecret method.
const agent = new Agent('my-private-key', 'my-agent-subject');
const agent = Agent.fromSecret('my-long-secret-string');
Resource
Resources are the fundamental units of Atomic Data. All data fetched using the store is represented as a resource.
In @tomic/lib resources are instances of the Resource class.
Getting a resource
A resource can be obtained by either fetching it from the server or by creating a new one.
To fetch a resource, use the store.getResource method.
const resource = await store.getResource('https://my-resource-subject.com');
Read more about fetching resources.
Creating a new resource is done using the store.newResource method.
const resource = await store.newResource();
Read more about creating resources.
Typescript
Resources can be annotated with the subject of a class. This subject has to be known to @tomic/lib.
import { type Article } from './ontologies/article'; // File generated by @tomic/cli

const resource = await store.getResource<Article>(
  'https://my-resource-subject.com',
);
Annotating resources opens up a lot of great dev experience improvements, such as autocompletion and type checking. Read more about generating ontologies with @tomic/cli.
Reading Data
How you read data from a resource depends on whether you've annotated the resource with a class or not.
For annotated resources, it's as easy as using the .props accessor:
import { type Article } from './ontologies/article';
const resource = await store.getResource<Article>(
  'https://my-atomicserver.com/my-resource',
);

console.log(resource.props.category); // string
console.log(resource.props.likesAmount); // number
for non annotated resources you can use the .get method:
import { core } from '@tomic/lib';

const resource = await store.getResource(
  'https://my-atomicserver.com/my-resource',
);

const description = resource.get(core.properties.description); // string | undefined
const category = resource.get(
  'https://my-atomicserver.com/properties/category',
); // JSONValue
Writing Data
Writing data is done using the .set method (works on any resource) or by assigning to the props accessor (only works on annotated resources).
Using .props
import { type Article } from './ontologies/article';

const resource = await store.getResource<Article>(
  'https://my-atomicserver.com/my-resource',
);

resource.props.description = 'New description';

await resource.save();
Setting values via resource.props does not validate the value against the properties datatype.
Use the resource.set() method when you want to validate the value.
Using .set()
import { core } from '@tomic/lib';

const resource = await store.getResource('https://my-atomicserver.com/my-resource');
// With Validation
await resource.set(core.properties.description, 'New description');

// Without Validation
resource.set(core.properties.description, 'New description', false);

await resource.save();
By default, .set validates the value against the properties datatype.
You should await the method when validation is enabled because the property's resource might not be in the store yet and has to be fetched.
Note
Setting validate to false only disables validation on the client. The server will always validate the data and respond with an error if the data is invalid.
Parameters
| Name | Type | Description |
|---|---|---|
| property | string | Subject of the property to set |
| value | JSONValue* | The value to set |
| validate | boolean | Whether to validate the value against the property's datatype |
*When setting properties from known ontologies, you get automatic type-checking as a bonus.
Pushing to ResourceArrays
You can use the .push method to push data to a ResourceArray property.
import { socialmedia } from '../ontologies/socialmedia';

resource.push(socialmedia.properties.likedBy, [
  'https://my-atomicserver.com/users/1',
]);

// Only add values that are not in the array already
resource.push(
  socialmedia.properties.likedBy,
  ['https://my-atomicserver.com/users/1'],
  true,
);

await resource.save();
Note
You cannot push values usingresource.props. For example:resource.props.likedBy.push('https://my-atomicserver.com/users/1')will not work.
Parameters
| Name | Type | Description |
|---|---|---|
| property | string | Subject of the property to push to |
| values | JSONArray | list of values to push |
| unique | boolean | (Optional) When true, does not push values already contained in the list. (Defaults to false) |
Removing properties
Removing properties is done using the .remove method.
Alternatively, you can pass undefined as a value to .set
import { core } from '@tomic/lib';

resource.remove(core.properties.description);
// or
resource.set(core.properties.description, undefined);

await resource.save();
Saving
When using methods like .set() and .push(), the changes will be collected into a single commit.
This commit is only reflected locally and has to be sent to the server to make the changes permanent.
To do this, call the .save() method.
await resource.save();
You can check if a resource has unsaved changes with the .hasUnsavedChanges() method.
if (resource.hasUnsavedChanges()) {
  // Show a save button
}
Deleting resources
Deleting resources is done using the .destroy() method.
await resource.destroy();
When a resource is deleted, all children of the resource are also deleted.
Classes
Classes are an essential part of Atomic Data, therefore Resource has a few useful methods for reading and setting classes.
resource.getClasses()
Resource provides a .getClasses method to get the classes of the resource.
const classes = resource.getClasses(); // string[]

// Syntactic sugar for:
// const classes = resource.get(core.properties.isA);
resource.hasClasses()
If you just want to know if a resource is of a certain class use: .hasClasses()
if (resource.hasClasses('https://my-atomicserver.com/classes/Article')) {
  //...
}

// multiple classes (AND)
if (resource.hasClasses(core.classes.agent, dataBrowser.classes.folder)) {
  // ...
}
resource.matchClass()
There are often situations where you want the value of some variable to depend on the class of a resource.
An example would be a React component that renders different subcomponents based on the resource it is given.
The .matchClass() method makes this easy.
// A React component that renders a resource inside a table cell.
function ResourceTableCell({ subject }: ResourceTableCellProps): JSX.Element {
  // A react hook that fetches the resource
  const resource = useResource(subject);

  // Depending on the class of the resource, render a different component
  const Comp = resource.matchClass(
    {
      [core.classes.agent]: AgentCell,
      [server.classes.file]: FileCell,
    },
    BasicCell,
  );

  return <Comp resource={resource} />;
}
.matchClass() takes an object that maps class subjects to values.
If the resource has a class that is a key in the object, the corresponding value is returned.
An optional fallback value can be provided as the second argument.
The order of the classes in the object is important, as the first match is returned.
resource.addClasses()
To add classes to a resource, use the .addClasses() method.
resource.addClasses('https://my-atomicserver.com/classes/Article');

// With multiple classes
resource.addClasses(
  'https://my-atomicserver.com/classes/Article',
  'https://my-atomicserver.com/classes/Comment',
);
Finally, there is the .removeClasses() method to remove classes from a resource.
resource.removeClasses('https://my-atomicserver.com/classes/Article');
Access Rights
Sometimes you want to check if your agent has write access to a resource and maybe render a different UI based on that.
To check this use .canWrite().
if (await resource.canWrite()) {
  // Render a UI with edit buttons
}
You can also get a list of all rights for the resource using .getRights().
const rights = await resource.getRights();
History and versions
AtomicServer keeps a record of all changes (commits) done to a resource. This allows you to roll back to anywhere in the history of the resource.
To get a list of each version of the resource use resource.getHistory().
When you've found a version you want to roll back to, use resource.setVersion().
const versions = await resource.getHistory();

const version = userPicksVersion(versions);

await resource.setVersion(version);
Useful methods and properties
Subject
resource.subject is a get accessor that returns the subject of the resource.
Loading & Error states
If an error occurs while fetching the resource, resource.error will be set.
Additionally, when a resource is fetched using store.getResourceLoading() a resource is returned immediately that is not yet complete.
To check if the resource is not fully loaded yet use resource.loading.
These properties are useful when you want to show a loading spinner or an error message while fetching a resource.
import { useResource } from '@tomic/react';

function ResourceCard({ subject }: ResourceCardProps): JSX.Element {
  // Uses store.getResourceLoading internally.
  const resource = useResource(subject);

  if (resource.error) {
    return <ErrorCard error={resource.error} />;
  }

  if (resource.loading) {
    return <LoadingSpinner />;
  }

  return <Card>{resource.title}</Card>;
}
If you want to know if a resource has errored because the user was not authorised, use resource.isUnauthorized().
Title
resource.title is a get accessor that returns the title of the resource.
This title is the value of either the name, shortname or filename of the resource, whichever is present first.
Falls back to the subject if none of these are present.
Children
resource.getChildrenCollection() returns a Collection that has all the children of the resource.
Collection & CollectionBuilder
The Collection class is a wrapper around a collection, these are Atomics way of querying large amounts of data.
Collections consist of two main components, a 'property' and a 'value'. They collect all resources that have the specified property with the specified value. Currently, it is only possible to query one property value pair at a time.
Creating Collections
The CollectionBuilder class is used to create new Collections.
import { CollectionBuilder, core } from '@tomic/lib';

const collection = new CollectionBuilder(store)
  .setProperty(core.properties.isA)
  .setValue(core.classes.agent)
  .build();
Additionally, some parameters can be set on the CollectionBuilder to further refine the query
const collection = new CollectionBuilder(store)
  .setProperty(core.properties.isA)
  .setValue(core.classes.agent)
  .sortBy(core.properties.name) // Sort the results on the value of a specific property.
  .setSortDesc(true) // Sort the results in descending order.
  .setPageSize(100) // Set the amount of results per page.
  .build();
When a collection is created this way it might not have all data right away.
For example, reading the .totalMembers property is only available after the first page is fetched.
To make sure the first page is fetched you should await collection.waitForReady().
Alternatively, you could use await collectionBuilder.buildAndFetch() instead of .build().
Reading data
There are many ways to get data from a collection.
If you just want an array of all members in the collection use .getAllMembers().
const members = await collection.getAllMembers();
Get a member at a specific index using .getMemberWithIndex().
const member = await collection.getMemberWithIndex(8);
Get all members on a specific page using .getMembersOnPage().
This is very useful for building paginated layouts.
function renderPage(page: number) {
  const members = await collection.getMembersOnPage(page);
  // Render the members
}
Collection can also act as an async iterable, which means you can use it in a for-await loop.
const resources: Resource = [];

for await (const member of collection) {
  resources.push(await store.getResource(member));
}
Caveats
Some things to keep in mind when using collections:
- Unlike normal resources, you can't subscribe to a collection. You can refresh the collection using
.refresh(). - There is currently no support for multiple property-value pairs on a single collection. You might be able to manage by filtering the results further on the client.
@tomic/react: Using Atomic Data in a JS / TS React project
Atomic Data has been designed with front-end development in mind. The open source Atomic-Data-Browser, which is feature-packed with chatrooms, a real-time collaborative rich text editor, tables and more, is powered by two libraries:
@tomic/lib(docs) is the core library, containing logic for fetching and storing data, keeping things in sync using websockets, and signing commits.@tomic/react(docs) is the react library, featuring various useful hooks that mimicuseState, giving you real-time updates through your app.
Check out the template on CodeSandbox.
This template is a very basic version of the Atomic Data Browser, where you can browse through resources, and see their properties. There is also some basic editing functionality for descriptions.
Feeling stuck? Post an issue or join the discord.
Getting Started
Installation
npm install @tomic/react
Setup
For Atomic React to work, you need to wrap your app in a StoreContext.Provider and provide a Store instance.
// App.tsx
import { Store, StoreContext, Agent } from '@tomic/react';

const store = new Store({
  serverUrl: 'my-atomic-server-url',
  agent: Agent.fromSecret('my-agent-secret');
});


export const App = () => {
  return (
    <StoreContext.Provider value={store}>
      ...
    </StoreContext.Provider>
  );
};
Hooks
Atomic React provides a few useful hooks to interact with your atomic data. Read more about them by clicking on their names
useStore
Easy access to the store instance.
useResource
Fetching and subscribing to resources
useValue
Reading and writing data.
useCollection
Querying large sets of data.
useServerSearch
Easy full text search.
useCurrentAgent
Get the current agent and change it.
useCanWrite
Check for write access to a resource.
Examples
Find some examples here.
useStore
You can use useStore when you need direct access to the store in your components.
For example, on a login screen, you might want to set the agent on the store by calling store.setAgent after the user has entered their agent secret.
import { Agent, useStore } from '@tomic/react';

export const Login = () => {
  const store = useStore();
  const [agentSecret, setAgentSecret] = useState('');

  const login = () => {
    try {
      const newAgent = Agent.fromSecret(agentSecret);
      store.setAgent(newAgent);
    } catch(e) {
      console.error(e);
      // Show error.
    }
  };

  return (
    <label>
      Agent Secret
      <input
        type="password"
        placeholder="My agent secret"
        value={agentSecret}
        onChange={e => setAgentSecret(e.target.value)}
      />
    </label>
    <button onClick={login}>Login</button>
  );
};
Reference
Paramaters
None.
Returns
Store - The store object.
useResource
useResource is the primary way to fetch data with Atomic React.
It returns a Resource object, that is still loading when initially returned.
When the data is loaded, the component will re-render with the new data allowing you to show some UI before the content is available, resulting in a more responsive user experience.
The hook also subscribes to changes meaning that the component will update whenever the data changes clientside and even serverside. You essentially get real-time features for free!
import { useResource } from '@tomic/react';

export const Component = () => {
  const resource = useResource('https://my-atomic-server/my-resource');

  // Optionally show a loading state
  if (resource.loading) {
    return <Loader />
  }

  return (
    <p>{resource.title}</p>
  )
}
Typescript
Just like the store.getResource method, useResource can be annotated with a subject of a certain class.
import { useResource } from '@tomic/react';
import type { Author } from './ontologies/blogsite' // <-- Generated with @tomic/cli

// ...
const resource = useResource<Author>('https://my-atomic-server/moderndayshakespear69')
const age = Date.now() - resource.props.yearOfBirth
Reference
Parameters
- subject:
string- The subject of the resource you want to fetch. - options:
FetchOpts- (Optional) Options for how the store should fetch the resource.
FetchOpts:
| Name | Type | Description |
|---|---|---|
| allowIncomplete | boolean | ? |
| noWebSocket | boolean | (Optional) If true, uses HTTP to fetch resources instead of websockets |
| newResource | Resource | (Optional) If true, will not send a request to a server, it will simply create a new local resource. |
Returns
Resource - The fetched resource (might still be in a loading state).
Views
A common way to build interfaces with Atomic React is to make a view component. Views are a concept where the component is responsible for rendering a resource in a certain way to fit in the context of the view type.
The view selects a component based on the resource's class or renders a default view when there is no component for that class.
In this example, we have a ResourceInline view that renders a resource inline in some text.
For most resources, it will just render the name but for a Person or Product, it will render a special component.
// views/inline/ResourceInline.tsx

import { useResource } from '@tomic/react';
import { shop } from '../../ontologies/shop'; // <-- Generated with @tomic/cli
import { PersonInline } from './PersonInline';
import { ProductInline } from './ProductInline';

interface ResourceInlineProps {
  subject: string;
}

export interface ResourceInlineViewProps<T> {
  resource: Resource<T>;
}

export const ResourceInline = ({ subject }: ResourceInlineProps): JSX.Element => {
  const resource = useResource(subject);

  const Comp = resource.matchClass({
    [shop.classes.product]: ProductInline,
    [shop.classes.person]: PersonInline,
  }, Default);

  return <Comp subject={subject} />
}

const Default = ({ subject }: ResourceInlineViewProps<unknown>) => {
  const resource = useResource(subject);

  return <span>{resource.title}</span>
}
The PersonInline view will render a person resource inline.
It could render a mention-like thing with the person's name, their profile picture and a link to their profile for example.
// views/inline/PersonInline.tsx
import { useResource, Resource, type Server } from '@tomic/react';
import type { Person } from '../../ontologies/social' // <-- Generated with @tomic/cli
import type { ResourceInlineViewProps } from './ResourceInline';

export const PersonInline = ({ resource }: ResourceInlineViewProps<Person>) => {
  const image = useResource<Server.File>(resource.props.image);

  return (
    <span className="person-inline">
      <img src={image.props.downloadUrl} className="profile-image-inline" />
      <span>{resource.title}</span>
    </span>
  )
}
useValue
The useValue hook is used to read and write values from a resource.
It looks and functions a lot like React's useState hook.
  import { useValue } from '@tomic/react';

  const MyComponent = ({ subject }) => {
    const resource = useResource(subject);
    const [value, setValue] = useValue(resource, 'https://example.com/property');

    return (
      <div>
        <input value={value} onChange={e => setValue(e.target.value)} />
      </div>
    );
  };
The useValue hook does not save the resource by default when the value is changed.
This can be configured by passing an options object as the third argument with commit set to true.
In practice, you will use typed versions of useValue more often.
These offer better typescript typing and validation on writes.
The following value hooks are available:
useStringfor string, slug and markdown values.useNumberfor float and integer values.useBooleanfor boolean values.useDatefor date and timestamp values.useArrayfor ResourceArray values.
Reference
Parameters
- resource:
Resource- The resource object to read and write from. - property:
string- The subject of the property you want to read and write. - options:
object- (Optional) Options for how the value should be read and written.
Options:
| Name | Type | Description |
|---|---|---|
| commit | boolean | If true, the resource will be saved when the value is changed. Default: false |
| validate | boolean | If true, the value will be validated against the properties datatype. Default: true |
| commitDebounce | number | The number of milliseconds to wait before saving the resource. Default: 100 |
| handleValidationError | function | A function that is called when the value is invalid. |
Returns
Returns an array (tuple) with two items:
- value: type depends on the hook used - The value of the property.
- setValue:
async function- A function to set the value of the property.
Examples
Changing the name of some resource.
  import { useString } from '@tomic/react';

  const MyComponent = ({ subject }) => {
    const resource = useResource(subject);
    const [value, setValue] = useString(resource, core.properties.name, {
      commit: true,
    });

    return (
      <div>
        <input value={value} onChange={e => setValue(e.target.value)} />
      </div>
    );
  };
Adding tags to a ResourceArray property. Displays an error when the name is not a valid slug.
const MyComponent = ({subject}) => {
  const store = useStore();
  const resource = useResource(subject);
  // We might encounter validation errors so we should show these to the user.
  const [error, setError] = useState<Error>();
  // Value of the input field. Used to set the name of the tag.
  const [inputValue, setInputValue] = useState('');

  // The ResourceArray value of the resource.
  const [tags, setItems] = useArray(resource, myOntology.properties.tags, {
    commit: true,
    handleValidationError: setError,
  });


  const addTag = async () => {
    // Create a new tag resource.
    const newTag = await store.newResource({
      isA: dataBrowser.classes.tag,
      parent: subject,
      propVals: {
        [core.properties.shortname]: inputValue,
      }
    });

    // Add the new tag to the array.
    await setItems([...tags, newTag]);
    // Reset the input field.
    setInputValue('');
  }

  return (
    <div>
      {tags.map((item, index) => (
        <Tag key={item.subject} subject={item.subject}/>
      ))}
      <input type="text" onChange={e => setInputValue(e.target.value)}>
      <button onClick={addTag}>Add</button>
      {error && (
        <p>{error.message}</p>
      )}
    </div>
  );
};
useCollection
The useCollection hook is used to fetch a Collection. It returns the collection together with a function to invalidate and re-fetch it.
// Create a collection of all agents on the drive.
const { collection ,invalidateCollection } = useCollection({
  property: core.properties.isA,
  value: core.classes.Agent
});
Reference
Parameters
- query: QueryFilter - The query used to build the collection
- options: UseCollectionOptions? - An options object described below.
Returns
Returns an object containing the following items:
- collection: Collection - The collection.
- invalidateCollection:
() => void- A function to invalidate and re-fetch the collection.
QueryFilter
A QueryFilter is an object with the following properties:
| Name | Type | Description |
|---|---|---|
| property | string? | The subject of the property you want to filter by. |
| value | string? | The value of the property you want to filter by. |
| sort_by | string? | The subject of the property you want to sort by. By default collections are sorted by subject |
| sort_desc | boolean? | If true, the collection will be sorted in descending order. (Default: false) |
UseCollectionOptions
| Name | Type | Description |
|---|---|---|
| pageSize | number? | The max number of members per page. Defaults to 30 |
| server | string? | The server that this collection should query. Defaults to the store's serverURL |
Additional Hooks
Working with collections in React can be a bit tedious because most methods of Collection are asynchronous.
Luckily, we made some extra hooks to help with the most common patterns.
useCollectionPage
The useCollectionPage hook makes it easy to create paginated views. It takes a collection and a page number and returns the items on that page.
import {
  core,
  useCollection,
  useCollectionPage,
  useResource,
} from '@tomic/react';
import { useState } from 'react';

interface PaginatedChildrenProps {
  subject: string;
}

export const PaginatedChildren = ({ subject }: PaginatedChildrenProps) => {
  const [currentPage, setCurrentPage] = useState(0);

  const { collection } = useCollection({
    property: core.properties.parent,
    value: subject,
  });

  const items = useCollectionPage(collection, currentPage);

  return (
    <div>
      <button onClick={() => setCurrentPage(p => Math.max(0, p - 1))}>
        Prev
      </button>
      <button
        onClick={() =>
          setCurrentPage(p => Math.min(p + 1, collection.totalPages - 1))
        }
      >
        Next
      </button>
      {items.map(item => (
        <Item key={item} subject={item} />
      ))}
    </div>
  );
};

const Item = ({ subject }: { subject: string }) => {
  const resource = useResource(subject);

  return <div>{resource.title}</div>;
};
UseMemberOfCollection
Building virtualized lists is always difficult when working with unfamiliar data structures, especially when the data is paginated.
The UseMemberOfCollection hook makes it easy.
It takes a collection and index and returns the resource at that index.
In this example, we use the react-window library to render a virtualized list of comments.
import { useCallback } from 'react';
import { FixedSizeList } from 'react-window';
import Autosizer from 'react-virtualized-auto-sizer';
import { useCollection, useMemberOfCollection } from '@tomic/react';
import { myOntology, type Comment } from './ontologies/myOntology';

const ListView = () => {
  // We create a collection of all comments.
  const { collection } = useCollection({
    property: core.properties.isA,
    value: myOntology.classes.comment,
  });

  // We have to define the CommentComponent inside the ListView component because it needs access to the collection.
  // Normally you'd pass it as a prop but that is not possible due to how react-window works.
  const CommentComp = useCallback(({index}: {index: number}) => {
    // Get the resource at the specified index.
    const comment = useMemberOfCollection<Comment>(collection, index);

    return (
      <div>
        <UserInline subject={comment.props.writtenBy}>
        <p>{comment.props.description}</p>
      </div>
    );
  }, [collection]);

  return (
    <Autosizer>
    {({width, height}) => (
      <FixedSizeList
        height={height}
        itemCount={collection.totalMembers}
        itemSize={50}
        width={width}
      >
        {CommentComp}
      </FixedSizeList>
    )}
    </Autosizer>
  );
}
useServerSearch
AtomicServer has a very powerful full-text search feature and Atomic React makes it super easy to use.
The useServerSearch hook takes a search query and optionally additional filters and returns a list of results.
Here we build a component that renders a search input and shows a list of results as you type.
import { useState } from 'react';
import { useResource, useServerSearch } from '@tomic/react';

export const Search = () => {
  const [inputValue, setInputValue] = useState('');
  const { results } = useServerSearch(inputValue);

  return (
    <search>
      <input
        type='search'
        placeholder='Search...'
        value={inputValue}
        onChange={e => setInputValue(e.target.value)}
      />
      <ol>
        {results.map(result => (
          <SearchResultItem key={result} subject={result} />
        ))}
      </ol>
    </search>
  );
};

interface SearchResultItemProps {
  subject: string;
}

const SearchResultItem = ({ subject }: SearchResultItemProps) => {
  const resource = useResource(subject);

  return <li>{resource.title}</li>;
};
Reference
Parameters
query: string- The search query.options?: Object- Additional search parameters
Options:
| Name | Type | Description |
|---|---|---|
debounce | number | Amount of milliseconds the search should be debounced (default: 50). |
allowEmptyQuery | boolean | If you set additional filters your search might get results back even when the query is still empty. If you want this you can enable this setting (default: false). |
include | boolean | If true sends full resources in the response instead of just the subjects |
limit | number | The max number of results to return (default: 30). |
parents | string[] | Only include resources that have these given parents somewhere as an ancestor |
filters | Record<string, string> | Only include resources that have matching values for the given properties. Should be an object with subjects of properties as keys |
Returns
Returns an object with the following fields:
results: string[]- An array with the subjects of resources that match the search query.loading: boolean- Whether the search is still loading.error: Error | undefined- If an error occurred during the search, it will be stored here.
useCurrentAgent
useCurrentAgent is a convenient hook that returns the current agent set in the store.
It also allows you to change the agent.
It also updates whenever the agent changes.
const [agent, setAgent] = useCurrentAgent();
Reference
Parameters
none
Returns
Returns a tuple with the following fields:
agent: Agent- The current agent set on the store.setAgent: (agent: Agent) => void- A function to set the current agent on the store.
useCanWrite
useCanWrite is a hook that can be used to check if an agent has write access to a certain resource.
Normally you would just use await resource.canWrite() but since this is an async function, using it in react can be annoying.
The useCanWrite hook works practically the same as the canWrite method on Resource.
import { useCanWrite, useResource, useString } from '@tomic/react';

const ResourceDescription = () => {
  const resource = useResource('https://my-server.com/my-resource');
  const [description, setDescription] = useString(resource, core.properties.description);
  const [canWrite] = useCanWrite(resource);

  if (canWrite) {
    return (
      <textarea onChange={e => setDescription(e.target.value)}>{description}</textarea>
      <button onClick={() => resource.save()}>Save</button>
    )
  }

  return <p>{description}</p>;
};
Reference
Parameters
resource: Resource- The resource to check write access for.agent?: Agent- Optional different agent to check write access for. Defaults to the current agent.
Returns
Returns a tuple with the following fields:
canWrite: boolean- Whether the agent can write to the resource.msg: string- An error message if the agent cannot write to the resource.
The Image component
AtomicServer can generate optimized versions of images in modern image formats (WebP, AVIF) on demand by adding query parameters to the download URL of an image. More info here.
Serving the correct size and format of an image can greatly improve the performance of your website. This is especially important on mobile devices, where bandwidth is limited. But it's not always the easiest thing to do. You need to generate multiple versions of the same image and serve the correct one based on the device's capabilities.
We added a component to @tomic/react that makes this easy: the Image component.
In its most basic form, it looks like this:
import { Image } from "@tomic/react";

const MyComponent = () => {
  return (
    <Image
      subject="https://atomicdata.dev/files/1668879942069-funny-meme.jpg"
      alt="A funny looking cat"
    />
  );
};
You give it the subject of a file resource that has an image MIME type and it will render a picture element with sources for avif, webp and the original format. It also creates a couple of sizes the browser can choose from, based on the device's screen size.
Making sure the browser chooses the right image
By default, the browser looks at the entire viewport width and chooses the smallest version that still covers this width.
This is often too big so we should help by giving it an approximation of the size of the image relative to the viewport.
This is done via the sizeIndication prop.
When the unit given is a number it is interpreted as a percentage of the viewport width. If your image is displayed in a static size you can also pass a string like '4rem'. Note that percentages don't work as the browser doesn't know the size of the parent element yet.
 <Image
  subject='http://myatomicserver.com/files/1664878581079-hiker.jpg'
  alt='a person standing in front of a mountain'
  sizeIndication={50} // the image is about 50% of the viewport width
 />
 <Image
  subject='http://myatomicserver.com/files/1664878581079-hiker.jpg'
  alt='a person standing in front of a mountain'
  sizeIndication='4rem'
 />
When the image's size changes based on media queries we can give the browser a more detailed indication.
<Image
  className='inline-image'
  subject='http://myatomicserver.com/files/1664878581079-hiker.jpg'
  alt='a person standing in front of a mountain'
  sizeIndication={{
    '500px': 100, // On screens smaller than 500px the image is displayed at full width.
    default: 50, // the image is about 50% of the viewport when no media query matches
  }}
/>
Specifying the encoding quality
You can specify the quality of the image by passing a number between 0 and 100 to the quality prop.
This is only used for the webp and avif formats.
<Image
  subject='http://myatomicserver.com/files/1664878581079-hiker.jpg'
  alt='a person standing in front of a mountain'
  quality={40}
/>
Styling the image
The Image component passes all standard HTML img attributes to the underlying img element so you can style it like any other element.
Keep in mind that there is also a picture element wrapped around it that can interfere with how you're targeting the image.
Accessibility
The alt prop is required on the image component.
Screen readers use these to describe the image to visually impaired users.
If you don't have a good description of the image, you can use an empty string.
Using an empty string is still better than no alt text at all.
Examples
Realtime Todo app
In this example, we create a basic to-do app that persists on the server and updates in real-time when anyone makes changes.
If you were to make this in vanilla react without any kind of persistence it would probably look almost the same.
The main difference is the use of the useArray and useBoolean hooks instead of useState.
import { useState } from 'react';
import {
  useStore,
  useArray,
  useBoolean,
  useResource
 } from '@tomic/react';
import { type Checklist, todoApp } from './ontologies/todoApp';

 export const TodoList = () => {
  const store = useStore();
  const checklist = useResource<Checklist>('https://my-server/checklist/1');

  const [todos, setTodos] = useArray(checklist, todoApp.properties.todos, {
    commit: true,
  });

  const [inputValue, setInputValue] = useState('');

  const removeTodo = (subject: string) => {
    setTodos(todos.filter(todo => todo !== subject));
  };

  const addTodo = async () => {
    const newTodo = await store.newResource({
      isA: todoApp.classes.todoItem,
      parent: checklist.subject,
      propVals: {
        [core.properties.name]: inputValue,
        [todoApp.properties.done]: false,
      },
    });

    await newTodo.save();

    setTodos([...todos, newTodo.subject]);
    setInputValue('');
  };

  return (
    <div>
      <ul>
        {todos.map(subject => (
          <li key={subject}>
            <Todo subject={subject} onDelete={removeTodo} />
          </li>
        ))}
      </ul>
      <input
        type='text'
        placeholder='Add a new todo...'
        value={inputValue}
        onChange={e => setInputValue(e.target.value)}
      />
      <button onClick={addTodo}>Add</button>
    </div>
  );
};

interface TodoProps {
  subject: string;
  onDelete: (subject: string) => void;
}

const Todo = ({ subject, onDelete }: TodoProps) => {
  const resource = useResource<Todo>(subject);
  const [done, setDone] = useBoolean(resource, todoApp.properties.done, {
    commit: true,
  });

  const deleteTodo = () => {
    resource.destroy();
    onDelete(subject);
  };

  return (
    <span>
      <input
        type='checkbox'
        checked={done}
        onChange={e => setDone(e.target.checked)}
      />
      {resource.title}
      <button onClick={deleteTodo}>Delete</button>
    </span>
  );
};
@tomic/svelte
An AtomicServer client for Svelte. Makes fetching AtomicData easy. Fetched resources are cached and reactive, they will update when the data changes, even when the resource was changed by someone else.
See open source template: atomic-sveltekit-demo (outdated).
Note: As of version 0.41, @tomic/svelte requires Svelte 5 or later. Svelte 4 is not supported on versions above 0.40.0.
Quick Examples
Getting a resource and displaying one of its properties
<script lang="ts">
  import { getResource } from '@tomic/svelte';
  import { type Core } from '@tomic/lib';

  const resource = getResource<Core.Agent>(() => 'https://example.com/user1');
</script>

<h1>{resource.props.name}</h1>
Changing the value of a property with an input field
<script lang="ts">
  import { getResource } from '@tomic/svelte';
  import { type Core } from '@tomic/lib';

  const resource = getResource<Core.Agent>(() => 'https://example.com/user1');
</script>a

<input bind:value={resource.props.name} />
<button onclick={() => resource.save()}>Save</button>
Getting started
Install the library with your preferred package manager:
npm install -S @tomic/svelte @tomic/lib
yarn add @tomic/svelte @tomic/lib
pnpm add @tomic/svelte @tomic/lib
Creating a store
@tomic/svelte uses svelte's context API to make the store available to any sub components. The store is what fetches and caches resources. It also handles authentication by setting an agent, therefore you should always create a separate store on authenticated routes.
To initialise the store, create a new store and then call createAtomicStoreContext with the store as the argument:
// App.svelte or +page.svelte

<script lang="ts">
  import { createAtomicStoreContext } from '@tomic/svelte';
  import { Store } from '@tomic/lib';

  const store = new Store();

  createAtomicStoreContext(store);
</script>

// do svelty things
You can now access this store from any sub component by using getStoreFromContext().
// Some random component.svelte

<script lang="ts">
  import { getStoreFromContext } from '@tomic/svelte';
  import { dataBrowser } from '@tomic/lib';

  const store = getStoreFromContext();
  store.newResource({
    isA: [dataBrowser.classes.Folder]
    parent: 'some_other_subject',
  });
</script>
If you've used @tomic/lib before you might know that fetching resources is done with await store.getResource().
However, this is not very practical in Svelte because it's async and not reactive, meaning it won't update when its data changes.
That's where the getResource function comes in.
getResource returns a reactive resource object.
At first the resource will be empty and its loading property will be true (unless it was found in the cache).
The store will start fetching and will update the resource instance when it's done.
// Some random component.svelte

<script lang="ts">
  import { getResource, getValue } from '@tomic/svelte';
  import { type Page } from '$lib/ontologies/myApp.js';

  const page = getResource<Page>(() => 'https://example.com/');
</script>

<main>
  {#if page.loading}
    <p>Loading...</p>
  {:else}
    <h1>{page.title}</h1>
    <p>{page.props.description}</p>
  {/if}
</main>
To write data to a resource, just change the value of its properties and save it when you're done. Note: you can only write to resources when you've set an agent on the store.
page.props.name = 'New Title';
page.save();
Typescript
This library is build using typescript and is fully typed. To take full advantage of Atomic Data's strong type system use @tomic/cli to generate types using Ontologies. These can then be used like this:
<script lang="ts">
  import { getResource, getValue } from '@tomic/svelte';
  import { core } from '@tomic/lib';
  // User 'app' ontology generated using @tomic/cli
  import { type Person, app } from './ontologies';

  const resource = getResource<Person>(() =>'https://myapp.com/users/me'); // Readable<Resource<Person>>
  const name = $derived(resource.props.name); // string
  const hobbies = $derived(resource.props.hobbies); // string[] - a list of subjects of 'Hobby' resources.
</script>
Using with SvelteKit
While this library is mostly focussed on client side rendering it can also be used on the server. There are a few important things to keep in mind to avoid problems with server side rendering.
The problem with fetching inside components
When SvelteKit renders a page on the server it will only do so once and it won't wait for any pending requests.
Because getResource is async only the empty resource it initially returns is sent to the client.
It is still fetched and rendered after the page hydrates but the user might see a flicker of missing content.
This essentially means you won't get much benefit out of rendering on the server.
There are a few ways to mitigate this.
Load Functions
One option is to just not use getResource, or @tomic/svelte for that matter, and only use @tomic/lib to fetch resources in a load function with await store.getResource().
This isn't a big deal if you only need a single resource with a little bit of data but depending on how dynamic your site is this might become cumbersome.
Preloading resources
Another option is to preload the resources you need for a page.
Inside the load function of your route you can call await store.preloadResourceTree() to fetch the resource and any referenced resources.
When the resources have been preloaded they are available in the store's cache so you can use getResource in your components as usual.
More info about the preloadResourceTree function can be found here.
export async function load({ params }) {
  const store = getStoreFromSomewhere();

  await store.preloadResourceTree('https://myapp.com/my-page', {
   [website.properties.blocks]: {
    [website.properties.images]: true
   }
  });
}
SvelteKits custom fetch function
SvelteKit has a clever custom fetch function that caches a response and inlines it in the pages HTML so the client doesn't have to send the request again. You need to inject this fetch function into the store so it can be used for fetching resources.
// some +page.js
export async function load({ fetch }) {
  const store = getStoreFromSomewhere();
  store.injectFetch(fetch);
}
The Image component
AtomicServer can generate optimized versions of images in modern image formats (WebP, AVIF) on demand by adding query parameters to the download URL of an image. More info here.
Serving the correct size and format of an image can greatly improve the performance of your website. This is especially important on mobile devices, where bandwidth is limited. But it's not always the easiest thing to do. You need to generate multiple versions of the same image and serve the correct one based on the device's capabilities.
We added a component to @tomic/svelte that makes this easy: the Image component.
In its most basic form, it looks like this:
<script lang="ts">
  import { Image } from "@tomic/svelte";
</script>

<Image
  subject="https://atomicdata.dev/files/1668879942069-funny-meme.jpg"
  alt="A funny looking cat"
/>
You give it the subject of a file resource that has an image MIME type and it will render a picture element with sources for avif, webp and the original format. It also creates a couple of sizes the browser can choose from, based on the device's screen size.
Making sure the browser chooses the right image
By default, the browser looks at the entire viewport width and chooses the smallest version that still covers this width.
This is often too big so we should help by giving it an approximation of the size of the image relative to the viewport.
This is done via the sizeIndication prop.
When the unit given is a number it is interpreted as a percentage of the viewport width. If your image is displayed in a static size you can also pass a string like '4rem'. Note that percentages don't work as the browser doesn't know the size of the parent element yet.
 <Image
  subject='http://myatomicserver.com/files/1664878581079-hiker.jpg'
  alt='a person standing in front of a mountain'
  sizeIndication={50} // the image is about 50% of the viewport width
 />
 <Image
  subject='http://myatomicserver.com/files/1664878581079-hiker.jpg'
  alt='a person standing in front of a mountain'
  sizeIndication='4rem'
 />
When the image's size changes based on media queries we can give the browser a more detailed indication.
<Image
  className='inline-image'
  subject='http://myatomicserver.com/files/1664878581079-hiker.jpg'
  alt='a person standing in front of a mountain'
  sizeIndication={{
    '500px': 100, // On screens smaller than 500px the image is displayed at full width.
    default: 50, // the image is about 50% of the viewport when no media query matches
  }}
/>
Specifying the encoding quality
You can specify the quality of the image by passing a number between 0 and 100 to the quality prop.
This is only used for the webp and avif formats.
<Image
  subject='http://myatomicserver.com/files/1664878581079-hiker.jpg'
  alt='a person standing in front of a mountain'
  quality={40}
/>
Styling the image
By default the Image component has a max-width of 100% and a height of auto.
If you don't want this, pass the noBaseStyles prop.
To style the image you can target it you can wrap it in a parent element and then target the image from there.
<script lang="ts">
  import { Image } from "@tomic/svelte";
</script>

<div class="image-wrapper">
  <Image
    subject="https://atomicdata.dev/files/1668879942069-funny-meme.jpg"
    alt="A funny looking cat"
  />
</div>

<style>
  .image-wrapper {
    display: contents;

    & img {
      // Your styles go here
    }
  }
</style>
You can also pass a class prop and then use :global() selector to target that class.
HTML Attributes
All standard HTML img attributes are passed to the underlying img element.
This makes it possible to for example add an id or set loading="lazy"
Accessibility
The alt prop is required on the image component.
Screen readers use these to describe the image to visually impaired users.
If you don't have a good description of the image, you can use an empty string.
Using an empty string is still better than no alt text at all.
@tomic/template
npm create @tomic/template my-project -- --template <TEMPLATE> --server-url <SERVER_URL>
pnpm create @tomic/template my-project --template <TEMPLATE> --server-url <SERVER_URL>
bun create @tomic/template my-project --template <TEMPLATE> --server-url <SERVER_URL>
yarn create @tomic/template my-project --template <TEMPLATE> --server-url <SERVER_URL>
@tomic/template is a tool that helps you kickstart a new project using AtomicServer using a variaty of pre build templates that you can further customize to your needs.
In order to use these templates you need the coresponding template data on your AtomicServer. To get this data go to the new resource page and click on the template you want. A dialog will open with a description of the template and a button to add the data to your server.
The following templates are available:
| Name | Description | AtomicServer Template |
|---|---|---|
sveltekit-site | A sveltekit website with dynamically rendered content and blog posts | Website |
@tomic/cli: Generate Typescript types from an Ontology
@tomic/cli is an NPM tool that helps the developer with creating a front-end for their atomic data project by providing typesafety on resources.
In atomic data you can create ontologies that describe your business model.
You can use @tomic/cli to generate Typscript types for these ontologies in your front-end.
import { Post } from './ontolgies/blog'; // <--- generated

const myBlogpost = await store.getResourceAsync<Post>(
  'https://myblog.com/atomic-is-awesome',
);

const comments = myBlogpost.props.comments; // string[] automatically inferred!
Getting started
Installation
You can install the package globally or as a dev dependency of your project.
Globally:
npm install -g @tomic/cli
You should now be able to run:
ad-generate
Dev Dependency:
npm install -D @tomic/cli
To run:
npx ad-generate
Generating the files
To start generating your ontologies you first need to configure the cli. Start by creating the config file by running:
ad-generate init
There should now be a file called atomic.config.json in the folder where you ran this command. The contents will look like this:
{
  "outputFolder": "./src/ontologies",
  "moduleAlias": "@tomic/lib",
  "ontologies": []
}
If you want to change the location where the files are generated you can change the
outputFolderfield.
Next add the subjects of your atomic ontologies to the ontologies array in the config.
Now we will generate the ontology files. We do this by running the ad-generate ontologies command. If your ontologies don't have public read rights you will have to add an agent secret to the command that has access to these resources.
ad-generate ontologies --agent <AGENT_SECRET>
Agent secret can also be preconfigured in the config but be careful when using version control as you can easily leak your secret this way.
After running the command the files will have been generated in the specified output folder along with an index.ts file. The only thing left to do is to register our ontologies with @tomic/lib. This should be done as soon in your apps runtime lifecycle as possible, for example in your App.tsx when using React or root index.ts in most cases.
import { initOntologies } from './ontologies';

initOntologies();
Using the types
If everything went well the generated files should now be in the output folder. In order to gain the benefit of the typings we will need to annotate our resource with its respective class as follows:
import { Book, creativeWorks } from './ontologies/creativeWorks.js';

const book = await store.getResourceAsync<Book>(
  'https://mybookstore.com/books/1',
);
Now we know what properties are required and recommended on this resource so we can safely infer the types
Because we know written-by is a required property in book we can safely infer type string;
const authorSubject = book.get(creativeWorks.properties.writtenBy); // string
description has datatype Markdown and is inferred as string but it is a recommended property and might therefore be undefined
const description = book.get(core.properties.description); // string | undefined
If the property is not in any ontology we can not infer the type so it will be of type JSONValue
(this type includes undefined)
const unknownProp = book.get('https://unknownprop.site/prop/42'); // JSONValue
Props shorthand
Because you've generated your ontologies, lib is aware of what properties exist and what their name and types are.
It is therefore possible to use the .props field on a resource and get full intellisense and typing!
const book = await store.getResourceAsync<Book>(
  'https://mybookstore.com/books/1',
);

const name = book.props.name; // string
const description = book.props.description; // string | undefined
The props field is a computed property and is readonly.
If you have to read very large number of properties at a time it is more efficient to use the
resource.get()method instead of the props field because the props field iterates over the resources propval map.
Configuration
@tomic/cli loads the config file from the root of your project. This file should be called atomic.config.json and needs to conform to the following interface.
interface AtomicConfig {
  /**
   * Path relative to this file where the generated files should be written to.
   */
  outputFolder: string;

  /**
   * [OPTIONAL] The @tomic/lib module identifier.
   * The default should be sufficient in most but if you have given the module an alias you should change this value
   */
  moduleAlias?: string;

  /**
   * [OPTIONAL] The secret of the agent that is used to access your atomic data server. This can also be provided as a command line argument if you don't want to store it in the config file.
   * If left empty the public agent is used.
   */
  agentSecret?: string;

  /** The list of subjects of your ontologies */
  ontologies: string[];
}
Running ad-generate init will create this file for you that you can then tweak to your own preferences.
atomic-lib: Rust library for Atomic Data
Library that powers atomic-server and atomic-cli. Features:
- An in-memory store
- Parsing (JSON-AD) / Serialization (JSON-AD, JSON-LD, TTL, N-Triples)
- Commit validation and processing
- Constructing Collections
- Path traversal
- Basic validation
atomic-lib: Rust library for Atomic Data
Library that powers atomic-server and atomic-cli. Features:
- An in-memory store
- Parsing (JSON-AD) / Serialization (JSON-AD, JSON-LD, TTL, N-Triples)
- Commit validation and processing
- Constructing Collections
- Path traversal
- Basic validation
atomic-cli: Rust Client CLI for Atomic Data
An open source terminal tool for generating / querying Atomic Data from the command line.
Install with cargo install atomic-cli.
atomic-cli --help
Create, share, fetch and model Atomic Data!

Usage: atomic-cli [COMMAND]

Commands:
  new      Create a Resource
  get      Get a Resource or Value by using Atomic Paths.
  tpf      Finds Atoms using Triple Pattern Fragments.
  set      Update a single Atom. Creates both the Resource if they don't exist. Overwrites existing.
  remove   Remove a single Atom from a Resource.
  edit     Edit a single Atom from a Resource using your text editor.
  destroy  Permanently removes a Resource.
  list     List all bookmarks
  help     Print this message or the help of the given subcommand(s)

Options:
  -h, --help     Print help
  -V, --version  Print version

Visit https://atomicdata.dev for more info
Creating a portfolio website using Astro and Atomic Server
Atomic Server is a great fit for a headless CMS because it works seamlessly on the server and client while providing a top-notch developer experience. In this guide, we will build a portfolio site using Astro to serve and build our pages and use Atomic Data to hold our data.
Astro is a web framework for creating fast multi-page applications using web technology.
It plays very nicely with the @tomic/lib client library.
There are a few things that won't be covered in this guide like styling and CSS. There will be very minimal use of CSS in this guide so we can focus on the technical parts of the website. Feel free to spice it up and add some styling while following along though.
I will also not cover every little detail about Astro, only what is necessary to follow along with this guide. If you're completely new to Astro consider skimming the documentation to see what it has to offer.
With all that out of the way let's start by setting up your atomic data server. If you already have a server running skip to Creating the frontend
Setup
We recommend you set up an AtomicServer on a networked machine like a VPS and couple it to a domain name you intend to use for the final product as this can be difficult to change later.
For example, if you intend to build a portfolio website with the domain my-portfolio.com you could couple your atomic server to atomic.my-portfolio.com.
For instructions on how to install Atomic Server see: Atomic Server Docs: Setup / Installation
Setting up the frontend
Let's start with setting up Astro.
NOTE:
I will use npm since that is the standard but you can of course use other package managers like pnpm.
To create an Astro project open your terminal in the folder you'd like to house the projects folder and run the following command:
npm create astro@latest
You will be presented by a wizard, here you can choose the folder you want to create and set up stuff like typescript.
We will choose the following options:
- "Where should we create your new project?":
./astro-guide(feel free to change this to anything you like) - "How would you like to start your new project?": Choose
Empty - "Install dependencies?":
Yes - "Do you plan to write TypeScript?":
Yes>Strict - "Initialize a new git repository?" Choose whatever you want here
Open the newly created folder in your favourite editor and navigate to the folder in your terminal.
Check to see if everything went smoothly by testing out if it works. Run npm run dev and navigate to the address shown in the output (http://localhost:4321/)
You should see a boring page that looks like this:

About Astro
If you've never used Astro before here is a short primer:
Pages in Astro are placed in the pages folder and use the .astro format.
Files that end with .astro are Astro components and are always rendered on the server or at build time (But never on the client)
Routing is achieved via the filesystem so for example the file pages/blog/how-to-sharpen-a-pencil.astro is accessible via https://mysite.com/blog/how-to-sharpen-a-pencil.
To share layouts like headers and footers between pages we use Layout components, these are placed in the layouts folder. Let's create a layout right now.
Layout
In src create a folder called layouts and in there a file called Layout.astro.
<!-- src/layouts/Layout.astro -->

<!DOCTYPE html>
<html lang="en">
  <head>
    <meta charset="UTF-8" />
    <meta name="description" content="Astro description" />
    <meta name="viewport" content="width=device-width" />
    <link rel="icon" type="image/svg+xml" href="/favicon.svg" />
    <meta name="generator" content="{Astro.generator}" />
    <title>Some title</title>
  </head>
  <body>
    <header>
      <nav>
        <ul>
          <li>
            <a href="/">Home</a>
          </li>
          <li>
            <a href="/blog">Blog</a>
          </li>
        </ul>
      </nav>
      <h1>Some heading</h1>
      <p>Some header text</p>
    </header>
    <slot />
  </body>
</html>

<style is:global>
  body {
    font-family: system-ui;
  }
</style>
This bit of html will be wrapped around the page which will be rendered in the slot element.
Next update the src/pages/index.astro file to this
---
// src/pages/index.astro
import Layout from '../layouts/Layout.astro';
---

<Layout>
    <p>Hello world!</p>
</Layout>
Our page should now look like this:
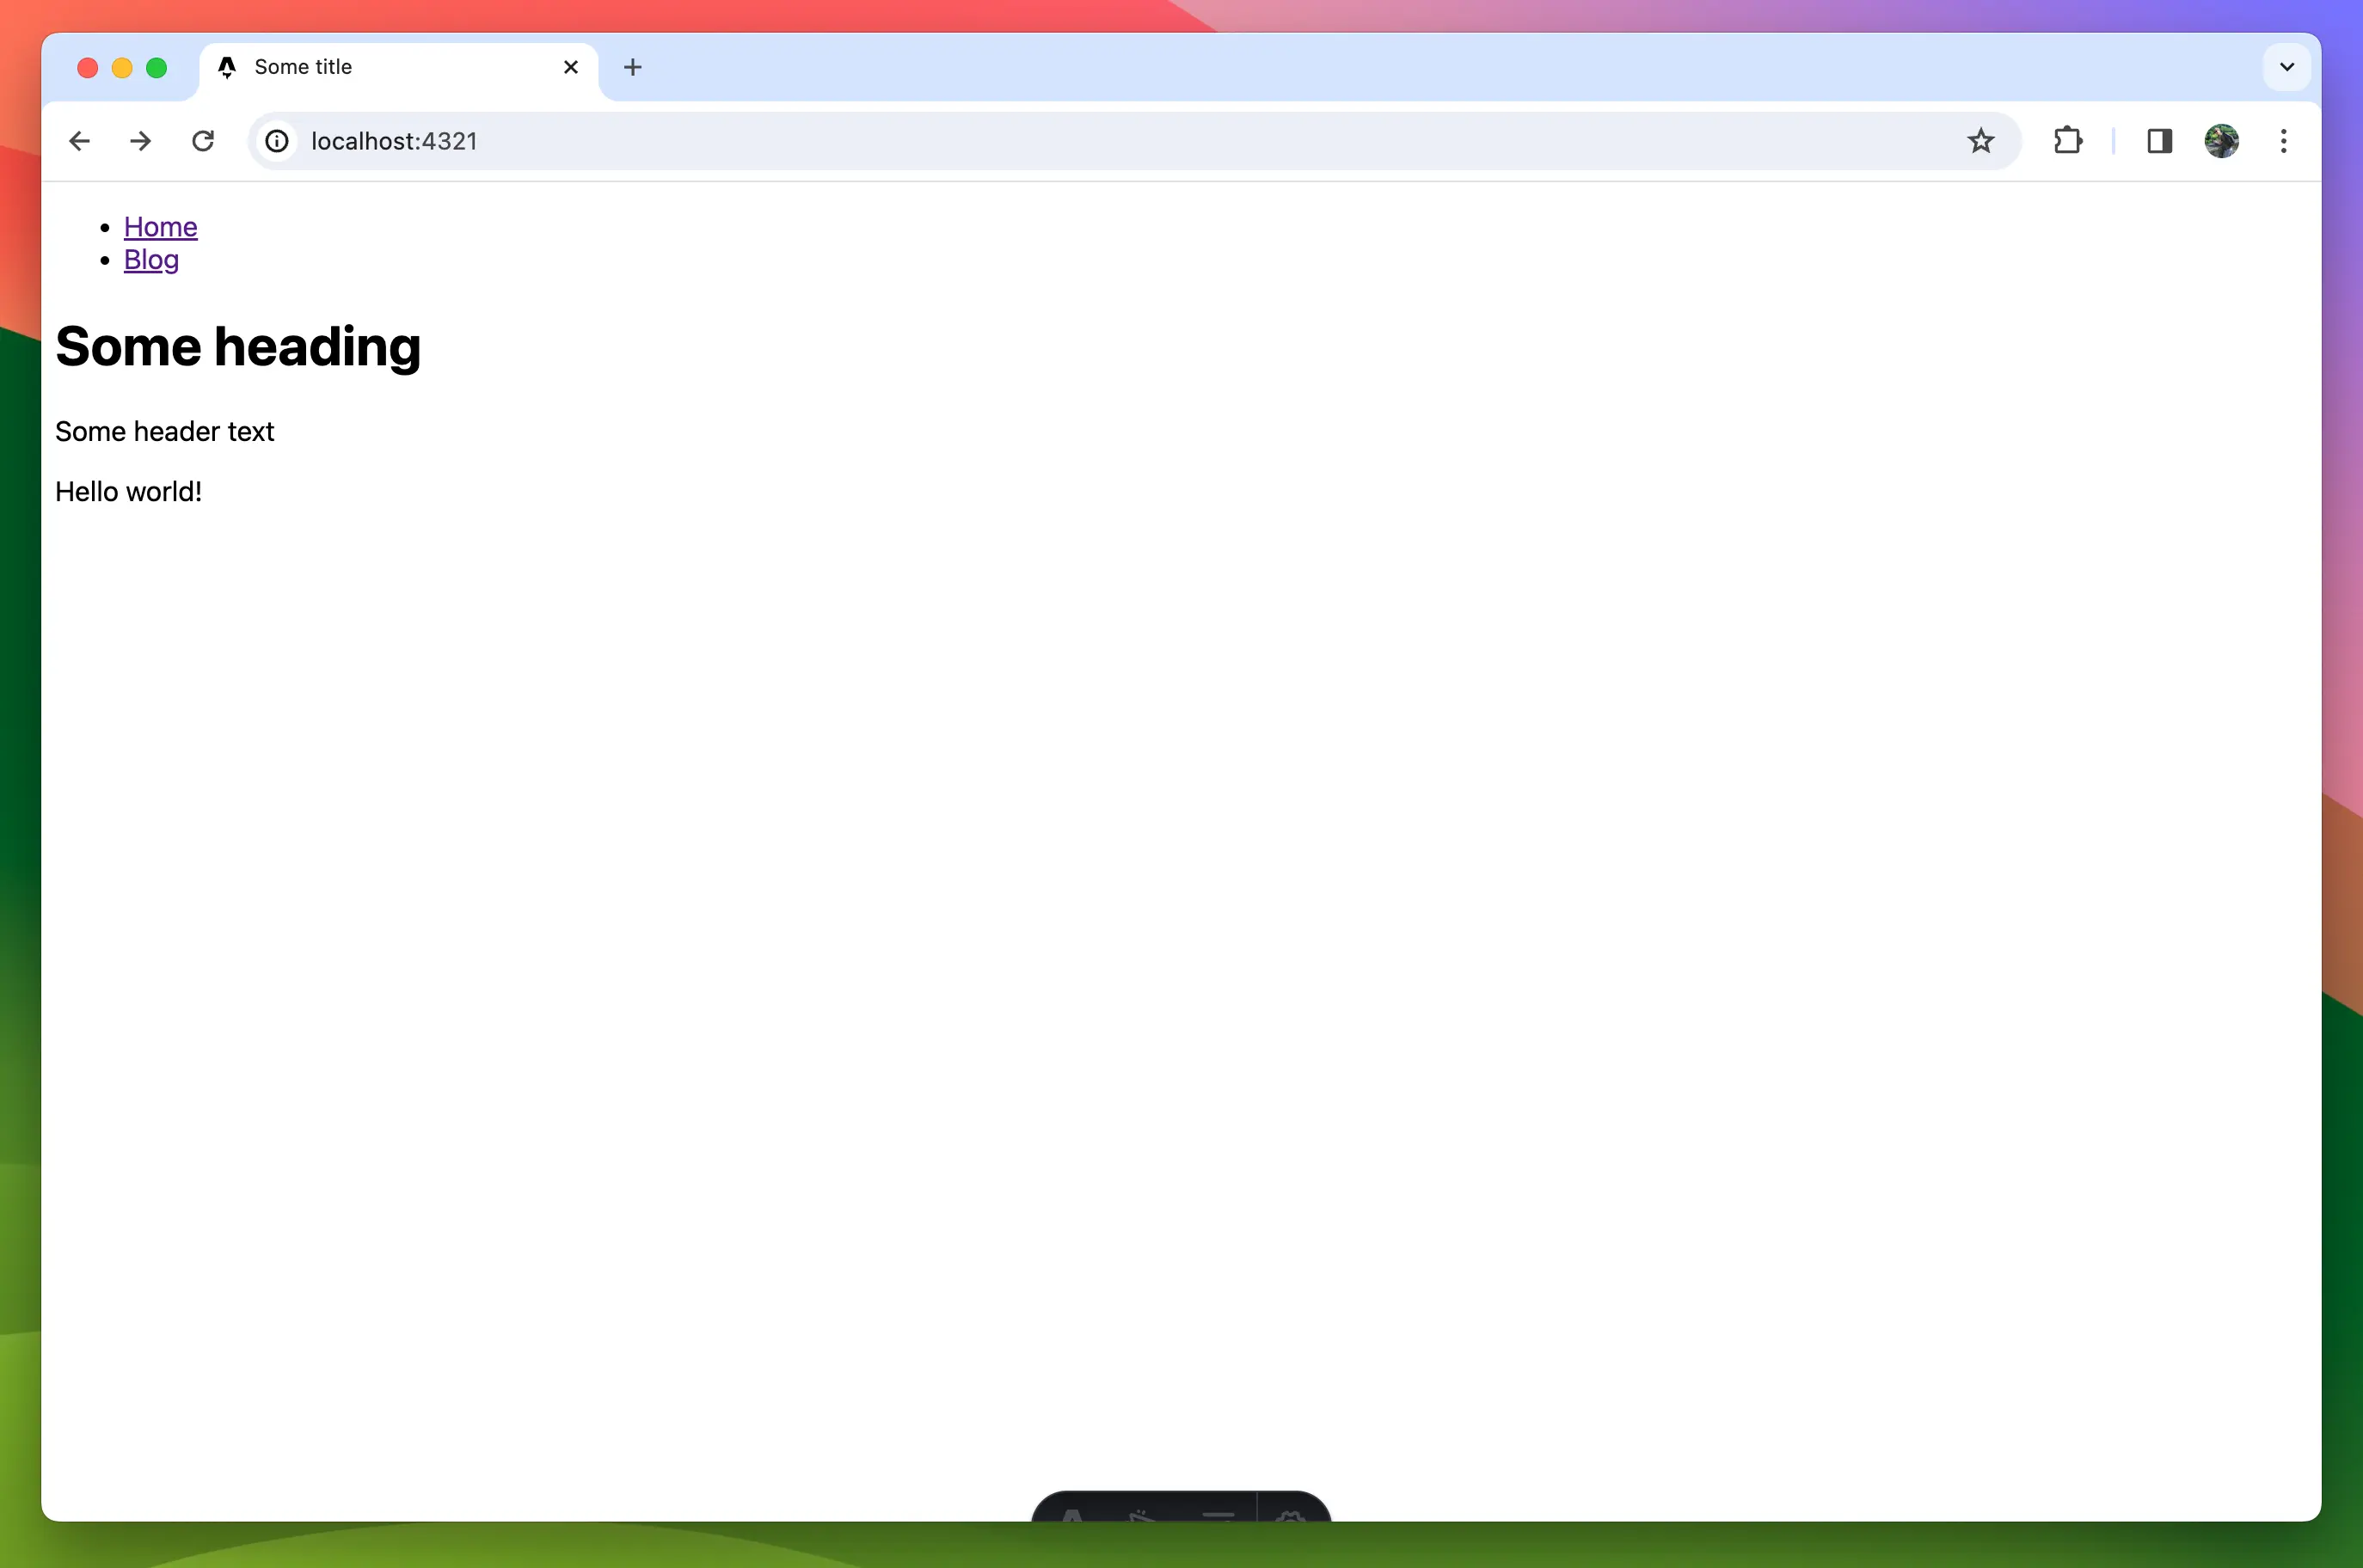
Time to take a break from Astro and create our data model in the Atomic Data Browser.
Creating a basic data model
Atomic data is strictly typed meaning we need to define the data model first. To do this we'll make an ontology.
NOTE:
You'll likely have some stuff in your atomic data browser sidebar that you won't see in these screenshots. This is because I created a new drive for the purpose of this guide (you can visit the drive yourself to see what the end result will look like here)
To create an ontology click on the plus icon in the top left of the page. From the list of classes pick 'Ontology'.
A dialog will pop up prompting you to pick a name. I'm going to call it my-portfolio but you can choose something else like 'epic-pencil-sharpening-enjoyers-blog' (try to keep it short though because the CLI will use this when generating the typescript types).
Click 'Create', you should now see the new ontology. Click 'Edit' to start editing.
Let's start by creating a class with the name homepage.
For now, we'll give our homepage the required properties: name, heading, sub-heading, body-text and header-image.
For the name property, we can use the existing atomic property name.
NOTE:
If a class has a title or name that describes the instance, e.g. books and movies have a title and a person has a name, you should always use the existing name property. This makes it more easy to share data between applications and implementations.
Click on the + icon under 'Requires' and type 'name'.
The existing name property should be the first option in the list (If it's not in the list you might have to start Atomic Server with the --initialize flag once to make sure all pre-existing resources are known to the server).
The name property will serve as the name of our homepage resource and we'll use it as the html title of the website.
Once you click on 'name' you'll see that the property is added to the list but is greyed out, this is because it is an external resource not defined in the ontology and you do not have edit rights for it. Because you do have read rights though you can still add it to the list.
The next few props don't already exist so we'll have to create them.
Click the + button again and type: "heading". An option with Create: heading should be visible.
Click it and give it a description like "Heading text displayed in the header".
The datatype should be STRING which is selected by default.
Do the same for subheading.
Next, create a property called body-text but change the datatype to MARKDOWN.
The last property we'll add is header-image. The datatype should be Resource, this means it will reference another resource.
Since we want this to always be a file and not some other random class we are going to give it a classtype.
To do this click on the configure button next to the datatype selector.
A dialog should appear with additional settings for the property.
In the 'Classtype' field search for file.
An option with the text file - A single binary file should appear, select it and close the dialog.
Your ontology should look something like this now
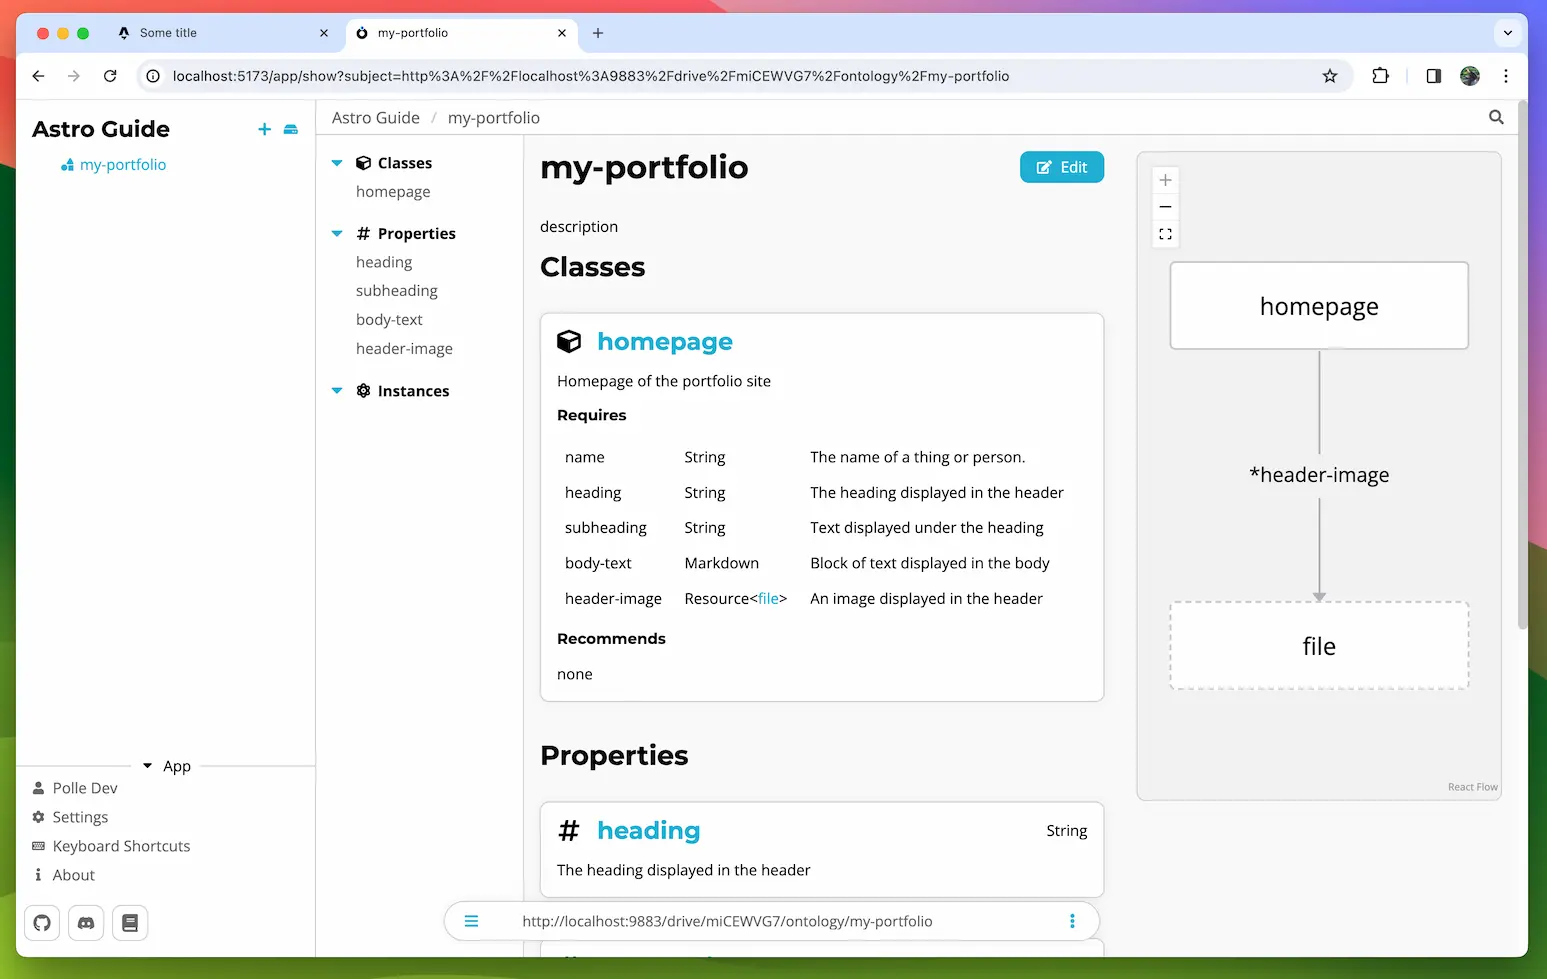
Alright, our model is done for now, let's create the actual homepage resource and then we'll move on to generating types and fetching the data in the frontend.
Creating the homepage data
Let's make two folders, one for our images and one for the data. You can create a folder by clicking on the + button in the top left and choosing 'folder'. Create one called 'Assets' and one called 'Data'
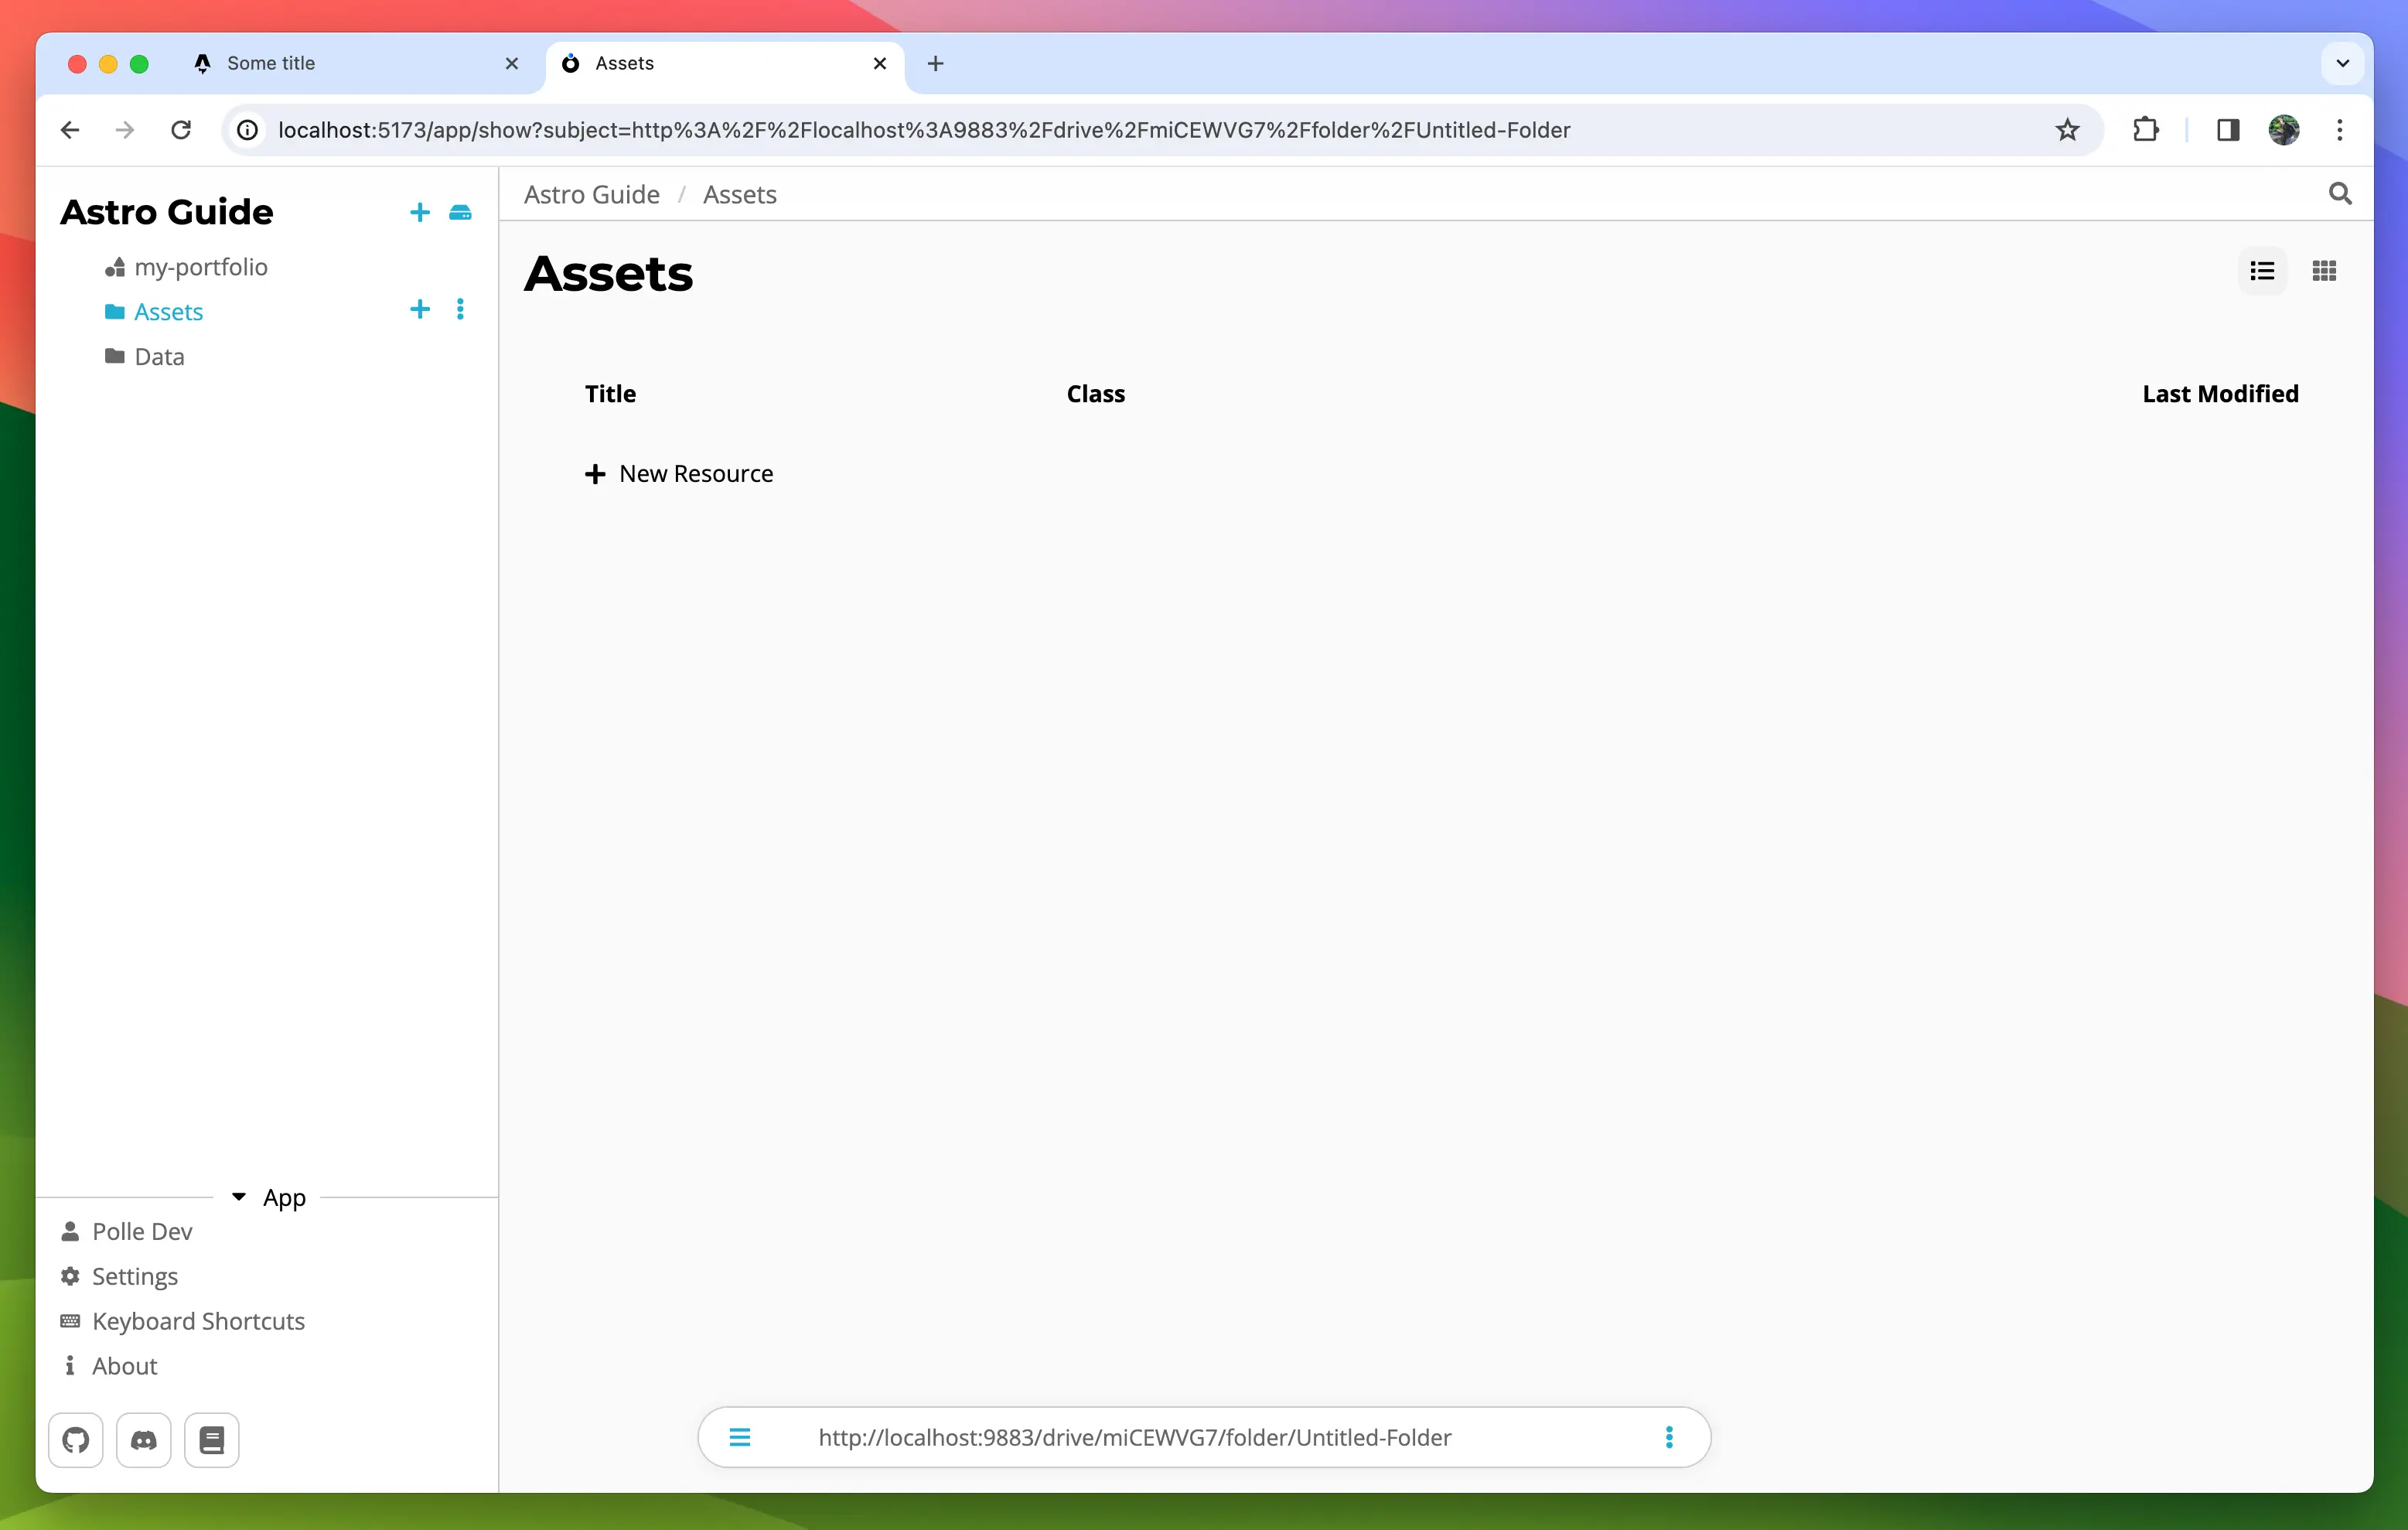
Since we need a header-image to create a homepage resource we should upload one first.
You can use any image but you get bonus points if it's a cute image of your cat.
To upload go to the 'Assets' folder and drag & drop an image into the folder.
TIP:
You can change the folder view mode by clicking on one of the two buttons in the top right.
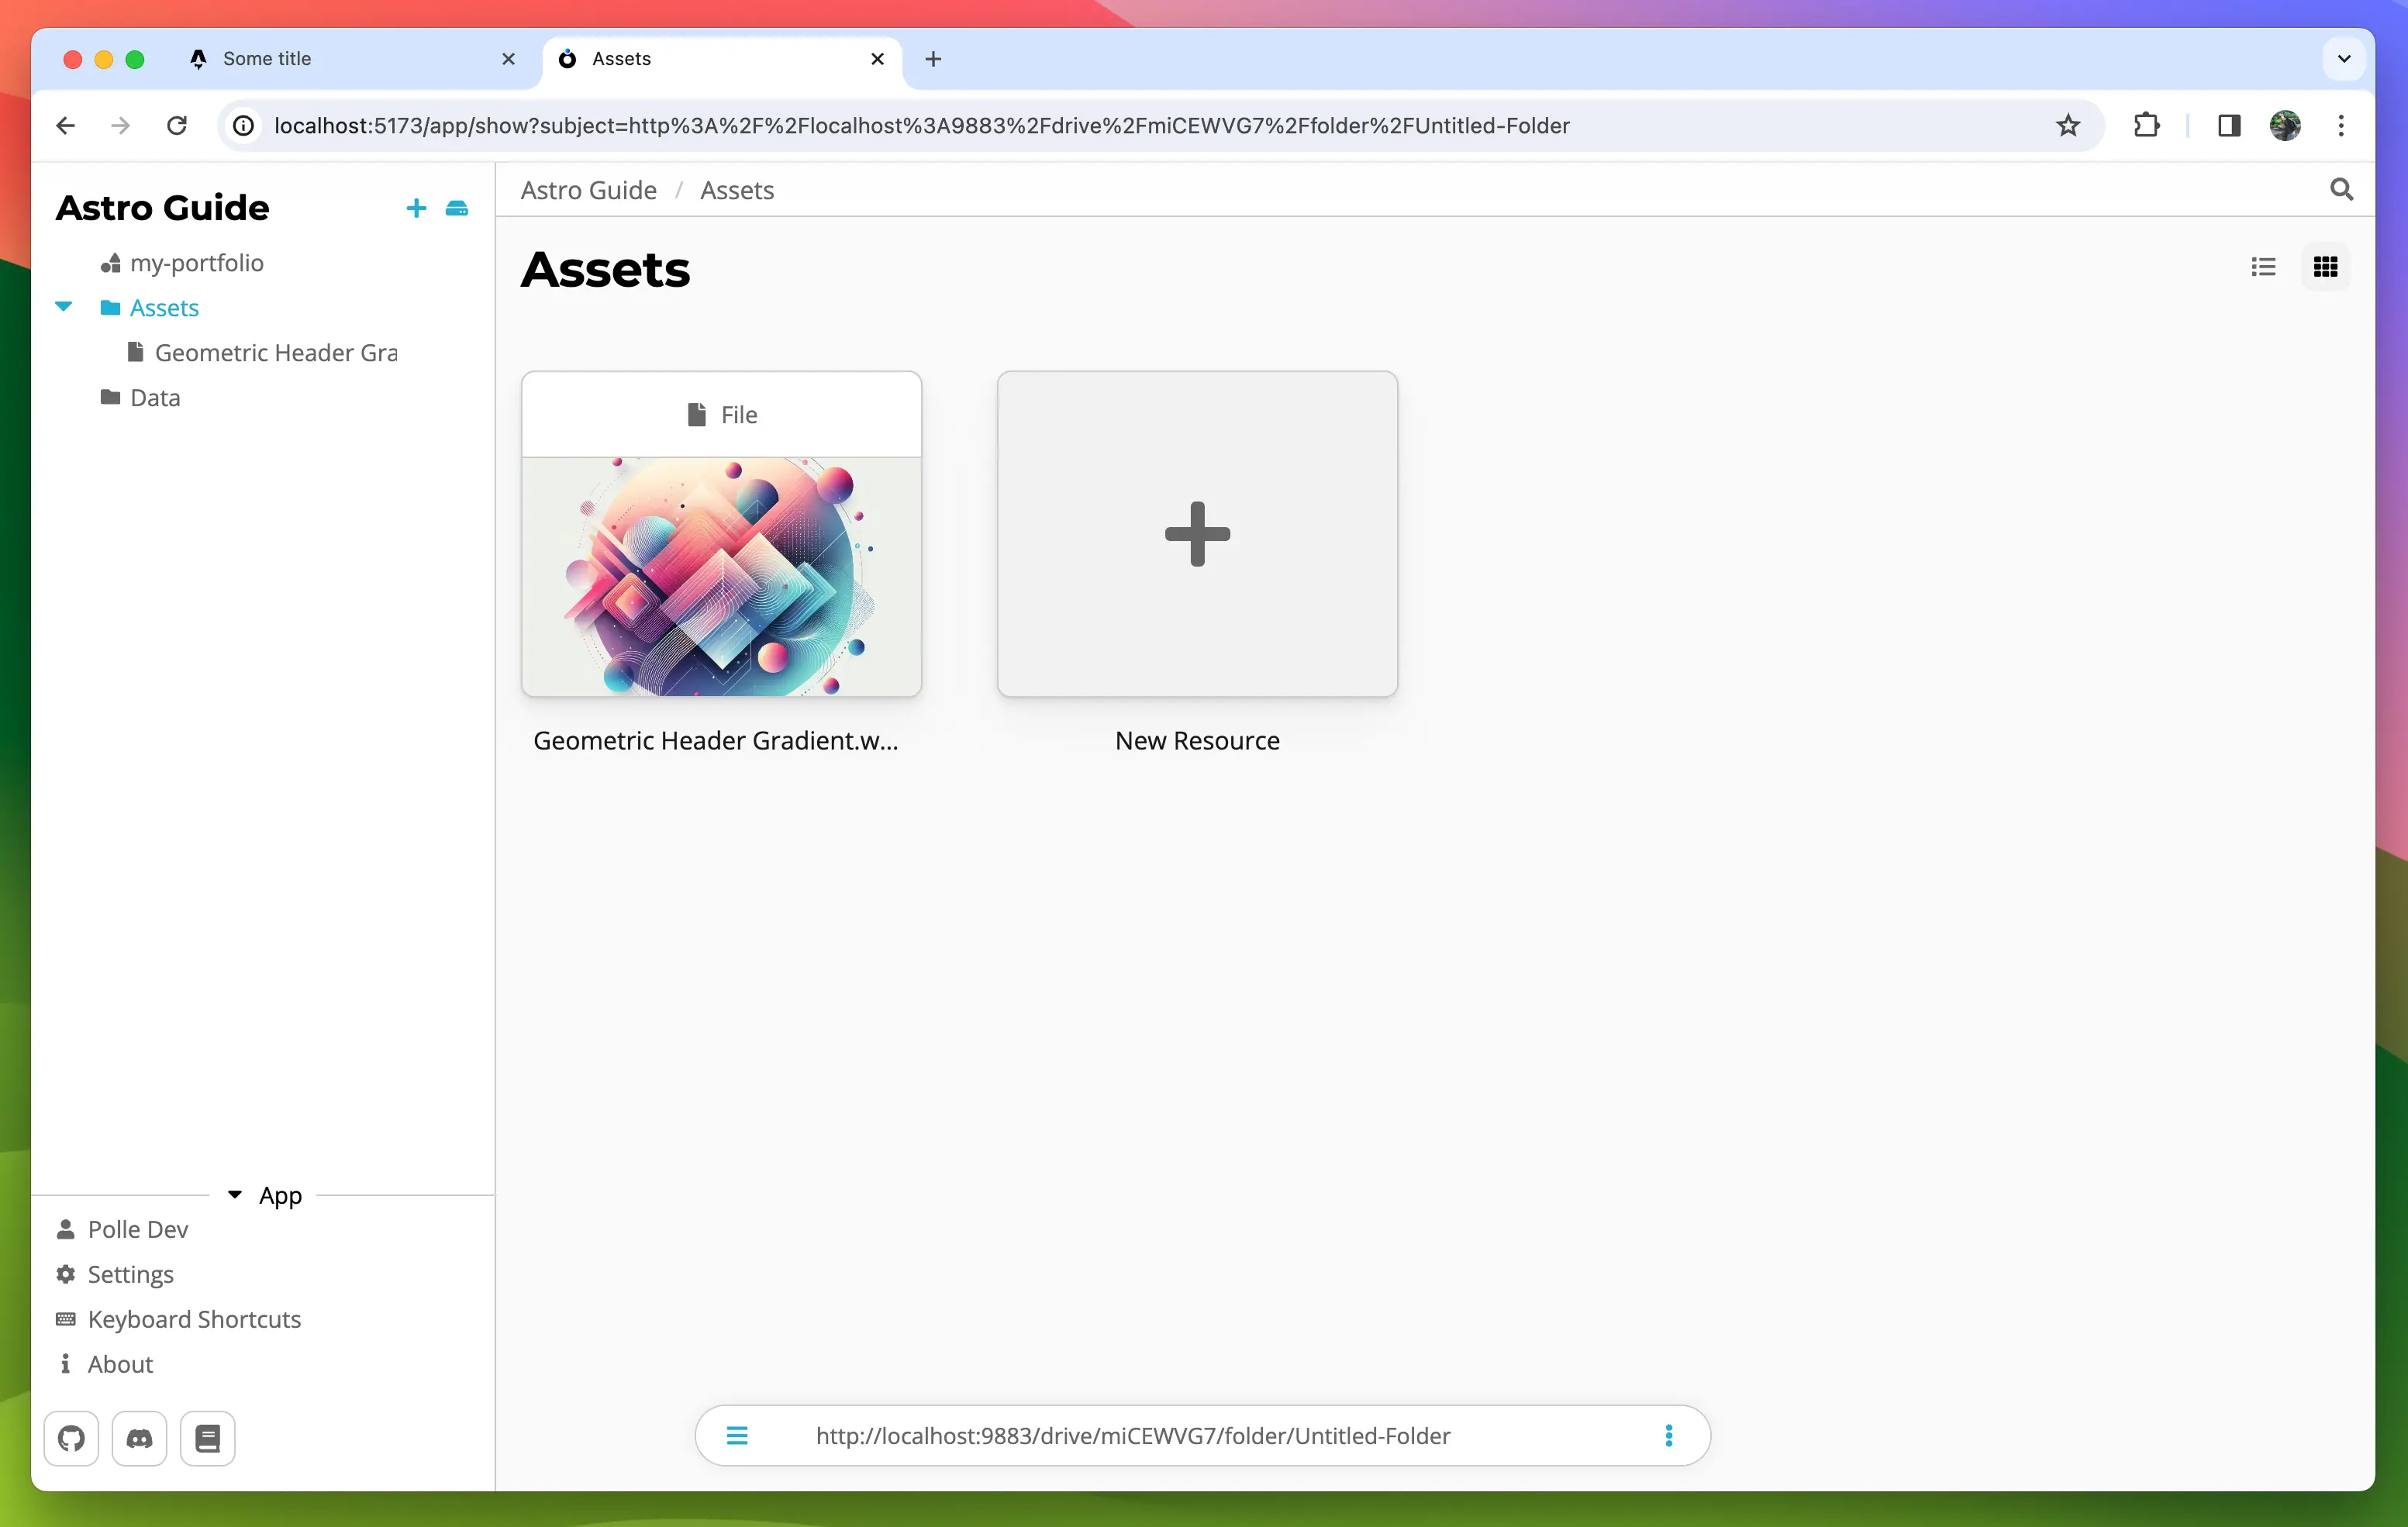
Now move into the 'Data' folder and click on '+ New Resource'. There should now be a section under the base classes with all classes from your ontology. Click on 'homepage'.
Fill out the form to your liking and hit save at the bottom
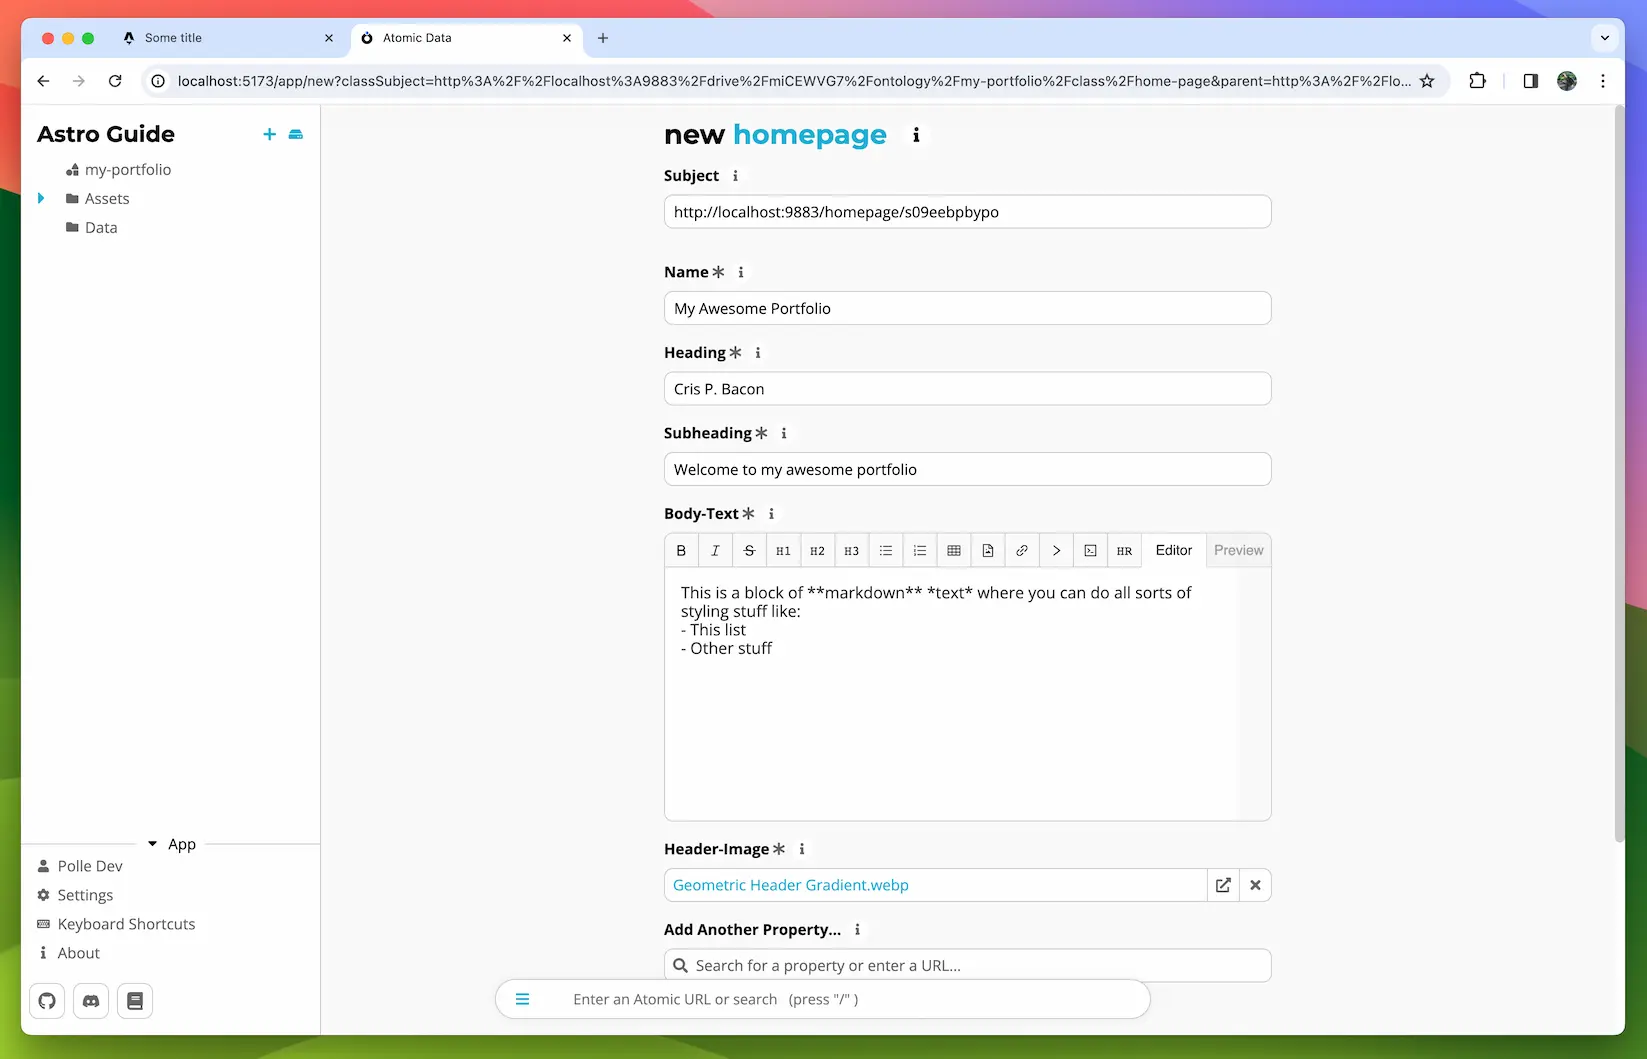
Generating Types
It's time to generate some Typescript types and display our data in the Astro frontend.
First things first, install the @tomic/lib and @tomic/cli packages.
npm install @tomic/lib
npm install -D @tomic/cli
To generate types based on the ontology we just created the CLI needs to know where to get that data from.
We can configure this using the atomic.config.json file.
Run the following command to generate one at the current working directory (Make sure this is the root of the Astro project)
npx ad-generate init
A config file called atomic.config.json has been generated, it should look something like this:
{
  "outputFolder": "./src/ontologies",
  "moduleAlias": "@tomic/lib",
  "ontologies": []
}
Now let's add the subject of our ontology to the ontologies list.
To get the subject, go to your ontology in the browser and copy the URL from the address bar or the navigation/search bar at the bottom.
Paste the URL as a string in the ontologies array like so:
"ontologies": [
    "<insert my-ontology url>"
]
We're ready to generate the types, Run the following command:
npx ad-generate ontologies
NOTE:
If your data does not have public read rights you will have to specify the agent to use to fetch the ontology:npx ad-generate ontologies -a <YOUR_AGENT_SECRET>. However you should consider keeping at least your ontologies publicly readable if you want to make it more easy for other apps to integrate with your stuff
If everything went as planned we should now have an ontologies folder inside src with two files: our portfolio ontology and an index.ts
Each time you rerun the ad-generate command it fetches the latest version of the ontologies specified in the config file and overwrites what's in src/ontologies.
You'll have to rerun this command to update the types when you make changes in one of these ontologies.
Fetching data
Alright the moment we've been waiting for, getting the actual data into the app.
Setup and creating a store
Data fetching and updating in Atomic is handled through a Store, the store manages connections to various atomic servers, authentication, real-time updates using web sockets, caching and more.
Most of the time, like in the case of this portfolio example, you share one global store that is shared throughout the application but if your app supports multiple users with their own data or account you will have to instantiate a store per each user as the store can only authenticate one agent at a time (This is by design to prevent leaking data between users).
Let's first create a .env file at the root of the project in which we specify some info like the URL of our Atomic server.
We also add an environment variable with the subject of our homepage resource.
The server URL is the subject of your Drive, you can find this by clicking on the name of the drive at the top and copying the URL in the address bar.
// .env
ATOMIC_SERVER_URL=<REPLACE WITH URL TO YOUR ATOMIC SERVER>
ATOMIC_HOMEPAGE_SUBJECT=<REPLACE WITH SUBJECT OF THE HOMEPAGE RESOURCE>
Next, we'll create a folder called helpers and in it a file called getStore.ts.
This file will contain a function we can call anywhere in our app to get the global Store instance.
NOTE:
If you don't like singletons and want to make a different system of passing the store around you can totally do that but for a simple portfolio website there is really no need
// src/helpers/getStore.ts

import { Store } from '@tomic/lib';
import { initOntologies } from '../ontologies';

let store: Store;

export function getStore(): Store {
  if (!store) {
    // On first call, create a new store.
    store = new Store({
      serverUrl: import.meta.env.ATOMIC_SERVER_URL,
      // If your data is not public, you have to specify an agent secret here. (Don't forget to add AGENT_SECRET to the .env file)
      // agent: Agent.fromSecret(import.meta.env.AGENT_SECRET),
    });

    // @tomic/lib needs to know some stuff about your ontologies at runtime so we do that by calling the generated initOntologies function.
    initOntologies();
  }

  return store;
}
Now that we have a store we can start fetching data.
Fetching
To fetch data we are going to use the store.getResource() method.
This is an async method on Store that takes a subject and returns a promise that resolves to a resource.
When getResource is called again with the same subject the store will return the cached version of the resource instead so don't worry about fetching the same resource again in multiple components.
getResource also accepts a type parameter, this type parameter is the subject of the resource's class.
You could type out the whole URL each time but luckily @tomic/cli generated shorthands for us.
Fetching our homepage will look something like this:
import type { Homepage } from '../ontologies/myPortfolio';

const homepage = await store.getResource<Homepage>('<homepage subject>'); // Resource<Homepage>
Reading data
Reading data from the resource can be done in a couple of ways. If you've generated your ontology types and annotated the resource with a class you can use the props shortcut, e.g.
...
const heading = homepage.props.heading; // string
This shortcut only works if the class is known to @tomic/lib, meaning if it's in one of your generated ontologies or one of the atomicdata.dev ontologies like core or server.
The second method is using the Resource.get() method. .get() takes the subject of the property you want as a parameter and returns its value.
const description = myResource.get(
  'https://atomicdata.dev/properties/description',
);

// @tomic/lib provides it's own ontologies for you to use urls like description
import { core } from '@tomic/lib';
const description = myResource.get(core.properties.description);
This method always works even if the class is not known beforehand.
NOTE:
Using the.get()method is actually a tiny bit faster performance wise since we don't have to construct an object with reverse name to subject mapping on call. For normal use it really won't matter but if you have to read hundreds of props in a loop you should go for.get()instead of.props.
Updating the homepage
Now that we know how to fetch data let's use it on the homepage to fetch the homepage resource and display the value of the body-text property.
In src/pages/index.astro change the content to the following:
---
// src/pages/index.astro
import Layout from '../layouts/Layout.astro';
import { getStore } from '../helpers/getStore';
import type { Homepage } from '../ontologies/myPortfolio';

const store = getStore();

const homepage = await store.getResource<Homepage>(
    import.meta.env.ATOMIC_HOMEPAGE_SUBJECT,
);
---

<Layout>
    <p>{homepage.props.bodyText}</p>
</Layout>
Check your browser and you should see the body text has changed!

It's not rendered as markdown yet so let's quickly fix that by installing marked and updating our index.astro.
npm install marked
---
// src/pages/index.astro
import { marked } from 'marked';
import Layout from '../layouts/Layout.astro';
import { getStore } from '../helpers/getStore';
import type { Homepage } from '../ontologies/myPortfolio';

const store = getStore();

const homepage = await store.getResource<Homepage>(
  import.meta.env.ATOMIC_HOMEPAGE_SUBJECT,
);

const bodyTextContent = marked.parse(homepage.props.bodyText);
---

<Layout>
  <p set:html={bodyTextContent}/>
</Layout>
Beautiful 👌
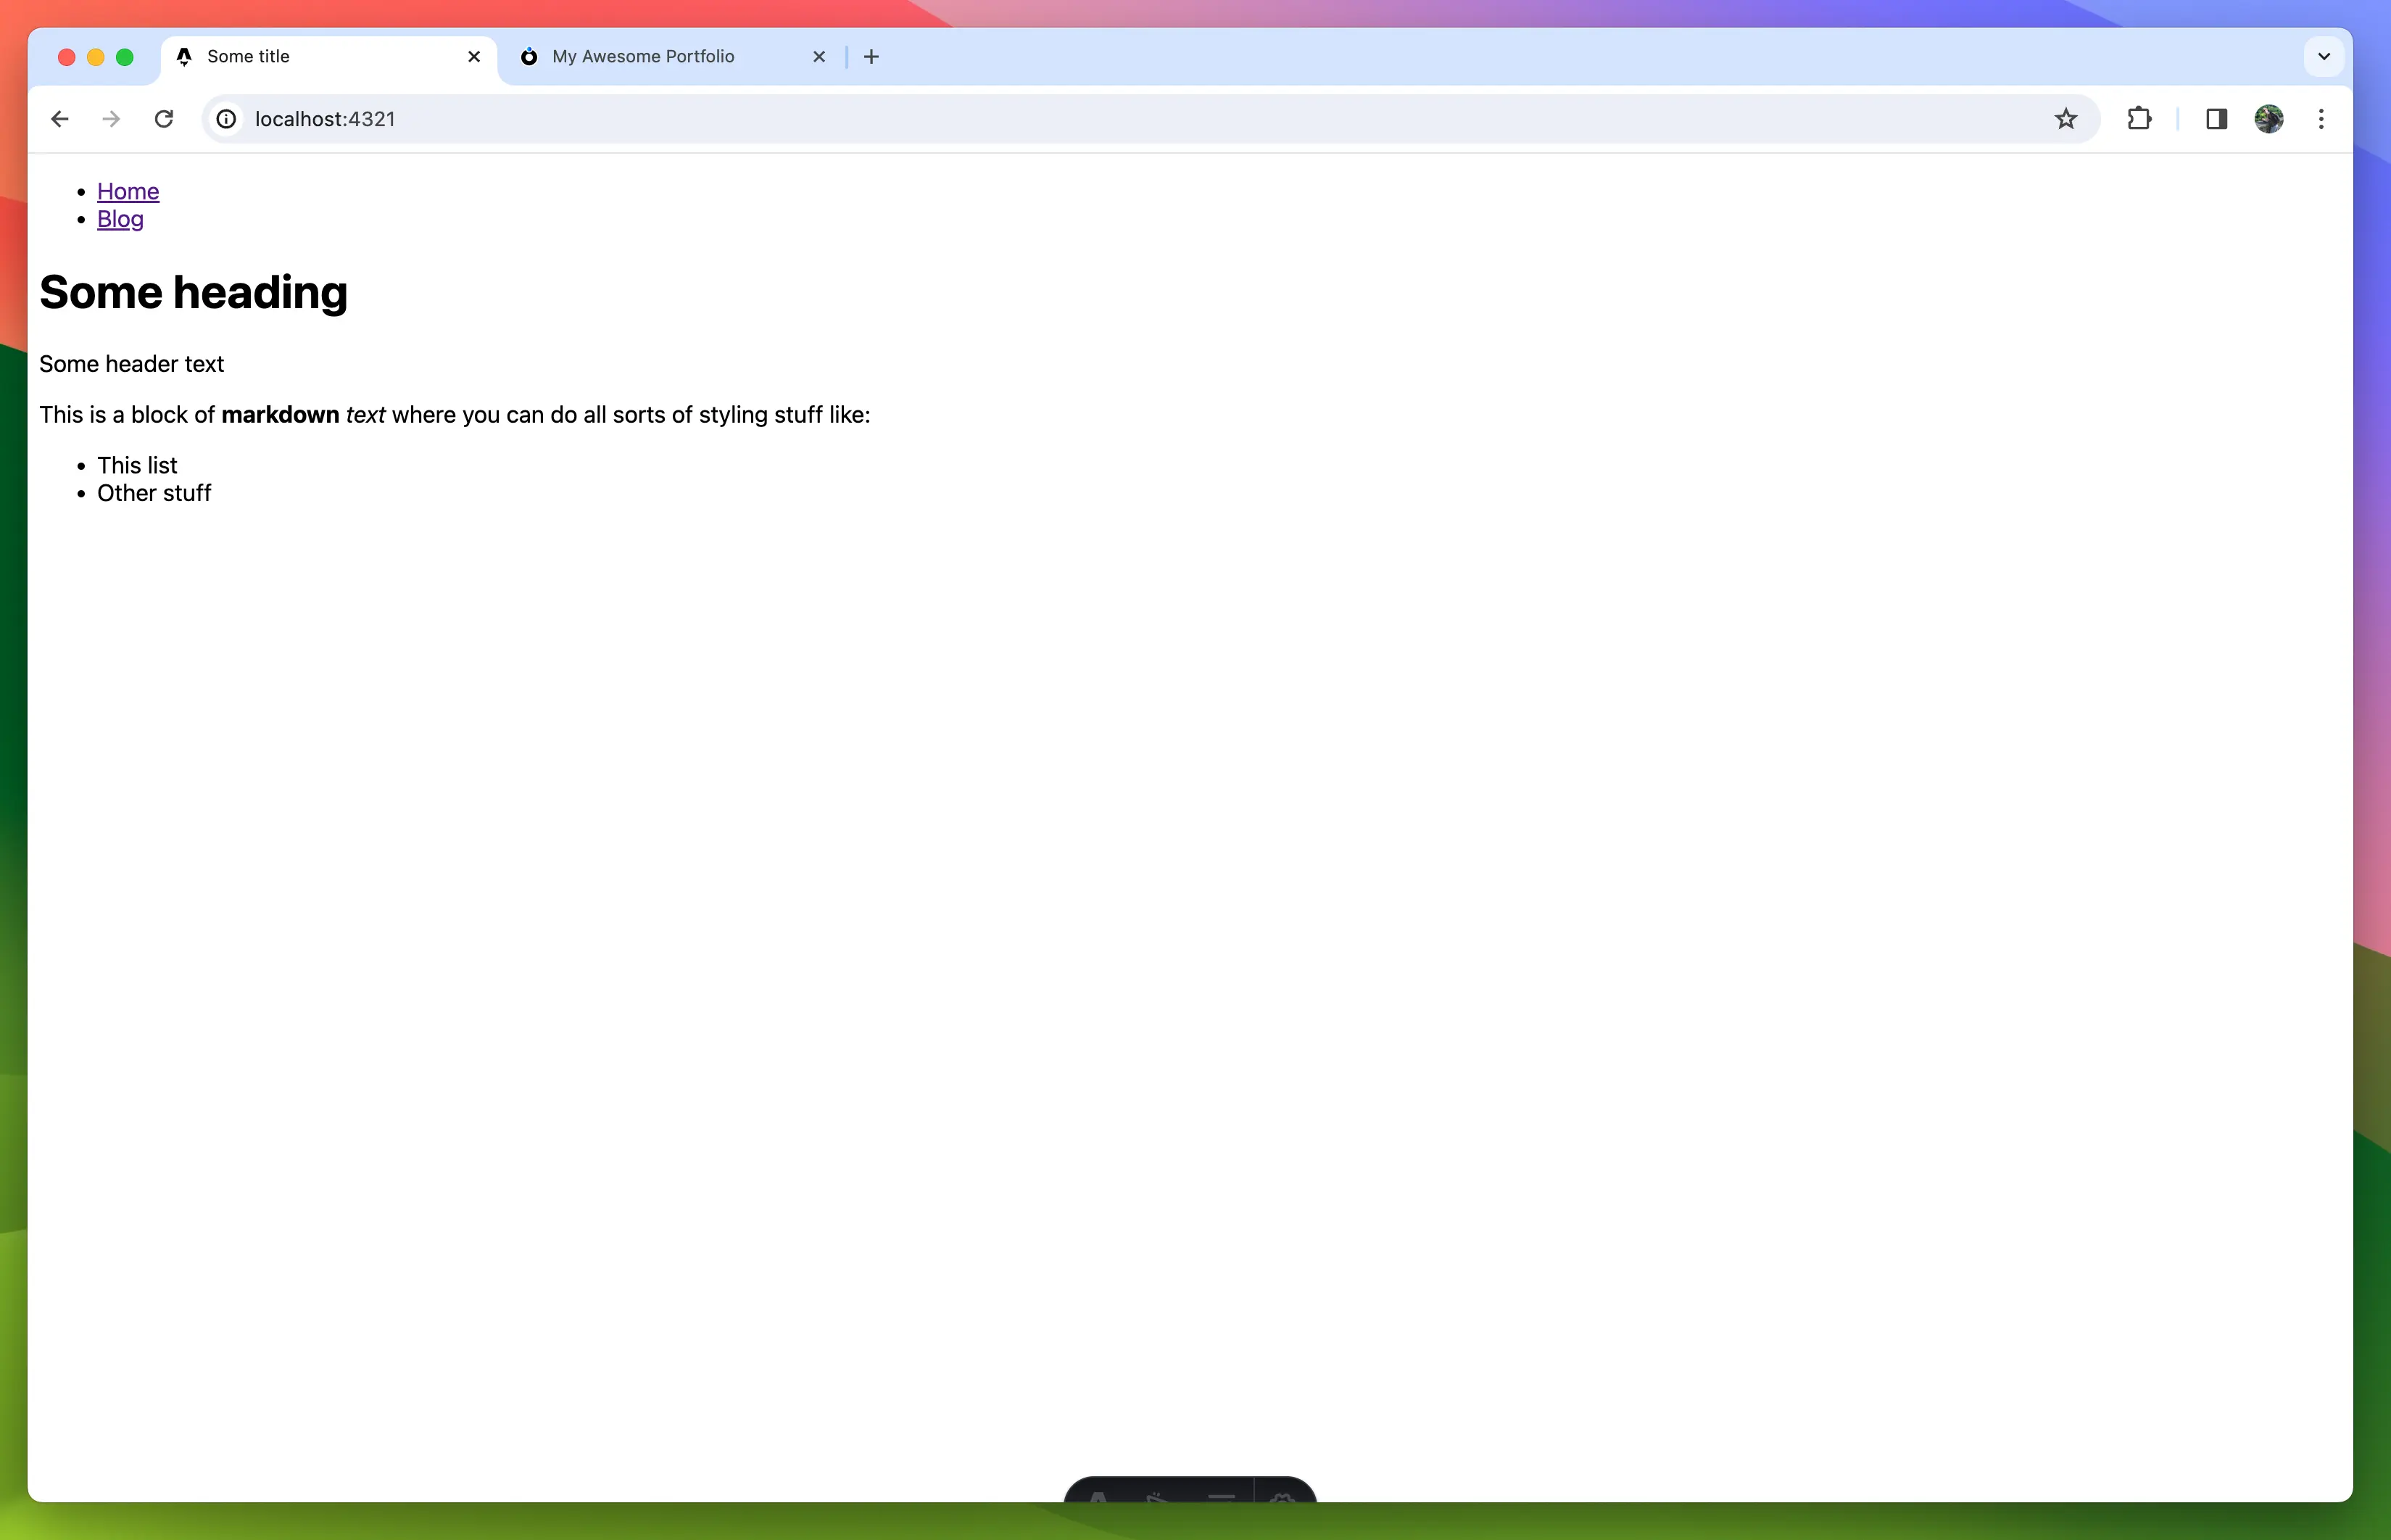
Updating the header
To get our data into the header we are going to pass the resource through to the Layout component. You might be hesitant to pass the whole resource instead of just the data it needs but don't worry, the Layout will stay generic and reusable. We are going to change what we render based on the class of the resource we give it. This approaches data-driven development territory, something Atomic Data is perfect for. At first, this might all seem useless and that's because it is when we only have one page, but when we add blog posts in the mix later you'll see that this becomes a very powerful approach.
Let's start by making a HomepageHeader component.
In src create a folder called components and in there a file called HomepageHeader.astro
---
// src/components/HomepageHeader.astro
import { Resource } from '@tomic/lib';
import type { Server } from '@tomic/lib';
import type { Homepage } from '../ontologies/myPortfolio';
import { getStore } from '../helpers/getStore';

interface Props {
  resource: Resource<Homepage>;
}

const store = getStore();
const { resource } = Astro.props;

const image = await store.getResource<Server.File>(
  resource.props.headerImage,
);
---

<header>
  <div class='wrapper'>
    <img src={image.props.downloadUrl} alt='Colourful geometric shapes' />
    <div>
      <h1>{resource.props.heading}</h1>
      <p>{resource.props.subheading}</p>
    </div>
  </div>
</header>

<style>
  img {
    height: 7rem;
    aspect-ratio: 1/1;
    clip-path: circle(50%);
  }

  .wrapper {
    display: flex;
    flex-direction: row;
    gap: 1rem;
  }
</style>
To display the header image we can't just use resource.props.headerImage directly in the src of the image element because the value is a reference to another resource, not the image link.
In most databases or CMSes, a reference would be some ID that you'd have to use in some type-specific endpoint or query language, not in Atomic.
A reference is just a subject, a URL that points to the resource.
If you wanted to you could open it in a browser or use the browser fetch API to get the resources JSON-AD and since it is a subject we can do the same we did to fetch the homepage, use store.getResource().
Once we've fetched the image resource we can access the image URL through the download-url property e.g. image.props.downloadUrl.
Let's update the Layout.astro file to use our new header component
---
// src/layouts/Layout.astro
import type { Resource } from '@tomic/lib';
import HomepageHeader from '../components/HomepageHeader.astro';

import { myPortfolio } from '../ontologies/myPortfolio';

interface Props {
  resource: Resource;
}

const { resource } = Astro.props;
---

<!doctype html>
<html lang='en'>
  <head>
    <meta charset='UTF-8' />
    <meta name='description' content='Astro description' />
    <meta name='viewport' content='width=device-width' />
    <link rel='icon' type='image/svg+xml' href='/favicon.svg' />
    <meta name='generator' content={Astro.generator} />
    <title>{resource.title}</title>
  </head>
  <body>
    <nav>
      <ul>
        <li>
          <a href='/'>Home</a>
        </li>
        <li>
          <a href='/blog'>Blog</a>
        </li>
      </ul>
    </nav>
    {
      resource.hasClasses(myPortfolio.classes.homepage) && (
        <HomepageHeader resource={resource} />
      )
    }
    <slot />
  </body>
</html>

<style is:global>
  body {
    font-family: system-ui;
  }
</style>
As you can see <Layout /> now accepts a resource as prop.
We changed the <title /> to use the name of the resource using resource.title, this is a shorthand for getting the resource's name, shortname or filename and falls back to the subject if it doesn't have any of the three properties.
Finally we've moved the <nav /> out of the header and replaced the <header /> with:
resource.hasClasses(myPortfolio.classes.homepage) && (
  <HomepageHeader resource={resource} />
);
What we're doing here is only rendering a <HomepageHeader /> component when the resource is a homepage.
myPortfolio is an object generated by @tomic/cli that contains a list of its classes and properties with their names mapped to their subjects.
Now all that's left to do is update src/pages/index.astro to pass the homepage resource to the <Layout /> component.
// src/pages/index.astro
...
<Layout resource={homepage}>
...
If all went according to plan you should now have something that looks like this:

Now of course a portfolio is nothing without projects to show off so let's add those.
Using ResourceArrays to show a list of projects
We are going to edit our portfolio ontology and give the homepage a list of projects to display.
Go back to our ontology and add a recommended property to the homepage class called projects.
Give it a nice description and set the datatype to ResourceArray.
This is basically an array of subjects pointing to other resources.
Click on the configure button next to datatype and in the classtype field type project, an option with the text Create: project should appear, click it and the new class will be added to the ontology.
We are going to give project 3 required and 2 recommended properties.
For the required add: name and description then create a property called image with datatype RESOURCE and a classtype of file.
For the recommended properties create one called demo-url with datatype STRING and one called repo-url with the same type. demo-url will be used to point to a demo of the project (if there is one), and repo-url will point to a git repository if there is one.
project should now look something like this:
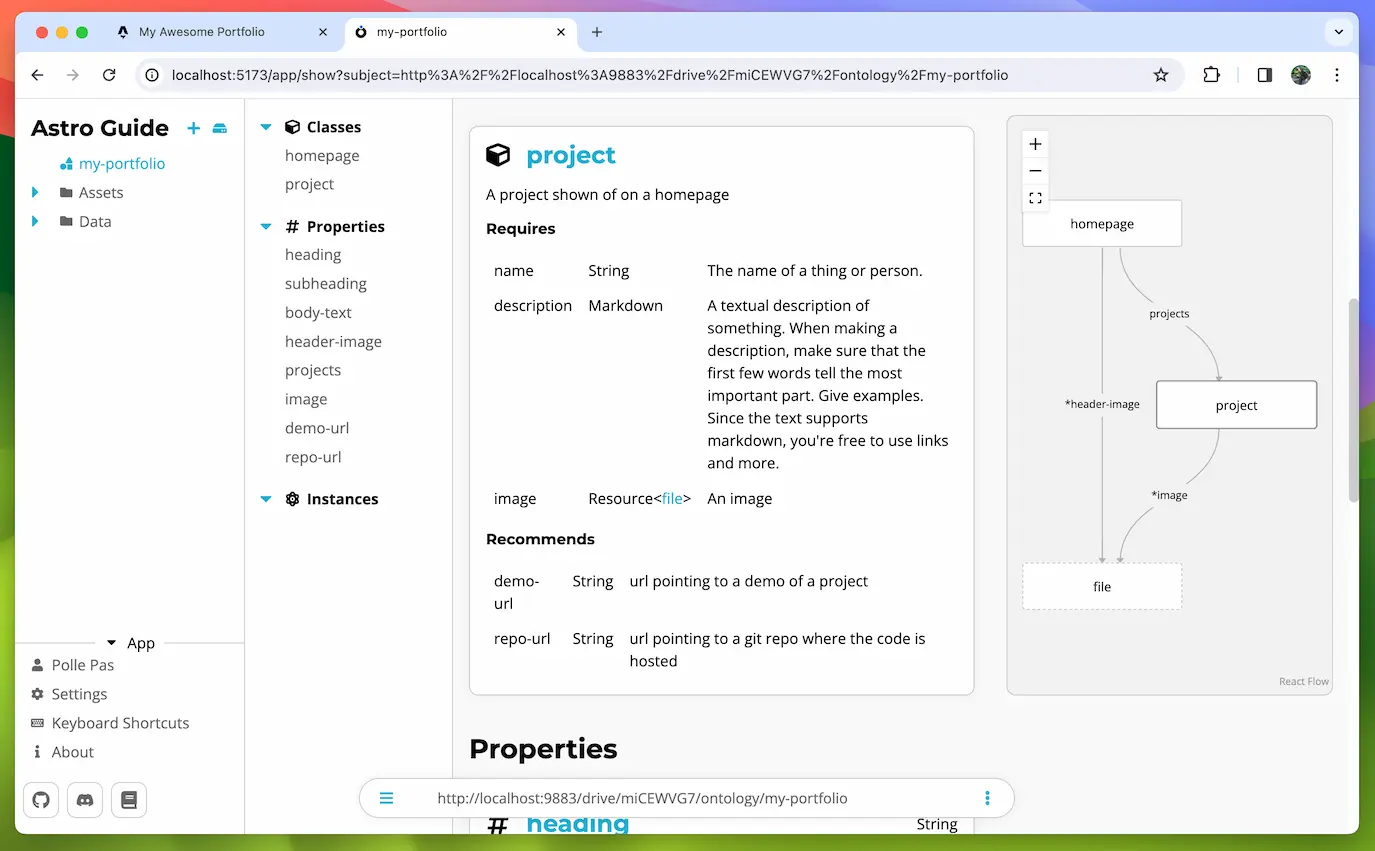
Now in your data folder create some projects and add them to your homepage resource like I did here:
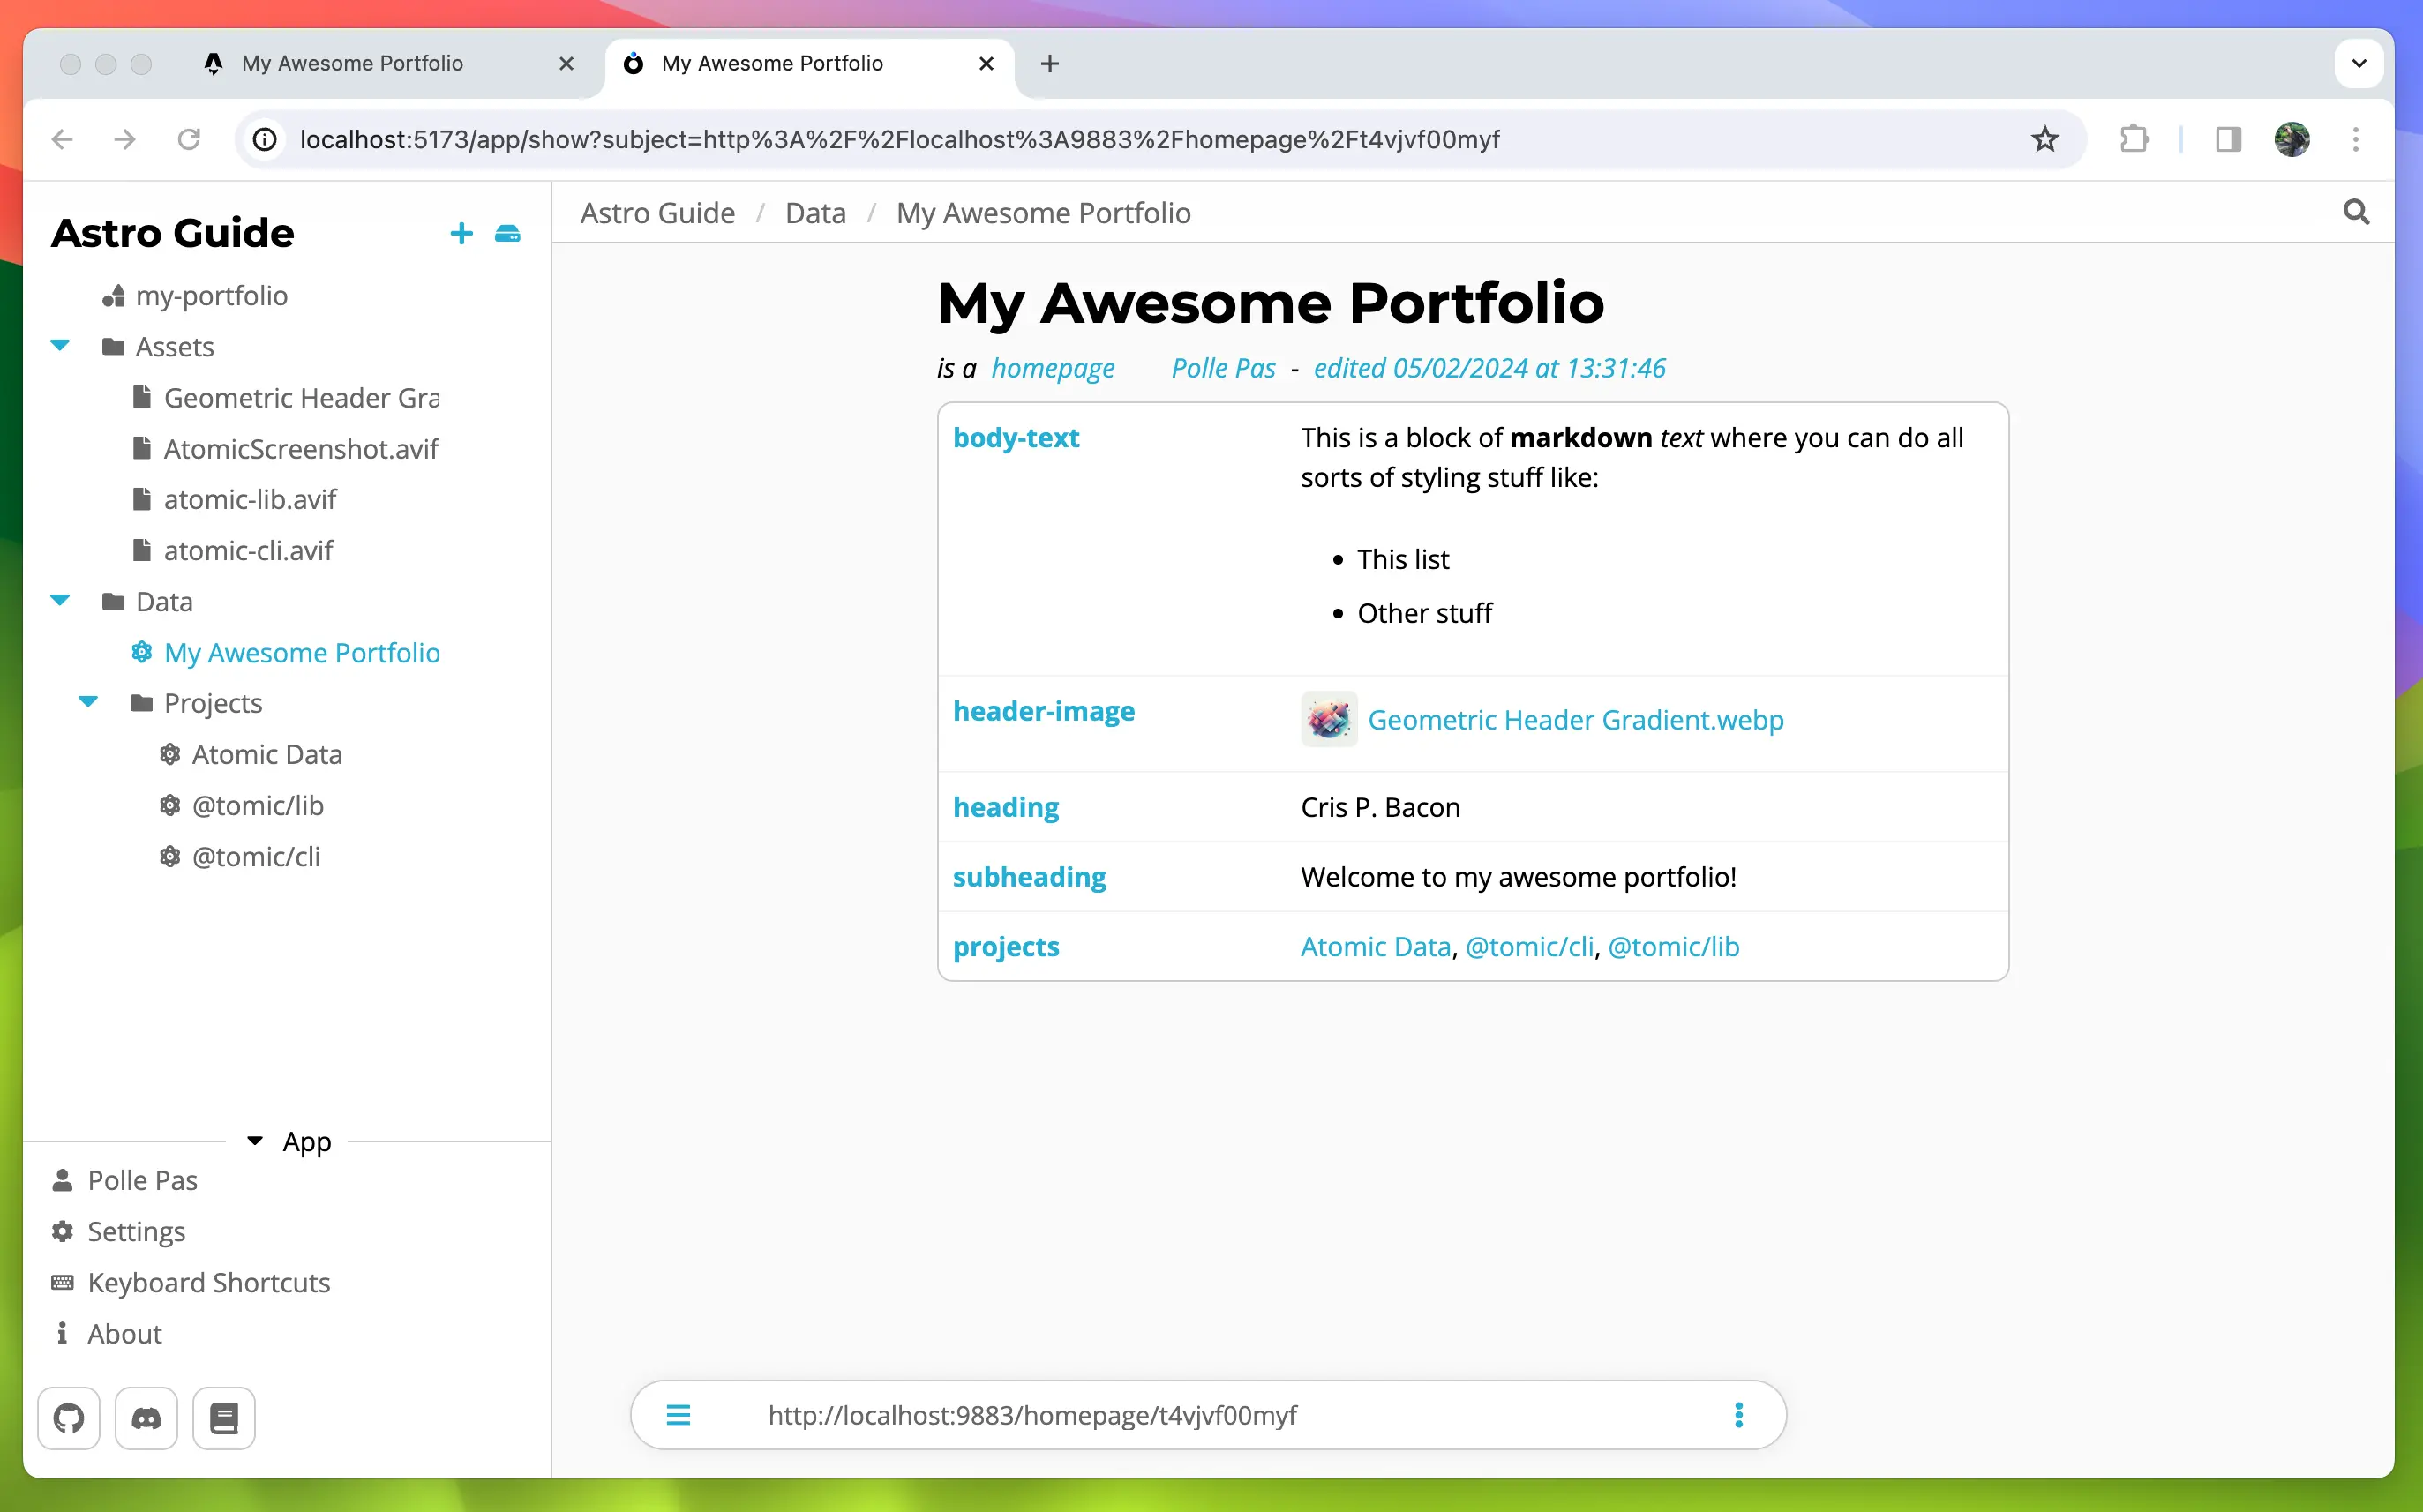
NOTE:
To edit a resource pressCmd + eorCtrl + e, alternatively you can click the context menu on the right of the search bar and clickEdit
Since we changed the ontology we will have to generate our types again:
npx ad-generate ontologies
In your Astro code make a new Component in the src/components folder called Project.astro.
---
// src/components/Project.astro
import { marked } from 'marked';
import { getStore } from '../helpers/getStore';
import type { Project } from '../ontologies/myPortfolio';
import type { Server } from '@tomic/lib';

interface Props {
  subject: string;
}

const store = getStore();

const { subject } = Astro.props;
const project = await store.getResource<Project>(subject);
const coverImg = await store.getResource<Server.File>(project.props.image);

const description = marked.parse(project.props.description);
---

<div>
  <h3>
    {project.title}
  </h3>
  <img src={coverImg.props.downloadUrl} alt='' />
  <div set:html={description} />
  <div>
    {
      project.props.demoUrl && (
        <a
          href={project.props.demoUrl}
          target='_blank'
          rel='noopener noreferrer'
        >
          Visit project
        </a>
      )
    }
    {
      project.props.repoUrl && (
        <a
          href={project.props.repoUrl}
          target='_blank'
          rel='noopener noreferrer'
        >
          View on Github
        </a>
      )
    }
  </div>
</div>

<style>
  img {
    width: 100%;
    aspect-ratio: 16 / 9;
    object-fit: cover;
  }
</style>
The component takes a subject as a prop that we use to fetch the project resource using the .getResource() method.
We then fetch the image resource using the same method.
The description is markdown so we have to parse that first like we did on the homepage.
Finally the links. Because demoUrl and repoUrl are recommended properties and may therefore be undefined we use the short circuit && operator here. This makes sure we don't render an empty link.
Let's update the homepage to use this Project component:
---
// src/pages/index.astro
import { marked } from 'marked';
import Layout from '../layouts/Layout.astro';
import { getStore } from '../helpers/getStore';
import type { Homepage } from '../ontologies/myPortfolio';
import Project from '../components/Project.astro';

const store = getStore();

const homepage = await store.getResource<Homepage>(
  import.meta.env.ATOMIC_HOMEPAGE_SUBJECT,
);

const bodyTextContent = marked.parse(homepage.props.bodyText);
---

<Layout resource={homepage}>
  <p set:html={bodyTextContent} />
  <h2>Projects</h2>
  <div class='grid'>
    {homepage.props.projects?.map(subject => <Project subject={subject} />)}
  </div>
</Layout>

<style>
  .grid {
    display: grid;
    grid-template-columns: repeat(auto-fill, minmax(300px, 1fr));
    gap: 1rem;
  }
</style>
Since a ResourceArray is just an array of subjects we can map through them and pass the subject to <Project />.
Our homepage is now complete and looks like this:
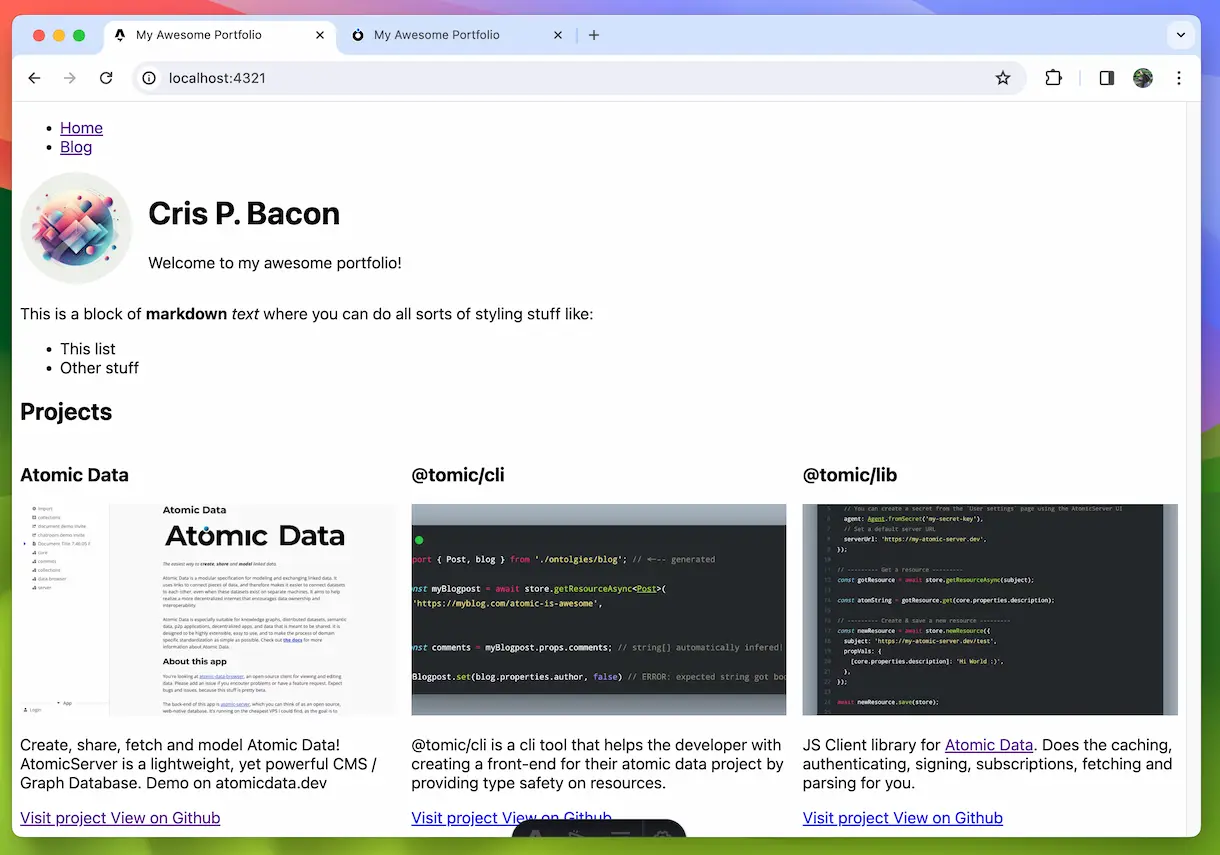
Using Collections to build the blogs page
Most databases have a way to query data, in Atomic, this is done with Collections. A collection is a dynamic resource created by AtomicServer based on the props we give it. @tomic/lib makes it very easy to create them and iterate over them.
Creating the model and data
Let's first add a blogpost class to our ontology.
Give it the following required properties:
- name-
https://atomicdata.dev/properties/name - description -
https://atomicdata.dev/properties/description - title-slug - datatype:
SLUG - image - (you can reuse the image property you created for
project) - published-at - datatype:
TIMESTAMP
name is going to be used for the blog's title, description will be the content of the blog, title-slug is the title in slug form that is used in the URL, image is the cover image of the post and published-at will be the timestamp the post was published.
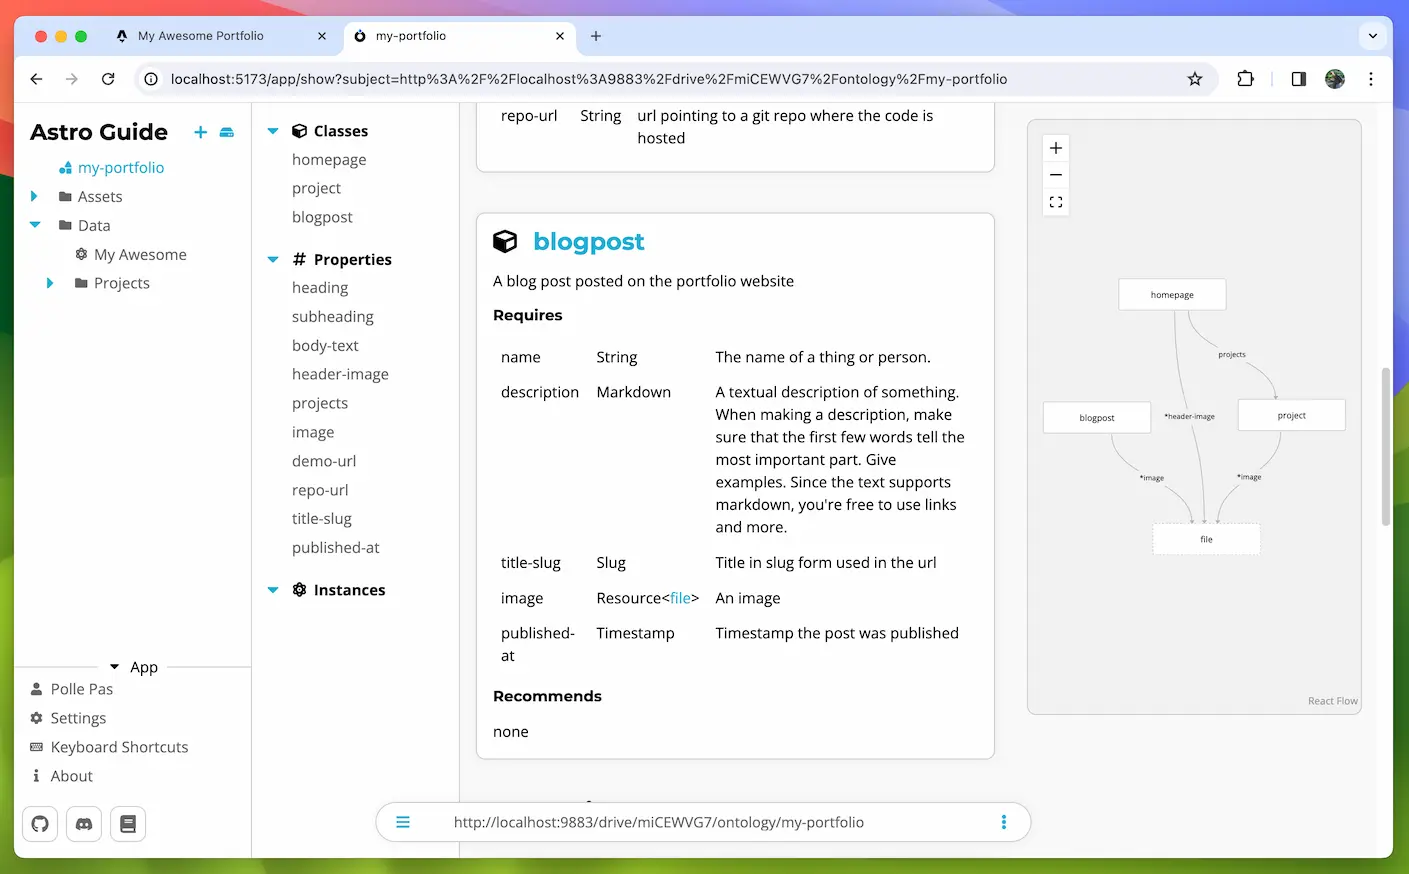
Regenerate the types by running:
npx ad-generate ontologies
Now create a folder called Blogposts inside your Data folder and add some blogposts to it.
I just made some nonsense articles as dummy content.
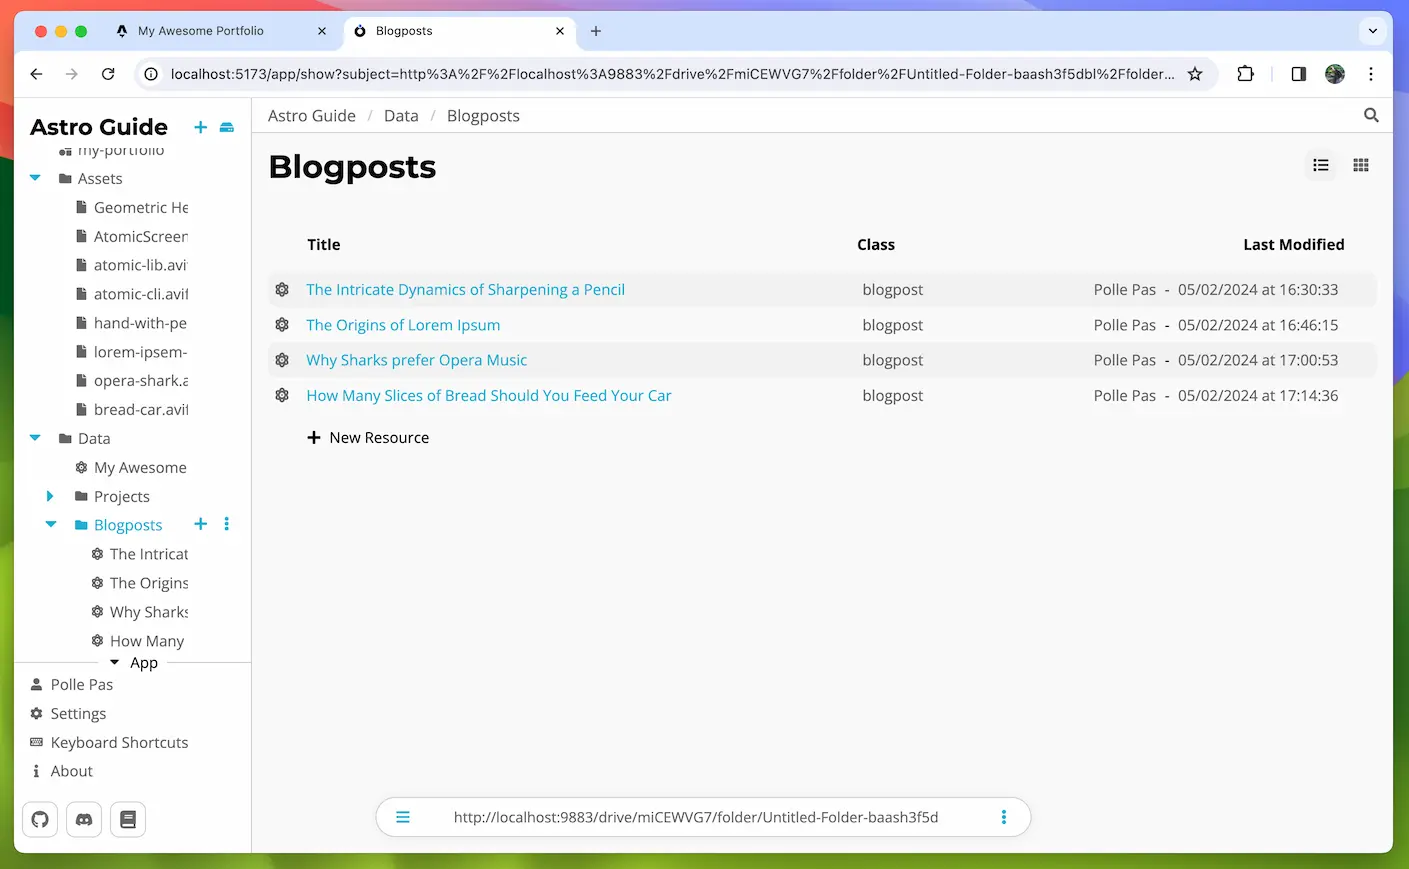
Blog Cards
Our blog page will have a list of blog posts sorted from newest to oldest. The blogs will be displayed as a card with their title and image.
We'll first make the blog card and then create the actual /blog route.
Create a component called BlogCard.astro inside the src/components folder.
This component looks and works a lot like the <Project /> component.
---
// src/components/BlogCard.astro
import type { Server } from '@tomic/lib';
import { getStore } from '../helpers/getStore';
import type { Blogpost } from '../ontologies/myPortfolio';

interface Props {
  subject: string;
}

const { subject } = Astro.props;
const store = getStore();

const blogpost = await store.getResource<Blogpost>(subject);
const cover = await store.getResource<Server.File>(blogpost.props.image);
---

<a href={`/blog/${blogpost.props.titleSlug}`}>
  <img src={cover.props.downloadUrl} alt='' />
  <span>{blogpost.title}</span>
</a>

<style>
  img {
    width: 4rem;
    object-fit: cover;
    display: inline;
  }
</style>
Most of this code should be self-explanatory by now, the only point of interest is the anchor tag where we point to the blog's content page by using titleSlug.
These links won't work right away because we have yet to make these content pages.
Now to display a list of blogposts we are going to query Atomic Server using collections, so how do these collections work?
Collections
A collection is made up of a few properties, most importantly: property and value.
The collection will collect all resources in the drive that have the specified property set to the specified value.
NOTE:
You can also leavepropertyorvalueempty meaning 'give me all resources with this property' or 'give me all resources with a property that has this value'
By setting property to https://atomicdata.dev/properties/isA (the subject of is-a) and value to the subject of our blog post class we tell the collection to collect all resources in our drive that are of class: blogpost.
Additionally, we can also set these properties on a collection to refine our query
| Property | Description | Datatype | Default |
|---|---|---|---|
| sort-by | Sorts the collected members by the given property | Resource< Property> | - |
| sort-desc | Sorts the collected members in descending order | Boolean | false |
| page-size | The maximum number of members per page | Integer | 30 |
Creating a collection using @tomic/lib is done using the CollectionBuilder class to easily set all parameters and then calling .build() to finalise and return a Collection.
const blogCollection = new CollectionBuilder(store)
  .setProperty(core.properties.isA)
  .setValue(myPortfolio.classes.blogpost)
  .setSortBy(myPortfolio.properties.publishedAt)
  .setSortDesc(true)
  .build();
Iterating over a collection can be done in a couple of ways. If you just want an array of all members you can use:
const members = await collection.getAllMembers(); // string[]
If you want to loop over the members and do something with them collection provides an async iterator:
for await (const member of collection) {
  // do something with member
}
Finally, you can also ask the collection to return the member at a certain index, this is useful on the client when you want to let a child component handle the data fetching by passing the collection itself along with the index.
const member = await collection.getMemberWithIndex(10);
Let's add a new blog list page to our website. Inside src/pages create a folder called blog and in there create a file called index.astro.
This page will live on https://<your domain>/blog.
This will be a list of all our blog posts.
---
// src/pages/blog/index.astro
import { CollectionBuilder, core } from '@tomic/lib';
import Layout from '../../layouts/Layout.astro';
import { getStore } from '../../helpers/getStore';
import { myPortfolio, type Homepage } from '../../ontologies/myPortfolio';
import BlogCard from '../../components/BlogCard.astro';

const store = getStore();

const homepage = await store.getResource<Homepage>(
  import.meta.env.ATOMIC_HOMEPAGE_SUBJECT,
);

const blogCollection = new CollectionBuilder(store)
  .setProperty(core.properties.isA)
  .setValue(myPortfolio.classes.blogpost)
  .setSortBy(myPortfolio.properties.publishedAt)
  .setSortDesc(true)
  .build();

const posts = await blogCollection.getAllMembers();
---

<Layout resource={homepage}>
  <h2>Blog</h2>
  <ul>
    {
      posts.map(post => (
        <li>
          <BlogCard subject={post} />
        </li>
      ))
    }
  </ul>
</Layout>
In this file, we create a collection using the CollectionBuilder.
We set property to is-a and value to blogpost to get a list of all blog posts in the drive.
We set sort-by to published-at so the list is sorted by publish date.
Then we set sort-desc to true so the list is sorted from newest to oldest.
We get an array of the post subjects using the blogCollection.getAllMembers().
Then in the markup, we map over this array and render a <BlogCard /> for each of the subjects.
Save and navigate to localhost:4321/blog and you should see the new blog page.
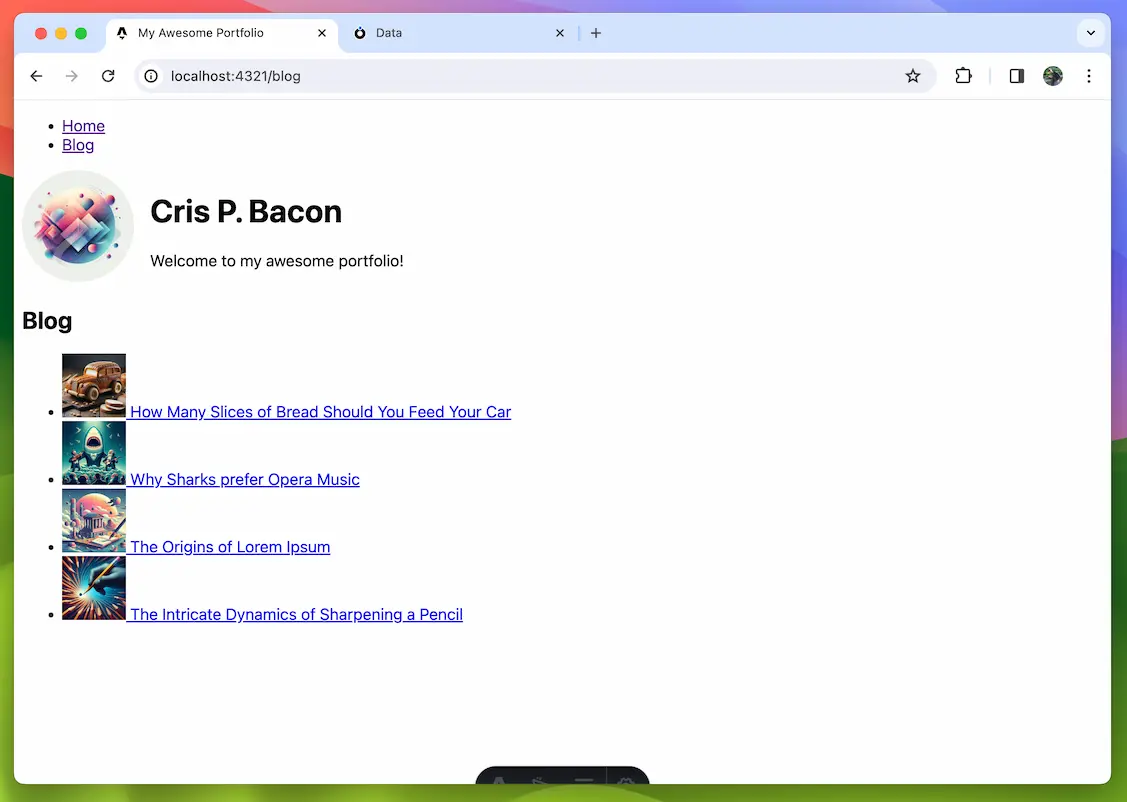
Clicking on the links brings you to a 404 page because we haven't actually made the blog content pages yet so let's do that now.
Creating the blog's content page
Our content pages will live on https://<your domain>/blog/<title-slug> so we need to use a route parameter to determine what blog post to show.
In Astro, this is done with square brackets in the file name.
Create a file in src/pages/blog called [slug].astro.
If you add some markup to the page and try to navigate to it you will get the following error:
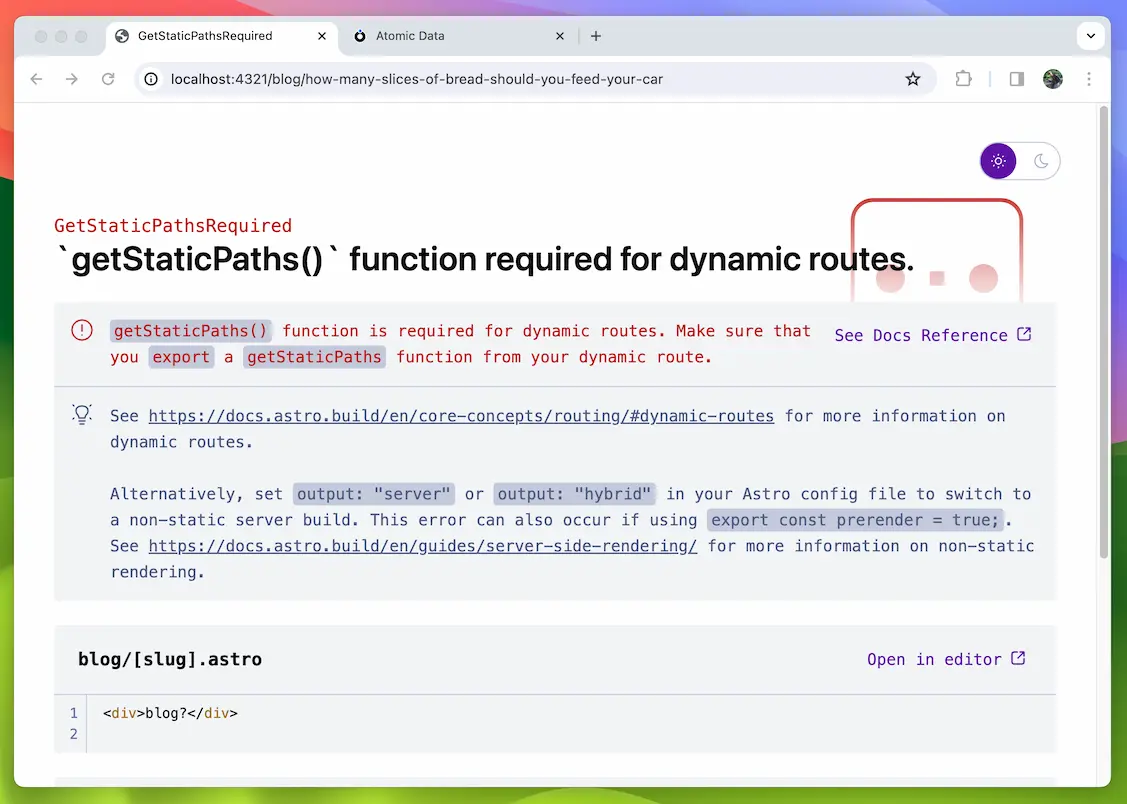
This is because by default Astro generates all pages at build time (called: Static Site Generation) and since this is a dynamic route it needs to know what pages there will be during the build process.
This is fixed by exporting a getStaticPaths function that returns a list of all URLs the route can have.
The other downside of static site generation is that to see any changes made in your data the site needs to be rebuilt. Most hosting providers like Netlify and Vercel make this very easy so this might not be a big problem for you but if you have a content team that is churning out multiple units of content a day, rebuilding each time is not a viable solution.
Luckily Astro also supports Server side rendering (SSR).
This means that it will render the page on the server when a user navigates to it.
When SSR is enabled you won't have to tell Astro what pages to build and therefore the getStaticPaths function can be skipped.
Changes in the data will also reflect on your website without needing to rebuild.
This guide will continue to use Static Site Generation however but feel free to enable SSR if you want to, if you do you can skip the next section about getStaticPaths.
For more info on SSR and how to enable it check out The Astro Docs.
Generating routes with getStaticPaths()
For Astro to know what paths to generate we need to export a function called getStaticPaths that returns a list of params.
Change src/pages/blog/[slug].astro to the following:
---
// src/pages/blog/[slug].astro
import type { GetStaticPaths, GetStaticPathsItem } from 'astro';
import { getStore } from '../../helpers/getStore';
import { CollectionBuilder } from '@tomic/lib';
import { core } from '@tomic/lib';
import { myPortfolio, type Blogpost } from '../../ontologies/myPortfolio';

export const getStaticPaths = (async () => {
  const store = getStore();
  // Build a collection of all blog posts on the drive
  const collection = new CollectionBuilder(store)
    .setProperty(core.properties.isA)
    .setValue(myPortfolio.classes.blogpost)
    .build();

  // Initialize the paths array
  const paths: GetStaticPathsItem[] = [];

  // Iterate over the collection and add the title-slug to the paths array
  for await (const subject of collection) {
    const post = await store.getResource<Blogpost>(subject);

    paths.push({
      params: {
        slug: post.props.titleSlug,
      },
      props: {
        subject,
      },
    });
  }

  return paths;
}) satisfies GetStaticPaths;

interface Props {
  subject: string;
}

const { subject } = Astro.props;
---

<div>Nothing here yet :(</div>
Here we define and export a getStaticPaths function.
In it, we create a collection of all blog posts in our drive.
We create the empty array: paths that will house all possible params.
We then iterate over the collection, get the blog post from the store and push a new GetStaticPathsItem to the paths array.
In this item, we set the slug param to be the title-slug of the post and also add a props object with the subject of the post which we can access inside the component using Astro.props.
Then finally we return the paths array.
Now when you click on one of the blog posts on your blog page you should no longer get an error or a 404 page.
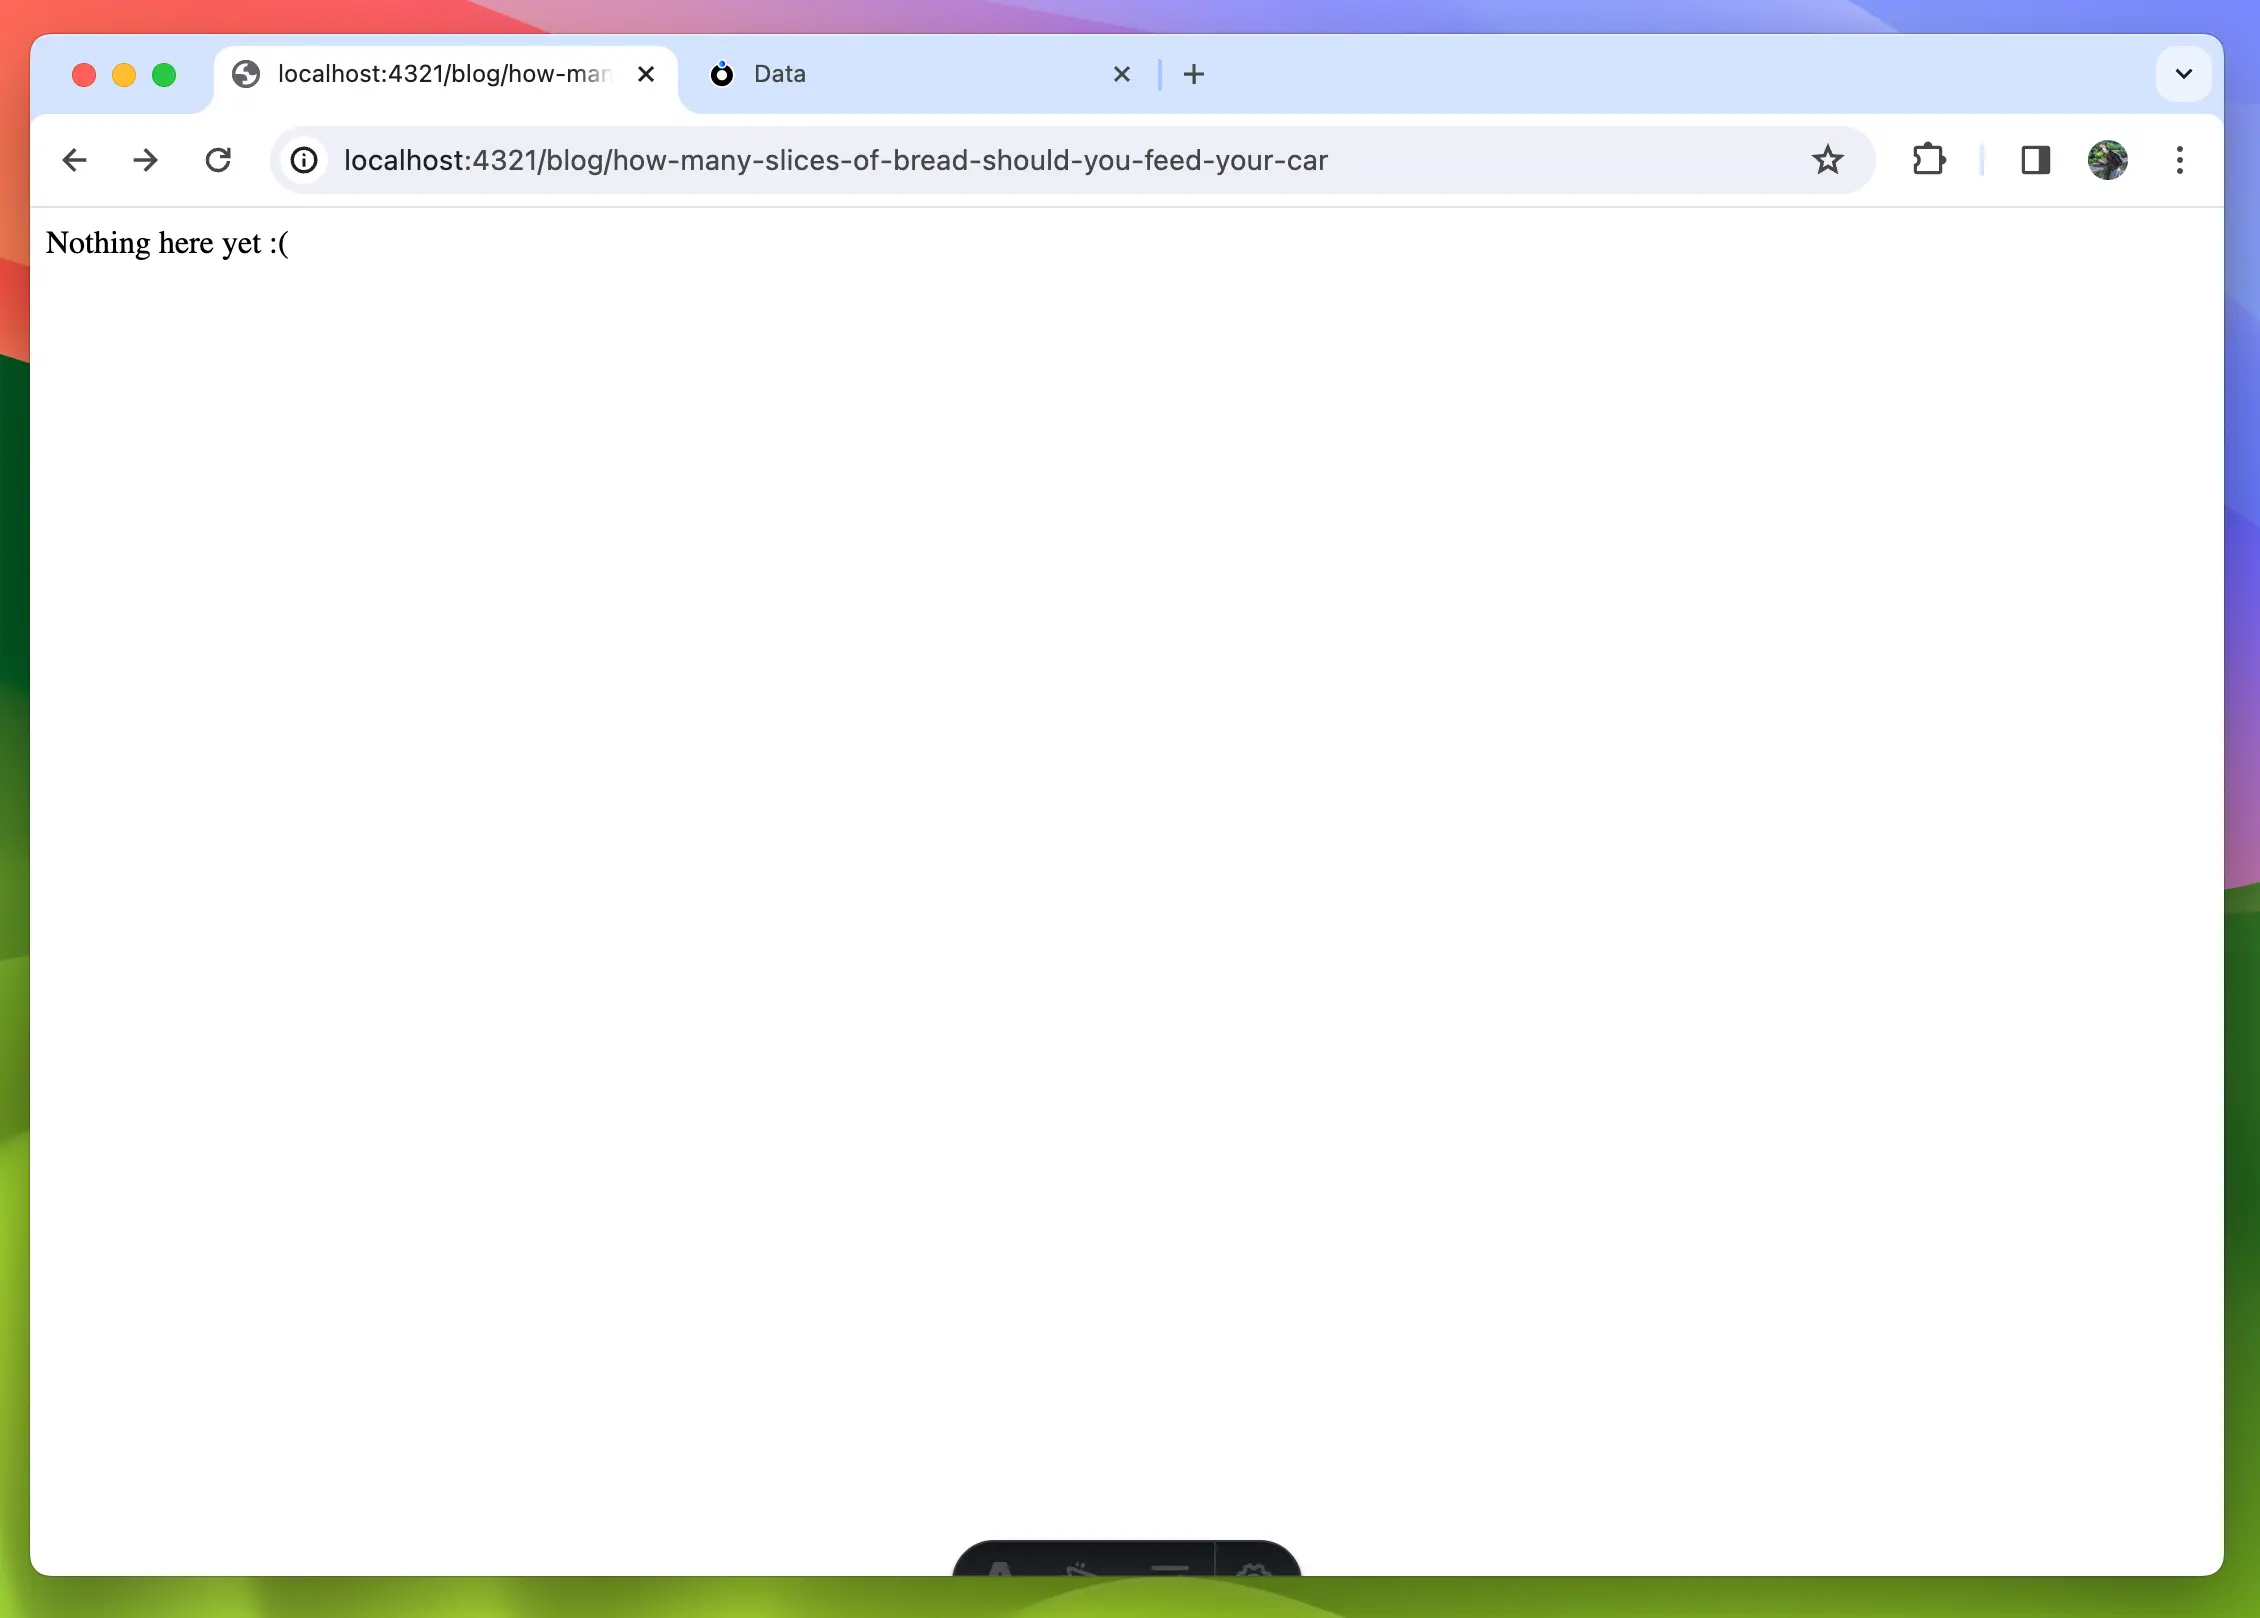
Building the rest of the page
If you opted to use SSR and skipped the
getStaticPaths function replace const {subject} = Astro.props with:
const { slug } = Astro.params;

// Build collection of all resources with a title-slug that matches the slug param
const postQuery = await new CollectionBuilder(store)
  .setProperty(myPortfolio.properties.titleSlug)
  .setValue(slug as string)
  .buildAndFetch();

// Get the first result of the collection
const subject = await postQuery.getMemberWithIndex(0);

// If the first result does not exist redirect to the 404 page.
if (!subject) {
  Astro.redirect('/404');
}
The rest of the page is not very complex, we use the subject passed down from the getStaticPaths function to fetch the blog post and use marked to parse the markdown content:
---
// src/pages/blog/[slug].astro
import type { GetStaticPaths, GetStaticPathsItem } from 'astro';
import { getStore } from '../../helpers/getStore';
import { CollectionBuilder } from '@tomic/lib';
import { core } from '@tomic/lib';
import { myPortfolio, type Blogpost } from '../../ontologies/myPortfolio';
import Layout from '../../layouts/Layout.astro';
import { marked } from 'marked';
import FormattedDate from '../../components/FormattedDate.astro';

export const getStaticPaths = (async () => {
  const store = getStore();
  // Build a collection of all blogposts on the drive
  const collection = new CollectionBuilder(store)
    .setProperty(core.properties.isA)
    .setValue(myPortfolio.classes.blogpost)
    .build();

  // Initialize the paths array
  const paths: GetStaticPathsItem[] = [];

  // Iterate over the collection and add the title-slug to the paths array
  for await (const subject of collection) {
    const post = await store.getResource<Blogpost>(subject);

    paths.push({
      params: {
        slug: post.props.titleSlug,
      },
      props: {
        subject,
      },
    });
  }

  return paths;
}) satisfies GetStaticPaths;

interface Props {
  subject: string;
}

const store = getStore();

const { subject } = Astro.props;

const post = await store.getResource<Blogpost>(subject);

const content = marked.parse(post.props.description);
---

<Layout resource={post}>
  <article>
    Published: <FormattedDate timestamp={post.props.publishedAt} />
    <div set:html={content} />
  </article>
</Layout>
I've added a FormattedDate component here that formats a timestamp to something that is humanly readable
---
// src/components/FormattedDate.astro
interface Props {
  timestamp: number;
}

const { timestamp } = Astro.props;

const date = new Date(timestamp);

const dateText = new Intl.DateTimeFormat('default', {
  dateStyle: 'full',
}).format(date);
---

<time datetime={date.toISOString()}>{dateText}</time>
The blog post page should now look something like this:

The only thing left is a Header with the image and title of the blog post.
Create a new component in the src/components folder called BlogPostHeader.astro
---
// src/components/BlogPostHeader.astro
import type { Resource } from '@tomic/lib';
import type { Blogpost } from '../ontologies/myPortfolio';
import { getStore } from '../helpers/getStore';
import type { Server } from '@tomic/lib';

interface Props {
  resource: Resource<Blogpost>;
}

const { resource } = Astro.props;
const store = getStore();
const cover = await store.getResource<Server.File>(resource.props.image);
---

<header>
  <h1>
    {resource.title}
  </h1>
</header>

<style define:vars={{ imgURL: `url(${cover.props.downloadUrl})` }}>
  header {
    background-image: var(--imgURL);
    background-size: cover;
    height: 20rem;
    padding: 1rem;
  }
  h1 {
    color: white;
    text-shadow: 0 4px 10px rgba(0, 0, 0, 0.46);
  }
</style>
The component expects a blog post resource as a prop and then fetches the cover image resource.
We pass the image's download-url to the stylesheet using CSS Variables, in Astro this is done using define:vars.
Now update src/layouts/Layout.astro to render a <BlogPostHeader /> when the resource has a blogpost class:
---
// src/layouts/Layout.astro
import type { Resource } from '@tomic/lib';
import HomepageHeader from '../components/HomepageHeader.astro';
import BlogPostHeader from '../components/BlogPostHeader.astro';
import { myPortfolio } from '../ontologies/myPortfolio';


interface Props {
  resource: Resource;
}

const { resource } = Astro.props;
---

<!doctype html>
<html lang='en'>
  <head>
    <meta charset='UTF-8' />
    <meta name='description' content='Astro description' />
    <meta name='viewport' content='width=device-width' />
    <link rel='icon' type='image/svg+xml' href='/favicon.svg' />
    <meta name='generator' content={Astro.generator} />
    <title>{resource.title}</title>
  </head>
  <body>
    <nav>
      <ul>
        <li>
          <a href='/'>Home</a>
        </li>
        <li>
          <a href='/blog'>Blog</a>
        </li>
      </ul>
    </nav>
    {
      resource.hasClasses(myPortfolio.classes.homepage) && (
        <HomepageHeader resource={resource} />
      )
    }
    {
      resource.hasClasses(myPortfolio.classes.blogpost) && (
        <BlogPostHeader resource={resource} />
      )
    }
    <slot />
  </body>
</html>

<style is:global>
  body {
    font-family: system-ui;
  }
</style>
That should be it. Our blog post now has a beautiful header.
Our site is almost complete but it's missing that one killer feature that shows you're not a developer to be messed with. A real-time search bar 😎.
Making a search bar for blogposts
Using the search API
AtomicServer comes with a fast full-text search API out of the box. @tomic/lib provides some convenient helper functions on Store to make using this API very easy.
To use search all you need to do is:
const results = await store.search('how to make icecream');
The method returns an array of subjects of resources that match the given query.
To further refine the query, we can pass a filter object to the method like so:
const results = await store.search('how to make icecream', {
  filters: {
    [core.properties.isA]: myPortfolio.classes.blogpost,
  },
});
This way the result will only include resources that have an is-a of blogpost.
Running code on the client
To make a working search bar, we will have to run code on the client.
Astro code only runs on the server but there are a few ways to have code run on the client.
The most commonly used option would be to use a frontend framework like React or Svelte but Astro also allows script tags to be added to components that will be included in the <head /> of the page.
To keep this guide framework-agnostic we will use a script tag and a web component but feel free to use any framework you're more comfortable with, the code should be simple enough to adapt to different frameworks.
First, we need to make a change to our environment variables because right now they are not available to the client and therefore getStore will not be able to access ATOMIC_SERVER_URL.
To make an environment variable accessible to the client it needs to be prefixed with PUBLIC_.
In .env change ATOMIC_SERVER_URL to PUBLIC_ATOMIC_SERVER_URL.
// .env
PUBLIC_ATOMIC_SERVER_URL=<REPLACE WITH URL TO YOUR ATOMIC SERVER>
ATOMIC_HOMEPAGE_SUBJECT=<REPLACE WITH SUBJECT OF THE HOMEPAGE RESOURCE>
Now update src/helpers/getStore.ts to reflect the name change.
// src/helpers/getStore.ts
import { Store } from '@tomic/lib';
import { initOntologies } from '../ontologies';

let store: Store;

export function getStore(): Store {
  if (!store) {
    store = new Store({
      serverUrl: import.meta.env.PUBLIC_ATOMIC_SERVER_URL,
    });

    initOntologies();
  }

  return store;
}
Creating the search bar
In src/components create a file called Search.astro.
<blog-search></blog-search>

<script>
  import { getStore } from '../../helpers/getStore';
  import { core } from '@tomic/lib';
  import { myPortfolio, type Blogpost } from '../../ontologies/myPortfolio';

  class BlogSearch extends HTMLElement {
    // Get access to the store. (Since this runs on the client a new instance will be created)
    private store = getStore();
    // Create an element to store the results in
    private resultsElement = document.createElement('div');

    // Runs when the element is mounted.
    constructor() {
      super();

      // We create an input element and add a listener to it that will trigger a search.
      const input = document.createElement('input');
      input.placeholder = 'Search...';
      input.type = 'search';

      input.addEventListener('input', (e) => {
        this.searchAndDisplay(input.value);
      });

      // Add the input and result list elements to the root of our webcomponent.
      this.append(input, this.resultsElement);
    }

    /**
     * Search for blog posts using the given query and display the results.
     */
    private async searchAndDisplay(query: string) {
      if (!query) {
        // Clear the results of the previous search.
        this.resultsElement.innerHTML = '';
        return;
      }

      const results = await this.store.search(query, {
        filters: {
          [core.properties.isA]: myPortfolio.classes.blogpost,
        },
      });

      // Map the result subjects to elements.
      const elements = await Promise.all(
        results.map(s => this.createResultItem(s)),
      );

      // Clear the results of the previous search.
      this.resultsElement.innerHTML = '';

      // Append the new results to the result list.
      this.resultsElement.append(...elements);
    }

    /**
     * Create a result link for the given blog post.
     */
    private async createResultItem(subject: string): Promise<HTMLAnchorElement> {
      const post = await this.store.getResource<Blogpost>(subject);

      const resultLine = document.createElement('a');
      resultLine.innerText = post.title;
      resultLine.style.display = 'block';
      resultLine.href = `/blog/${post.props.titleSlug}`;

      return resultLine;
    }
  }

  // Register the custom element.
  customElements.define('blog-search', BlogSearch);
</script>
If you've never seen web components before, <blog-search> is our custom element that starts as just an empty shell.
We then add a <script> that Astro will add to the head of our HTML.
In this script, we define the class that handles how to render the <blog-search> element.
At the end of the script, we register the custom element class.
NOTE:
Eventhough the server will most likely keep up with this many requests, lower end devices might not so it's still a good idea to add some kind of debounce to your searchbar.
Now all that's left to do is use the component to the blog page.
// src/pages/blog/index.astro

...
<Layout resource={homepage}>
  <h2>Blog 😁</h2>
+ <Search />
  <ul>
    {
      posts.map(post => (
        <li>
          <BlogCard subject={post} />
        </li>
      ))
    }
  </ul>
</Layout>
And there it is! A working real-time search bar 🎉
The end, what's next?
That's all for this guide. Some things you could consider adding next if you liked working with AtomicServer and want to continue building this portfolio:
- Add some more styling
- Add some interactive client components using one of many Astro integrations (Consider checking @tomic/react or @tomic/svelte)
- Do some SEO optimisation by adding meta tags to your
Layout.astro.
What is Atomic Data?
Atomic Data Core
Atomic Data is a modular specification for sharing information on the web. Since Atomic Data is a modular specification, you can mostly take what you want to use, and ignore the rest. The Core part, however, is the only required part of the specification, as all others depend on it.
Atomic Data Core can be used to express any type of information, including personal data, vocabularies, metadata, documents, files and more. It's designed to be easily serializable to both JSON and linked data formats. It is a typed data model, which means that every value must be validated by their datatype.
Design goals
- Browsable: Data should explicitly link to other pieces of data, and these links should be followable.
- Semantic: Every data Atom and relation has a clear semantic meaning.
- Interoperable: Plays nice with other data formats (e.g. JSON, XML, and all RDF formats).
- Open: Free to use, open source, no strings attached.
- Clear Ownership: The data shows who (or which domain) is in control of the data, so new versions of the data can easily be retrieved.
- Mergeable: Any two sets of Atoms can be merged into a single graph without any merge conflicts / name collisions.
- Extensible: Anyone can define their own data types and create Atoms with it.
- ORM-friendly: Navigate a decentralized graph by using
dot.syntax, similar to how you navigate a JSON object in javascript. - Type-safe: All valid Atomic data has an unambiguous, static datatype.
Concepts
Resource
A Resource is a bunch of information about a thing, referenced by a single link (the Subject). Formally, it is a set of Atoms (i.e. a Graph) that share a Subject URL. You can think of a Resource as a single row in a spreadsheet or database. In practice, Resources can be anything - a Person, a Blogpost, a Todo item. A Resource consists of at least one Atom, so it always has some Property and some Value. A Property can only occur once in every Resource.
Atom (or Atomic Triple)
Every Resource is composed of Atoms. The Atom is the smallest possible piece of meaningful data / information (hence the name). You can think of an Atom as a single cell in a spreadsheet or database. An Atom consists of three fields:
- Subject: the thing that the atom is providing information about. This is typically also the URL where we can find more information about it.
- Property: the property of the thing that the atom is about (will always be a URL to a Property).
- Value: the new piece of information about the Atom.
If you're familiar with RDF, you'll notice similarities. An Atom is comparable with an RDF Triple / Statement (although there are important differences).
Let's turn this sentence into Atoms:
Arnold Peters, who's born on the 20th of Januari 1991, has a best friend named Britta Smalls.
| Subject | Property | Value |
|---|---|---|
| Arnold | last name | Peters |
| Arnold | birthdate | 1991-01-20 |
| Arnold | best friend | Britta |
| Britta | last name | Smalls |
The table above shows human readable strings, but in Atomic Data, we use links (URLs) wherever we can. That's because links are awesome. Links remove ambiguity (we know exactly which person or property we mean), they are resolvable (we can click on them), and they are machine readable (machines can fetch links to do useful things with them). So the table from above, will more closely resemble this one:
| Subject | Property | Value |
|---|---|---|
| https://example.com/arnold | https://example.com/properties/lastname | Peters |
| https://example.com/arnold | https://example.com/properties/birthDate | 1991-01-20 |
| https://example.com/arnold | https://example.com/properties/bestFriend | https://example.com/britta |
| https://example.com/britta | https://example.com/properties/lastname | Smalls |
The standard serialization format for Atomic Data is JSON-AD, which looks like this:
[{
  "@id": "https://example.com/arnold",
  "https://example.com/properties/lastname": "Peters",
  "https://example.com/properties/birthDate": "1991-01-20",
  "https://example.com/properties/bestFriend": "https://example.com/britta",
},{
  "@id": "https://example.com/britta",
  "https://example.com/properties/lastname": "Smalls",
}]
The @id field denotes the Subject of each Resource, which is also the URL that should point to where the resource can be found.
In the JSON-AD example above, we have:
- two Resources, describing two different Subjects:
https://example.com/arnoldandhttps://example.com/britta. - three different Properties (
https://example.com/properties/lastname,https://example.com/properties/birthDate, andhttps://example.com/properties/bestFriend) - four Values (
Peters,1991-01-20,https://example.com/brittaandSmalls) - four Atoms - every row is one Atom.
All Subjects and Properties are Atomic URLs: they are links that point to more Atomic Data.
One of the Values is a URL, too, but we also have values like Arnold and 1991-01-20.
Values can have different Datatypes
In most other data formats, the datatypes are limited and are visually distinct.
JSON, for example, has array, object, string, number and boolean.
In Atomic Data, however, datatypes are defined somewhere else, and are extendible.
To find the Datatype of an Atom, you fetch the Property, and that Property will have a Datatype.
For example, the https://example.com/properties/bornAt Property requires an ISO Date string, and the https://example.com/properties/firstName Property requires a regular string.
This might seem a little tedious and weird at first, but is has some nice advantages!
Their Datatypes are defined in the Properties.
Subject field
The Subject field is the first part of an Atom.
It is the identifier that the rest of the Atom is providing information about.
The Subject field is a URL that points to the Resource.
The creator of the Subject MUST make sure that it resolves.
In other words: following / downloading the Subject link will provide you with all the Atoms about the Subject (see Querying Atomic Data.
This also means that the creator of a Resource must make sure that it is available at its URL - probably by hosting the data, or by using some service that hosts it.
In JSON-AD, the Subject is denoted by @id.
Property field
The Property field is the second part of an Atom. It is a URL that points to an Atomic Property. Examples can be found at https://atomicdata.dev/properties.
The Property field MUST be a URL, and that URL MUST resolve (it must be publicly available) to an Atomic Property.
The Property is perhaps the most important concept in Atomic Data, as it is what enables the type safety (thanks to datatype) and the JSON compatibility (thanks to shortname).
We also use Properties for rendering fields in a form, because the Datatype, shortname and description helps us to create an intuitive, easy to understand input for users.
Value field
The Value field is the third part of an Atom.
In RDF, this is called an object.
Contrary to the Subject and Property values, the Value can be of any datatype.
This includes URLs, strings, integers, dates and more.
Graph
A Graph is a collection of Atoms. A Graph can describe various subjects, which may or may not be related. Graphs can have several characteristics (Schema Complete, Valid, Closed)
In mathematial graph terminology, a graph consists of nodes and edges.
The Atomic Data model is a so called directed graph, which means that relationships are by default one-way.
In Atomic Data, every node is a Resource, and every edge is a Property.
Nested Resource
A Nested Resource only exists inside of another resource. It does not have its own subject.
In the next chapter, we'll explore how Atomic Data is serialized.
Serialization of Atomic Data
Atomic Data is not necessarily bound to a single serialization format.
It's fundamentally a data model, and that's an important distinction to make.
It can be serialized in different ways, but there is only one required: JSON-AD.
JSON-AD
JSON-AD (more about that on the next page) is specifically designed to be a simple, complete and performant format for Atomic Data.
{
  "@id": "https://atomicdata.dev/properties/description",
  "https://atomicdata.dev/properties/datatype": "https://atomicdata.dev/datatypes/markdown",
  "https://atomicdata.dev/properties/description": "A textual description of something. When making a description, make sure that the first few words tell the most important part. Give examples. Since the text supports markdown, you're free to use links and more.",
  "https://atomicdata.dev/properties/isA": [
    "https://atomicdata.dev/classes/Property"
  ],
  "https://atomicdata.dev/properties/parent": "https://atomicdata.dev/properties",
  "https://atomicdata.dev/properties/shortname": "description"
}
JSON (simple)
Atomic Data is designed to be serializable to clean, simple JSON, for usage in (client) apps that don't need to know the full URLs of properties.
{
  "@id": "https://atomicdata.dev/properties/description",
  "datatype": "https://atomicdata.dev/datatypes/markdown",
  "description": "A textual description of something. When making a description, make sure that the first few words tell the most important part. Give examples. Since the text supports markdown, you're free to use links and more.",
  "is-a": [
    "https://atomicdata.dev/classes/Property"
  ],
  "parent": "https://atomicdata.dev/properties",
  "shortname": "description"
}
Read more about JSON and Atomic Data
RDF serialization formats
Since Atomic Data is a strict subset of RDF, RDF serialization formats can be used to communicate and store Atomic Data, such as N-Triples, Turtle, HexTuples, JSON-LD and other RDF serialization formats. However, not all valid RDF is valid Atomic Data. Atomic Data is more strict. Read more about serializing Atomic Data to RDF in the RDF interoperability section.
JSON-LD:
{
  "@context": {
    "datatype": {
      "@id": "https://atomicdata.dev/properties/datatype",
      "@type": "@id"
    },
    "description": "https://atomicdata.dev/properties/description",
    "is-a": {
      "@container": "@list",
      "@id": "https://atomicdata.dev/properties/isA"
    },
    "parent": {
      "@id": "https://atomicdata.dev/properties/parent",
      "@type": "@id"
    },
    "shortname": "https://atomicdata.dev/properties/shortname"
  },
  "@id": "https://atomicdata.dev/properties/description",
  "datatype": "https://atomicdata.dev/datatypes/markdown",
  "description": "A textual description of something. When making a description, make sure that the first few words tell the most important part. Give examples. Since the text supports markdown, you're free to use links and more.",
  "is-a": [
    "https://atomicdata.dev/classes/Property"
  ],
  "parent": "https://atomicdata.dev/properties",
  "shortname": "description"
}
Turtle / N-Triples:
<https://atomicdata.dev/properties/description> <https://atomicdata.dev/properties/datatype> <https://atomicdata.dev/datatypes/markdown> .
<https://atomicdata.dev/properties/description> <https://atomicdata.dev/properties/parent> <https://atomicdata.dev/properties> .
<https://atomicdata.dev/properties/description> <https://atomicdata.dev/properties/shortname> "description"^^<https://atomicdata.dev/datatypes/slug> .
<https://atomicdata.dev/properties/description> <https://atomicdata.dev/properties/isA> "https://atomicdata.dev/classes/Property"^^<https://atomicdata.dev/datatypes/resourceArray> .
<https://atomicdata.dev/properties/description> <https://atomicdata.dev/properties/description> "A textual description of something. When making a description, make sure that the first few words tell the most important part. Give examples. Since the text supports markdown, you're free to use links and more."^^<https://atomicdata.dev/datatypes/markdown> .
JSON-AD: The Atomic Data serialization format
Although you can use various serialization formats for Atomic Data, JSON-AD is the default and only required serialization format.
It is what the current Rust and Typescript / React implementations use to communicate.
It is designed to feel familiar to developers and to be easy and performant to parse and serialize.
It is inspired by JSON-LD.
It uses JSON, but has some additional constraints:
- Every single Object is a
Resource. - Every Key is a
PropertyURL. Other keys are invalid. Each Property URL must resolve to an online Atomic Data Property. - The
@idfield is special: it defines theSubjectof theResource. If you send an HTTP GET request there with ancontent-type: application/ad+jsonheader, you should get the full JSON-AD resource. - JSON arrays are mapped to Resource Arrays
- Numbers can be Integers, Timestamps or Floats.
- JSON booleans map to Booleans.
- JSON strings can be many datatypes, including String, Markdown, Date or other.
- Nested JSON Objects are Nested Resources. A Nested Resource can either be Anonymous (without an
@idsubject) or a Named Nested Resource (with an@idsubject). Everywhere a Subject URL can be used as a value (i.e. all properties with the datatype atomicURL), a Nested Resource can be used instead. This also means that an item in anResourceArraycan be a Nested Resource. - The root data structure must either be a Named Resource (with an
@id), or an Array containing Named Resources. When you want to describe multiple Resources in one JSON-AD document, use an array as the root item.
Let's look at an example JSON-AD Resource:
{
  "@id": "https://atomicdata.dev/properties/description",
  "https://atomicdata.dev/properties/datatype": "https://atomicdata.dev/datatypes/markdown",
  "https://atomicdata.dev/properties/description": "A textual description of something. When making a description, make sure that the first few words tell the most important part. Give examples. Since the text supports markdown, you're free to use links and more.",
  "https://atomicdata.dev/properties/isA": [
    "https://atomicdata.dev/classes/Property"
  ],
  "https://atomicdata.dev/properties/shortname": "description"
}
The mime type (for HTTP content negotiation) is application/ad+json (registration ongoing).
Nested, Anonymous and Named resources
In JSON-AD, a Resource can be respresented in multiple ways:
- Subject: A URL string, such as
https://atomicdata.dev/classes/Class. - Named Resource: A JSON Object with an
@idfield containing the Subject. - Anonymous Nested Resource A JSON Object without an
@idfield. This is only possible if it is a Nested Resource, which means that it has a parent Resource.
Note that this is also valid for ResourceArrays, which usually only contain Subjects, but are allowed to contain Nested Resources.
In the following JSON-AD example, the address is a nested resource:
{
  "@id": "https://example.com/arnold",
  "https://example.com/properties/address": {
    "https://example.com/properties/firstLine": "Longstreet 22",
    "https://example.com/properties/city": "Watertown",
    "https://example.com/properties/country": "the Netherlands",
  }
}
Nested Resources can be named or anonymous. An Anonymous Nested Resource does not have it's own @id field.
It does have its own unique path, which can be used as its identifier.
The path of the anonymous resource in the example above is https://example.com/arnold https://example.com/properties/address.
JSON-AD Parsers, serializers and other libraries
- Typescript / Javacript: @tomic/lib JSON-AD parser + in-memory store. Works with @tomic/react for rendering Atomic Data in React.
- Rust: atomic_lib has a JSON-AD parser / serializer (and does a lot more).
Canonicalized JSON-AD
When you need deterministic serialization of Atomic Data (e.g. when calculating a cryptographic hash or signature, used in Atomic Commits), you can use the following procedure:
- Serialize your Resource to JSON-AD
- Do not include empty objects, empty arrays or null values.
- All keys are sorted alphabetically (lexicographically) - both in the root object, as in any nested objects.
- The JSON-AD is minified: no newlines, no spaces.
The last two steps of this process is more formally defined by the JSON Canonicalization Scheme (JCS, rfc8785).
Interoperability with JSON and JSON-LD
Querying Atomic Data
There are multiple ways of getting Atomic Data into some system:
- Subject Fetching requests a single subject right from its source
- Atomic Collections can filter, sort and paginate resources
- Atomic Paths is a simple way to traverse Atomic Graphs and target specific values
- Query endpoint (
/query) works virtually identical toCollections, but it does not require a Collection Resource be defined.
Subject fetching (HTTP)
The simplest way of getting Atomic Data when the Subject is an HTTP URL, is by sending a GET request to the subject URL.
Set the accept header to an Atomic Data compatible mime type, such as application/ad+json.
GET https://atomicdata.dev/test HTTP/1.1
accept: application/ad+json
The server SHOULD respond with all the Atoms of which the requested URL is the subject:
HTTP/1.1 200 OK
Content-Type: application/ad+json
Connection: Closed

{
  "@id": "https://atomicdata.dev/test",
  "https://atomicdata.dev/properties/shortname": "1611489928"
}
The server MAY also include other resources, if they are deemed relevant. For example, a search result might include nested children to speed up rendering.
Also note that AtomicServer supports other Content-Types, such as application/json, application/ld+json, text/turtle.
Atomic Collections
Collections are Resources that provide simple query options, such as filtering by Property or Value, and sorting. They also paginate resources. Under the hood, Collections are powered by Triple Pattern Fragments. Use query parameters to traverse pages, filter, or sort.
Atomic Paths
An Atomic Path is a string that consist of one or more URLs, which when traversed point to an item.
Full text search
AtomicServer supports a full text /search endpoint.
Because this is an Endpoint, you can simply open it to see the available query parameters.
Atomic Paths
An Atomic Path is a string that consists of at least one URL, followed by one or more URLs or Shortnames. Every single value in an Atomic Resource can be targeted through such a Path. They can be used as identifiers for specific Values.
The simplest path, is the URL of a resource, which represents the entire Resource with all its properties. If you want to target a specific atom, you can use an Atomic Path with a second URL. This second URL can be replaced by a Shortname, if the Resource is an instance of a class which has properties with that Shortname (sounds more complicated than it is).
Example
Let's start with this simple Resource:
{
  "@id": "https://example.com/john",
  "https://example.com/lastName": "McLovin",
}
Then the following Path targets the McLovin value:
https://example.com/john https://example.com/lastName => McLovin
Instead of using the full URL of the lastName Property, we can use its shortname:
https://example.com/john lastname => McLovin
We can also traverse relationships between resources:
[{
  "@id": "https://example.com/john",
  "https://example.com/lastName": "McLovin",
  "https://example.com/employer": "https://example.com/XCorp",
},{
  "@id": "https://example.com/XCorp",
  "https://example.com/description": "The greatest company!",
}]
https://example.com/john employer description => The greatest company!
In the example above, the XCorp subject exists and is the source of the The greatest company! value.
We can use this path as a unique identifier for the description of John's current employer.
Note that the data for the description of that employer does not have to be in John's control for this path to work - it can live on a totally different server.
However, in Atomic Data it's also possible to include this description in the resource of John as a Nested Resource.
Nested Resources
All Atomic Data Resources that we've discussed so far have an explicit URL as a subject. Unfortunately, creating unique and resolvable URLs can be a bother, and sometimes not necessary. If you've worked with RDF, this is what Blank Nodes are used for. In Atomic Data, we have something similar: Nested Resources.
Let's use a Nested Resource in the example from the previous section:
{
  "@id": "https://example.com/john",
  "https://example.com/lastName": "McLovin",
  "https://example.com/employer": {
    "https://example.com/description": "The greatest company!",
  }
}
Now the employer is simply a nested Object.
Note that it no longer has its own @id.
However, we can still identify this Nested Resource using its Path.
The Subject of the nested resource is its path: https://example.com/john https://example.com/employer, including the spacebar.
Note that the path from before still resolves:
https://example.com/john employer description => The greatest company!
Traversing Arrays
We can also navigate Arrays using paths.
For example:
{
  "@id": "https://example.com/john",
  "hasShoes": [
    {
      "https://example.com/name": "Mr. Boot",
    },
    {
      "https://example.com/name": "Sunny Sandals",
    }
  ]
}
The Path of Mr. Boot is:
https://example.com/john hasShoes 0 name
You can target an item in an array by using a number to indicate its position, starting with 0.
Notice how the Resource with the name: Mr. Boot does not have an explicit @id, but it does have a Path.
This means that we still have a unique, globally resolvable identifier - yay!
Try for yourself
Install the atomic-cli software and run atomic-cli get https://atomicdata.dev/classes/Class description.
Atomic Schema
Atomic Schema is the proposed standard for specifying classes, properties and datatypes in Atomic Data.
You can compare it to UML diagrams, or what XSD is for XML.
Atomic Schema deals with validating and constraining the shape of data.
It is designed for checking if all the required properties are present, and whether the values conform to the datatype requirements (e.g. datetime, or URL).
This section will define various Classes, Properties and Datatypes (discussed in Atomic Core: Concepts).
Design Goals
- Decentralized: Classes and Properties can be defined in external systems, and are resolved using web protocols such as HTTP.
- Typed: Every Atom of data has a clear datatype. Validated data should be highly predictable.
- IDE-friendly: Although Atomic Schema uses many URLs, users / developers should not have to type full URLs. The schema uses shortnames as aliases.
- Self-documenting: When seeing a piece of data, simply following links will explain you how the data model is to be understood. This removes the need for (most of) existing API documentation.
- Extensible: Anybody can create their own Datatypes, Properties and Classes.
- Accessible: Support for languages, easily translatable. Useful for humans and machines.
- Atomic: All the design goals of Atomic Data itself also apply here. Atomic Schema is defined using Atomic Data.
In short
In short, Atomic Schema works like this:
The Property field in an Atom, or the key in a JSON-AD object, links to a Property Resource. It is important that the URL to the Property Resource resolves, as others can re-use it and check its datatype. This Property does three things:
- it links to a Datatype which indicates which Value is acceptable.
- it has a description which tells you what the property means, what the relationship between the Subject and the Value means.
- it provides a Shortname, which is sometimes used as an alternative to the full URL of the Property.
DataTypes define the shape of the Value, e.g. a Number (124) or Boolean (true).
Classes are a special kind of Resource that describe an abstract class of things (such as "Person" or "Blog").
Classes can recommend or require a set of Properties.
They behave as Models, similar to struts in C or interfaces in Typescript.
A Resource could have one or more classes, which could provide information about which Properties are expected or required.
example:
{
  "@id": "https://atomicdata.dev/classes/Agent",
  "https://atomicdata.dev/properties/description": "An Agent is a user that can create or modify data. It has two keys: a private and a public one. The private key should be kept secret. The public key is used to verify signatures (on [Commits](https://atomicdata.dev/classes/Commit)) set by the of the Agent.",
  "https://atomicdata.dev/properties/isA": [
    "https://atomicdata.dev/classes/Class"
  ],
  "https://atomicdata.dev/properties/recommends": [
    "https://atomicdata.dev/properties/name",
    "https://atomicdata.dev/properties/description"
  ],
  "https://atomicdata.dev/properties/requires": [
    "https://atomicdata.dev/properties/publicKey"
  ],
  "https://atomicdata.dev/properties/shortname": "agent"
}
Atomic Schema: Classes
The following Classes are some of the most fundamental concepts in Atomic Data, as they make data validation possible.
Click the URLs of the classes to read the most actual data, and discover their properties!
Property
URL: https://atomicdata.dev/classes/Property
The Property class.
The thing that the Property field should link to.
A Property is an abstract type of Resource that describes the relation between a Subject and a Value.
A Property provides some semantic information about the relationship (in its description), it provides a shorthand (the shortname) and it links to a Datatype.
Properties of a Property instance:
shortname- (required, Slug) the shortname for the property, used in ORM-style dot syntax (thing.property.anotherproperty).description- (optional, AtomicURL, TranslationBox) the semantic meaning of the.datatype- (required, AtomicURL, Datatype) a URL to an Atomic Datatype, which defines what the datatype should be of the Value in an Atom where the Property is theclasstype- (optional, AtomicURL, Class) if thedatatypeis an Atomic URL, theclasstypedefines which class(es?) is (are?) acceptable.
{
  "@id": "https://atomicdata.dev/properties/description",
  "https://atomicdata.dev/properties/datatype": "https://atomicdata.dev/datatypes/markdown",
  "https://atomicdata.dev/properties/description": "A textual description of something. When making a description, make sure that the first few words tell the most important part. Give examples. Since the text supports markdown, you're free to use links and more.",
  "https://atomicdata.dev/properties/isA": [
    "https://atomicdata.dev/classes/Property"
  ],
  "https://atomicdata.dev/properties/shortname": "description"
}
Visit the Properties Collection for a list of example Properties.
Datatype
URL: https://atomicdata.dev/classes/Datatype
A Datatype specifies how a Value value should be interpreted.
Datatypes are concepts such as boolean, string, integer.
Since DataTypes can be linked to, you dan define your own.
However, using non-standard datatypes limits how many applications will know what to do with the data.
Properties:
description- (required, AtomicURL, TranslationBox) how the datatype functions.stringSerialization- (required, AtomicURL, TranslationBox) how the datatype should be parsed / serialized as an UTF-8 stringstringExample- (required, string) an examplestringSerializationthat should be parsed correctlybinarySerialization- (optional, AtomicURL, TranslationBox) how the datatype should be parsed / serialized as a byte array.binaryExample- (optional, string) an examplebinarySerializationthat should be parsed correctly. Should have the same contents as the stringExample. Required if binarySerialization is present on the DataType.
Visit the Datatype collection for a list of example Datatypes.
Class
URL: https://atomicdata.dev/classes/Class
A Class is an abstract type of Resource, such as Person.
It is convention to use an Uppercase in its URI.
Note that in Atomic Data, a Resource can have several Classes - not just a single one.
If you need to set more complex constraints to your Classes (e.g. maximum string length, Properties that depend on each other), check out SHACL.
Properties:
shortname- (required, Slug) a short string shorthand.description- (required, AtomicURL, TranslationBox) human readable explanation of what the Class represents.requires- (optional, ResourceArray, Property) a list of Properties that are required. If absent, none are required. These SHOULD have unique shortnames.recommends- (optional, ResourceArray, Property) a list of Properties that are recommended. These SHOULD have unique shortnames.
A resource indicates it is an instance of that class by adding a https://atomicdata.dev/properties/isA Atom.
Example:
{
  "@id": "https://atomicdata.dev/classes/Class",
  "https://atomicdata.dev/properties/description": "A Class describes an abstract concept, such as 'Person' or 'Blogpost'. It describes the data shape of data and explains what the thing represents. It is convention to use Uppercase in its URL. Note that in Atomic Data, a Resource can have several Classes - not just a single one.",
  "https://atomicdata.dev/properties/isA": [
    "https://atomicdata.dev/classes/Class"
  ],
  "https://atomicdata.dev/properties/recommends": [
    "https://atomicdata.dev/properties/recommends",
    "https://atomicdata.dev/properties/requires"
  ],
  "https://atomicdata.dev/properties/requires": [
    "https://atomicdata.dev/properties/shortname",
    "https://atomicdata.dev/properties/description"
  ],
  "https://atomicdata.dev/properties/shortname": "class"
}
Check out a list of example Classes.
Atomic Schema: Datatypes
The Atomic Datatypes consist of some of the most commonly used Datatypes.
Note: Please visit https://atomicdata.dev/datatypes for the latest list of official Datatypes.
Slug
URL: https://atomicdata.dev/datatypes/slug
A string with a limited set of allowed characters, used in IDE / Text editor context. Only letters, numbers and dashes are allowed.
Regex: ^[a-z0-9]+(?:-[a-z0-9]+)*$
Atomic URL
URL: https://atomicdata.dev/datatypes/atomicURL
A URL that should resolve to an Atomic Resource.
URI
URL: https://atomicdata.dev/datatypes/URI
A Uniform Resource Identifier, preferably a URL (i.e. an URI that can be fetched). Could be HTTP, HTTPS, or any other type of schema.
String
URL: https://atomicdata.dev/datatypes/string
UTF-8 String, no max character count.
Newlines use backslash escaped \n characters.
e.g. String time! \n Second line!
Markdown
URL: https://https://atomicdata.dev/datatypes/markdown
A markdown string, using the CommonMark syntax.
UTF-8 formatted, no max character count, newlines are \n.
e.g.
# Heading

Paragraph with [link](https://example.com).
Integer
URL: https://atomicdata.dev/datatypes/integer
Signed Integer, max 64 bit.
Max value: 9223372036854775807
e.g. -420
Float
URL: https://atomicdata.dev/datatypes/float
Number with a comma.
Max value: 9223372036854775807
e.g. -420
Boolean
URL: https://atomicdata.dev/datatypes/boolean
True or false, one or zero.
String serialization
true or false.
Binary serialization
Use a single bit one boolean.
1 for true, or 0 for false.
Date
ISO date without time.
YYYY-MM-DD.
e.g. 1991-01-20
Timestamp
URL: https://atomicdata.dev/datatypes/timestamp
Similar to Unix Timestamp. Milliseconds since midnight UTC 1970 Jan 01 (aka the Unix Epoch). Use this for most DateTime fields. Signed 64 bit integer (instead of 32 bit in Unix systems).
e.g. 1596798919 (= 07 Aug 2020 11:15:19)
ResourceArray
URL: https://atomicdata.dev/datatypes/resourceArray
Sequential, ordered list of Atomic URIs. Serialized as a JSON array with strings. Note that other types of arrays are not included in this spec, but can be perfectly valid.
- e.g.
["https://example.com/1", "https://example.com/1"]
Atomic Schema FAQ
How do I create a Property that supports multiple Datatypes?
A property only has one single Datatype. However, feel free to create a new kind of Datatype that, in turn, refers to other Datatypes. Perhaps Generics, or Option like types should be part of the Atomic Base Datatypes.
Do you have an enum datatype?
In Atomic Data, enum is not a datatype, but it's a constraint that can be added to properties that have.
You can set allows-only on a Property, and use that to limit which values are allowed.
How should a client deal with Shortname collisions?
Atomic Data guarantees Subject-Property uniqueness, which means that Valid Resources are guaranteed to have only one of each Property. Properties offer Shortnames, which are short strings. These strings should be unique inside Classes, but these are not guaranteed to be unique inside all Resources. Note that Resources can have multiple Classes, and through that, they can have colliding Shortnames. Resources are also free to include Properties from other Classes, and their Shortnames, too, might collide.
For example:
{
  "@id": "https://example.com/people/123",
  "https://example.com/name": "John",
  "https://another.example.com/someOtherName": "Martin"
}
Let's assume that https://example.com/name and https://another.example.com/someOtherName are Properties that have the Shortname: name.
What if a client tries something such as people123.name?
To consistently return a single value, we need some type of precedence:
- The earlier Class mentioned in the
isAProperty of the resource. Resources can have multiple classes, but they appear in an ordered ResourceArray. Classes, internally should have no key collisions in required and recommended properties, which means that they might have. If these exist internally, sort the properties by how they are ordered in theisAarray - first item is preferred. - When the Properties are not part of any of the mentioned Classes, use Alphabetical sorting of the Property URL.
When shortname collisions are possible, it's recommended to not use the shortname, but use the URL of the Property:
people123."https://example.com/name"
It is likely that using the URL for keys is also the most performant, since it probably more closely mimics the internal data model.
Atomic Data uses a lot of links. How do you deal with links that don't work?
Many features in Atomic Data apps depend on the availability of Resources on their subject URL. If that server is offline, or the URL has changed, the existing links will break. This is a fundamental problem to HTTP, and not unique to Atomic Data. Like with websites, hosts should make sure that their server stays available, and that URLs remain static.
One possible solution to this problem, is using Content Addressing, such as the IPFS protocol enables, which is why we're planning for using that in the near future.
Another approach, is using foreign keys (see issue).
How does Atomic Schema relate to RDF / SHACL / SheX / OWL / RDFS?
Atomic Schema is the schema language for Atomic Data, whereas RDF has a couple of competing ones, which all vary greatly. In short, OWL is not designed for schema validation, but SHACL and SheX can maybe be compared to Atomic Schema. An important difference is that SHACL and SheX have to deal with all the complexities of RDF, whereas Atomic Data is more constrained.
For more information, see RDF interoperability.
What are the risks of using Schema data hosted somewhere else?
Every time you use an external URL in your data, you kind of create a dependency. This is fundamental to linked data. In Atomic Data, not having access to the Property in some JSON-AD resource will lead to now knowing how to interpret the data itself. You will no longer know what the Datatype was (other than the native JSON datatype, of course), or what the semantic meaning was of the relationship.
There are multiple ways we can deal with this:
- Cache dependencies: Atomic Server already stores a copy of every class and property that it uses by default. The
/pathendpoint then allows clients to fetch these from servers that have cached it. If the source goes offline, the validations can still be performed by the server. However, it might be a good idea to migrate the data to a hosted ontology, e.g. by cloning the cached ontology. - Content-addressing: using non-HTTP identifiers, such as with IPFS.
How do I deal with subclasses / inheritance?
Atomic Data does not have a concept of inheritance.
However, you can use the isA property to link to multiple Classes from a single resource.
This effectively
Atomic Data Extended
Atomic Data is a modular specification, which means that you can choose to implement parts of it. All parts of Extended are optional to implement. The Core of the specification (described in the previous chapter) is required for all of the Extended spec to work, but not the other way around.
However, many of the parts of Extended do depend on eachother.
- Commits communicate state changes. These Commits are signed using cryptographic keys, which ensures that every change can be audited. Commits are also used to construct a history of versions.
- Agents are Users that enable authentication. They are Resources with their own Public and Private keys, which they use to identify themselves.
- Collections: querying, filtering, sorting and pagination.
- Paths: traverse graphs.
- Hierarchies used for authorization and keeping data organized. Similar to folder structures on file-systems.
- Invites: create new users and provide them with rights.
- WebSockets: real-time updates.
- Endpoints: provide machine-readable descriptions of web services.
- Files: upload, download and metadata for files.
Atomic Agents
Atomic Agents are used for authentication: to set an identity and prove who an actor actually is. Agents can represent both actual individuals, or machines that interact with data. Agents are the entities that can get write / read rights. Agents are used to sign Requests and Commits and to accept Invites.
Design goals
- Decentralized: Atomic Agents can be created by anyone, at any domain
- Easy: It should be easy to work with, code with, and use
- Privacy-friendly: Agents should allow for privacy friendly workflows
- Verifiable: Others should be able to verify who did what
- Secure: Resistant to attacks by malicious others
The Agent model
url: https://atomicdata.dev/classes/Agent
An Agent is a Resource with its own URL.
When it is created, the one creating the Agent will generate a cryptographic (Ed25519) keypair.
It is required to include the publicKey in the Agent resource.
The privateKey should be kept secret, and should be safely stored by the creator.
For convenience, a secret can be generated, which is a single long string of characters that encodes both the privateKey and the subject of the Agent.
This secret can be used to instantly, easily log in using a single string.
The publicKey is used to verify commit signatures by that Agent, to check if that Agent actually did create and sign that Commit.
Creating an Agent
Since an Agent is used for verification of commits, the Agent's subject should resolve and be publicly available.
This means that the one creating the Agent has to deal with this.
One way of doing this, is by hosting an Atomic Server.
An easier way of doing this, is by accepting an Invite that exists on someone else's server.
Hierarchy, rights and authorization
Hierarchies help make information easier to find and understand. For example, most websites use breadcrumbs to show you where you are. Your computer probably has a bunch of drives and deeply nested folders that contain files. We generally use these hierarchical elements to keep data organized, and to keep a tighter grip on rights management. For example, sharing a specific folder with a team, but a different folder could be private.
Although you are free to use Atomic Data with your own custom authorization system, we have a standardized model that is currently being used by Atomic-Server.
Design goals
- Fast. Authorization can sometimes be costly, but in this model we'll be considering performance.
- Simple. Easy to understand, easy to implement.
- Handles most basic use-cases. Should deal with basic read / write access control, calculating the size of a folder, rendering things in a tree.
Atomic Hierarchy Model
- Every Resource SHOULD have a
parent. There are some exceptions to this, which are discussed below. - Any Resource can be a
parentof some other Resource, as long as both Resources exists on the same Atomic Server. - Grants / rights given in a
parentalso apply to all children, and their children. - There are few Classes that do not require
parents:
Authorization
- Any Resource might have
readandwriteAtoms. These both contain a list of Agents. These Agents will be granted the rights to edit (using Commits) or read / use the Resources. - Rights are additive, which means that the rights add up. If a Resource itself has no
writeAtom containing your Agent, but it'sparentdoes have one, you will still get thewriteright. - Rights cannot be removed by children or parents - they can only be added.
Commitscan not be edited. They can bereadif the Agent has rights to read thesubjectof theCommit.
Top-level resources
Some resources are special, as they do not require a parent:
Drives are top-level items in the hierarchy: they do not have aparent.Agents are top-level items because they are notownedby anything. They can alwaysreadandwritethemselves.Commits are immutable, so they should never be edited by anyone. That's why they don't have a place in the hierarchy. Theirreadrights are determined by their subject.
Authentication
Authentication is about proving who you are, which is often the first step for authorization. See authentication.
Current limitations of the Authorization model
The specification is growing (and please contribute in the docs repo), but the current specification lacks some features:
- Rights can only be added, but not removed in the hierarchy. This means that you cannot have a secret folder inside a public folder.
- No model for representing groups of Agents, or other runtime checks for authorization. (issue)
- No way to limit delete access or invite rights separately from write rights (issue)
- No way to request a set of rights for a Resource
Authentication in Atomic Data
Authentication means knowing who is doing something, either getting access or creating some new data. When an Agent wants to edit a resource, they have to send a signed Commit, and the signatures are checked in order to authorize a Commit.
But how do we deal with reading data, how do we know who is trying to get access? There are two ways users can authenticate themselves:
- Signing an
Authentication Resourceand using that as a cookie - Opening a WebSocket, and passing an
Authentication Resource. - Signing every single HTTP request (more secure, less flexible)
Design goals
- Secure: Because, what's the point of authentication if it's not?
- Easy to use: Setting up an identity should not require any effort, and proving identity should be minimal effort.
- Anonimity allowed: Users should be able to have multiple identities, some of which are fully anonymous.
- Self-sovereign: No dependency on servers that user's don't control. Or at least, minimise this.
- Dummy-proof: We need a mechanism for dealing with forgetting passwords / client devices losing data.
- Compatible with Commits: Atomic Commits require clients to sign things. Ideally, this functionality / strategy would also fit with the new model.
- Fast: Of course, authentication will always slow things down. But let's keep that to a minimum.
Authentication Resources
An Authentication Resource is a JSON-AD object containing all the information a Server needs to make sure a valid Agent requests a session at some point in time. These are used both in Cookie-based auth, as well as in WebSockets
We use the following fields (be sure to use the full URLs in the resource, see the example below):
requestedSubject: The URL of the requested resource.- If we're authenticating a WebSocket, we use the
wssaddress as therequestedSubject. (e.g.wss://example.com/ws) - If we're authenticating a Cookie of Bearer token, we use the origin of the server (e.g.
https://example.com) - If we're authentication a single HTTP request, use the same URL as the
GETaddress (e.g.https://example.com/myResource)
- If we're authenticating a WebSocket, we use the
agent: The URL of the Agent requesting the subject and signing this Authentication Resource.publicKey: base64 serialized ED25519 public key of the agent.signature: base64 serialized ED25519 signature of the following string:{requestedSubject} {timestamp}(without the brackets), signed by the private key of the Agent.timestamp: Unix timestamp of when the Authentication was signedvalidUntil(optional): Unix timestamp of when the Authentication should be no longer valid. If not provided, the server will default to 30 seconds from thetimestamp.
Here's what a JSON-AD Authentication Resource looks like for a WebSocket:
{
  "https://atomicdata.dev/properties/auth/agent": "http://example.com/agents/N32zQnZHoj1LbTaWI5CkA4eT2AaJNBPhWcNriBgy6CE=",
  "https://atomicdata.dev/properties/auth/requestedSubject": "wss://example.com/ws",
  "https://atomicdata.dev/properties/auth/publicKey": "N32zQnZHoj1LbTaWI5CkA4eT2AaJNBPhWcNriBgy6CE=",
  "https://atomicdata.dev/properties/auth/timestamp": 1661757470002,
  "https://atomicdata.dev/properties/auth/signature": "19Ce38zFu0E37kXWn8xGEAaeRyeP6EK0S2bt03s36gRrWxLiBbuyxX3LU9qg68pvZTzY3/P3Pgxr6VrOEvYAAQ=="
}
Atomic Cookies Authentication
In this approach, the client creates and signs a Resource that proves that an Agent wants to access a certain server for some amount of time. This Authentication Resource is stored as a cookie, and passed along in every HTTP request to the server.
Setting the cookie
- Create a signed Authentication object, as described above.
- Serialize it as JSON-AD, then as a base64 string.
- Store it in a Cookie:
- Name the cookie
atomic_session - The expiration date of the cookie should be set, and should match the expiration date of the Authentication Resource.
- Set the
Secureattribute to prevent Man-in-the-middle attacks over HTTP
- Name the cookie
Bearer Token Authentication
Similar to creating the Cookie, except that we pass the base64 serialized Authentication Resource as a Bearer token in the Authorization header.
GET /myResource HTTP/1.1
Authorization: Bearer {base64 serialized Authentication Resource}
In Data Browser, you can find the token tab in /app/token to create a token.
Authenticating Websockets
After opening a WebSocket connection, create an Authentication Resource.
Send a message like so: AUTHENTICATE {authenticationResource}.
The server will only respond if there is something wrong.
Per-Request Signing
Atomic Data allows signing every HTTP request. This method is most secure, since a MITM attack would only give access to the specific resource requested, and only for a short amount of time. Note that signing every single request takes a bit of time. We picked a fast algorithm (Ed25519) to minimize this cost.
HTTP Headers
All of the following headers are required, if you need authentication.
x-atomic-public-key: The base64 public key (Ed25519) of the Agent sending the requestx-atomic-signature: A base64 signature of the following string:{subject} {timestamp}x-atomic-timestamp: The current time (when sending the request) as milliseconds since unix epochx-atomic-agent: The subject URL of the Agent sending the request.
Sending a request
Here's an example (js) client side implementation with comments:
// The Private Key of the agent is used for signing
// https://atomicdata.dev/properties/privateKey
const privateKey = "someBase64Key";
const timestamp = Math.round(new Date().getTime());;
// This is what you will need to sign.
// The timestmap is to limit the harm of a man-in-the-middle attack.
// The `subject` is the full HTTP url that is to be fetched.
const message = `${subject} ${timestamp}`;
// Sign using Ed25519, see example implementation here: https://github.com/atomicdata-dev/atomic-data-browser/blob/30b2f8af59d25084de966301cb6bd1ed90c0eb78/lib/src/commit.ts#L176
const signed = await signToBase64(message, privateKey);
// Set all of these headers
const headers = new Headers;
headers.set('x-atomic-public-key', await agent.getPublicKey());
headers.set('x-atomic-signature', signed);
headers.set('x-atomic-timestamp', timestamp.toString());
headers.set('x-atomic-agent', agent?.subject);
const response = await fetch(subject, {headers});
Verifying an Authentication
- If none of the
x-atomicHTTP headers are present, the server assigns the PublicAgent to the request. This Agent represents any guest who is not signed in. - If some (but not all) of the
x-atomicheaders are present, the server will return with a500. - The server must check if the
validUntilhas not yet passed. - The server must check whether the public key matches the one from the Agent.
- The server must check if the signature is valid.
- The server should check if the request resource can be accessed by the Agent using hierarchy (e.g. check
readright in the resource or its parents).
Hierarchies for authorization
Atomic Data uses Hierarchies to describe who gets to access some resource, and who can edit it.
Limitations / considerations
- Since we need the Private Key to sign Commits and requests, the client should have this available. This means the client software as well as the user should deal with key management, and that can be a security risk in some contexts (such as a web browser). See issue #49.
- When using the Agent's subject to authenticate somewehere, the authorizer must be able to check what the public key of the agent is. This means the agent must be publicly resolvable. This is one of the reasons we should work towards a server-independent identifier, probably as base64 string that contains the public key (and, optionally, also the https identifier). See issue #59 on DIDs.
- We'll probably also introduce some form of token-based-authentication created server side in the future. See #87
Invitations & Tokens
At some point on working on something in a web application, you're pretty likely to share that, often not with the entire world. In order to make this process of inviting others as simple as possible, we've come up with an Invitation standard.
Design goals
- Edit without registration. Be able to edit or view things without being required to complete a registration process.
- Share with a single URL. A single URL should contain all the information needed.
- (Un)limited URL usage. A URL might be re-usable, or maybe not.
Flow
- The Owner or a resource creates an Invite. This Invite points to a
targetResource, providesreadrights by default but can additionally addwriterights, contains a bunch ofusagesLeft. - The Guest opens the Invite URL. This returns the Invite resource, which provides the client with the information needed to do the next request which adds the actual rights.
- The browser client app might generate a set of keys, or use an existing one. It sends the Agent URL to the Invite in a query param.
- The server will respond with a Redirect resource, which links to the newly granted
targetresource. - The Guest will now be able to access the Resource.
Try it on https://atomicdata.dev/invites/1
Limitations and gotcha's
- The one creating the Invite has to take security in consideration. Some URLs can be easily guessed! When implementing Invitations, make sure to use a good amount of randomness when creating the Subject.
- Make sure that the invite is not publicly discoverable (e.g. through a Collection), this can happen if you set the
parentof the invite to a public resource.
Atomic Commits
Disclaimer: Work in progress, prone to change.
Atomic Commits is a specification for communicating state changes (events / transactions / patches / deltas / mutations) of Atomic Data. It is the part of Atomic Data that is concerned with writing, editing, removing and updating information.
Design goals
- Event sourced: Store and standardize changes, as well as the current state. This enables versioning, history playback, undo, audit logs, and more.
- Traceable origin: Every change should be traceable to an actor and a point in time.
- Verifiable: Have cryptographic proof for every change. Know when, and what was changed by whom.
- Identifiable: A single commit has an identifier - it is a resource.
- Decentralized: Commits can be shared in P2P networks from device to device, whilst maintaining verifiability.
- Extensible: The methods inside a commit are not fixed. Use-case specific methods can be added by anyone.
- Streamable: The commits could be used in streaming context.
- Familiar: Introduces as little new stuff as possible (no new formats or language to learn)
- Pub/Sub: Subscribe to changes and get notified on changes.
- ACID-compliant: An Atomic commit will only occur if it results in a valid state.
- Atomic: All the Atomic Data design goals also apply here.
Motivation
Although it's a good idea to keep data at the source as much as possible, we'll often need to synchronize two systems. For example when data has to be queried or indexed differently than its source can support. Doing this synchronization can be very difficult, since most of our software is designed to only maintain and share the current state of a system.
I noticed this mainly when working on OpenBesluitvorming.nl - an open data project where we aimed to fetch and standardize meeting data (votes, meeting minutes, documents) from 150+ local governments in the Netherlands. We wrote software that fetched data from various systems (who all had different models, serialization formats and APIs), transformed this data to a single standard and share it through an API and a fulltext search endpoint. One of the hard parts was keeping our data in sync with the sources. How could we now if something was changed upstream? We queried all these systems every night for all meetings from the next and previous month, and made deep comparisons to our own data.
This approach has a couple of issues:
- It costs a lot of resources, both for us and for the data suppliers.
- It's not real-time - we can only run this once every 24 ours (because of how costly it is).
- It's very prone to errors. We've had issues during all phases of Extraction, Transformation and Loading (ETL) processing.
- It causes privacy issues. When some data at the source is removed (because it contained faulty or privacy sensitive data), how do we learn about that?
Persisting and sharing state changes could solve these issues. In order for this to work, we need to standardize this for all data suppliers. We need a specification that is easy to understand for most developers.
Keeping track of where data comes from is essential to knowing whether you can trust it - whether you consider it to be true. When you want to persist data, that quickly becomes bothersome. Atomic Data and Atomic Commits aim to make this easier by using cryptography for ensuring data comes from some particular source, and is therefore trustworthy.
If you want to know how Atomic Commits differ from other specs, see the compare section
Atomic Commits: Concepts
Commit
url: https://atomicdata.dev/classes/Commit
A Commit is a Resource that describes how a Resource must be updated. It can be used for auditing, versioning and feeds. It is cryptographically signed by an Agent.
The required fields are:
subject- The thing being changed. A Resource Subject URL (HTTP identifier) that the Commit is changing about. A Commit Subject must not contain query parameters, as these are reserved for dynamic resources.signer- Who's making the change. The Atomic URL of the Author's profile - which in turn must contain apublicKey.signature- Cryptographic proof of the change. A hash of the JSON-AD serialized Commit (without thesignaturefield), signed by the Agent'sprivate-key. This proves that the author is indeed the one who created this exact commit. The signature of the Commit is also used as the identifier of the commit.created-at- When the change was made. A UNIX timestamp number of when the commit was created.
The optional method fields describe how the data must be changed:
destroy- If true, the existing Resource will be removed.remove- an array of Properties that need to be removed (including their values).set- a Nested Resource which contains all the new or edited fields.push- a Nested Resource which contains all the fields that are appended to. This means adding items to a new or existing ResourceArray.
These commands are executed in the order above.
This means that you can set destroy to true and include set, which empties the existing resource and sets new values.
Posting commits using HTTP
Since Commits contains cryptographic proof of authorship, they can be accepted at a public endpoint. There is no need for authentication.
A commit should be sent (using an HTTPS POST request) to a /commmit endpoint of an Atomic Server.
The server then checks the signature and the author rights, and responds with a 2xx status code if it succeeded, or an 5xx error if something went wrong.
The error will be a JSON object.
Serialization with JSON-AD
Let's look at an example Commit:
{
  "@id": "https://atomicdata.dev/commits/3n+U/3OvymF86Ha6S9MQZtRVIQAAL0rv9ZQpjViht4emjnqKxj4wByiO9RhfL+qwoxTg0FMwKQsNg6d0QU7pAw==",
  "https://atomicdata.dev/properties/createdAt": 1611489929370,
  "https://atomicdata.dev/properties/isA": [
    "https://atomicdata.dev/classes/Commit"
  ],
  "https://atomicdata.dev/properties/set": {
    "https://atomicdata.dev/properties/shortname": "1611489928"
  },
  "https://atomicdata.dev/properties/signature": "3n+U/3OvymF86Ha6S9MQZtRVIQAAL0rv9ZQpjViht4emjnqKxj4wByiO9RhfL+qwoxTg0FMwKQsNg6d0QU7pAw==",
  "https://atomicdata.dev/properties/signer": "https://surfy.ddns.net/agents/9YCs7htDdF4yBAiA4HuHgjsafg+xZIrtZNELz4msCmc=",
  "https://atomicdata.dev/properties/previousCommit": "https://surfy.ddns.net/commits/9YCs7htDdF4yBAiA4HuHgjsafg+xZIrtZNELz4msCmc=",
  "https://atomicdata.dev/properties/subject": "https://atomicdata.dev/test"
}
This Commit can be sent to any Atomic Server. This server, in turn, should verify the signature and the author's rights before the server applies the Commit.
Calculating the signature
The signature is a base64 encoded Ed25519 signature of the deterministically serialized Commit. Calculating the signature is a delicate process that should be followed to the letter - even a single character in the wrong place will result in an incorrect signature, which makes the Commit invalid.
The first step is serializing the commit deterministically. This means that the process will always end in the exact same string.
- Serialize the Commit as JSON-AD.
- Do not serialize the signature field.
- Do not include empty objects or arrays.
- If
destroyis false, do not include it. - All keys are sorted alphabetically - both in the root object, as in any nested objects.
- The JSON-AD is minified: no newlines, no spaces.
This will result in a string. The next step is to sign this string using the Ed25519 private key from the Author. This signature is a byte array, which should be encoded in base64 for serialization. Make sure that the Author's URL resolves to a Resource that contains the linked public key.
Congratulations, you've just created a valid Commit!
Here are currently working implementations of this process, including serialization and signing (links are permalinks).
If you want validate your implementation, check out the tests for these two projects.
Applying the Commit
If you're on the receiving end of a Commit (e.g. if you're writing a server or a client who has to parse Commits), you will apply the Commit to your Store. If you have to persist the Commit, you must perform all of the checks. If you're writing a client, and you trust the source of the Commit, you can probably skip the validation steps.
Here's how you apply a Commit:
- Check if the Subject URL is valid
- Validate the signature. This means serialize the Commit deterministically (see above), check the Agent's publickey (you might need to fetch this one), verify if the signature matches.
- Check if the timestamp matches is OK. I think an acceptable window is 10 seconds.
- If the Commit is for an existing resource, get it.
- Validate the Rights of the one making the Commit.
- Check if the
previousCommitof the Commit matches with thepreviousCommitof the Resource. - Iterate over the
setfields. Overwrite existing, or add the new Values. Make sure the Datatypes match with the respective Properties. - Iterate over the
removefields. Remove existing properties. - If the Resource has one or more classes, check if the required Properties are there.
- You might want to perform some custom validations now (e.g. if you accept an Invite, you should make sure that the one creating the Invite has the correct rights to actually make it!)
- Store the created Commit as a Resource, and store the modified Resource!
Limitations
- Commits adjust only one Resource at a time, which means that you cannot change multiple in one commit. (issue)
- The one creating the Commit will need to sign it, which may make clients that write data more complicated than you'd like. You can also let Servers write Commits, but this makes them less verifiable / decentralized.
- Commits require signatures, which means key management. Doing this securely is no trivial matter.
- The signatures require JSON-AD serialization
- If your implementation persists all Commits, you might need to store a lot of data.
Atomic Commits compared to other (RDF) delta models
Let's compare the Atomic Commit approach with some existing protocols for communicating state changes / patches / mutations / deltas in linked data, JSON and text files. First, I'll briefly discuss the existing examples (open a PR / issue if we're missing something!). After that, we'll discuss how Atomic Data differs from the existing ones.
Git
This might be an odd one in this list, but it is an interesting one nonetheless.
Git is an incredibly popular version control system that is used by most software developers to manage their code.
It's a decentralized concept which allows multiple computers to share a log of commits, which together represent a folder with its files and its history.
It uses hashing to represent (parts of) data (which keeps the .git folder compact through deduplication), and uses cryptographic keys to sign commits and verify authorship.
It is designed to work in the paradigm of text files, newlines and folders.
Since most data can be represented as text files in a folder, Git is very flexible.
This is partly because people are familiar with Git, but also because it has a great ecosystem - platforms such as Github provide a clean UI, cloud storage, issue tracking, authorization, authentication and more for free, as long as you use Git to manage your versions.
However, Git doesn't work great for structured data - especially when it changes a lot. Git, on its own, does not perform any validations on integrity of data. Git also does not adhere to some standardized serialization format for storing commits, which makes sense, because it was designed as a tool to solve a problem, and not as some standard that is to be used in various other systems. Also, git is kind of a heavyweight abstraction for many applications. It is designed for collaborating on open source projects, which means dealing with decentralized data storage and merge conflicts - things that might not be required in other kinds of scenarios.
RDF mutation systems
Let's move on to specifications that mutate RDF specifically:
.n3 Patch
N3 Patch is part of the Solid spec, since december 2021.
It uses the N3 serialization format to describe changes to RDF documents.
@prefix solid: <http://www.w3.org/ns/solid/terms#>

<> solid:patches <https://tim.localhost:7777/read-write.ttl>;
   solid:where   { ?a <y> <z>. };
   solid:inserts { ?a <y> <z>. };
   solid:deletes { ?a <b> <c>. }.
RDF-Delta
https://afs.github.io/rdf-delta/
Describes changes (RDF Patches) in a specialized turtle-like serialization format.
TX .
PA "rdf" "http://www.w3.org/1999/02/22-rdf-syntax-ns#" .
PA "owl" "http://www.w3.org/2002/07/owl#" .
PA "rdfs" "http://www.w3.org/2000/01/rdf-schema#" .
A <http://example/SubClass> <http://www.w3.org/1999/02/22-rdf-syntax-ns#type> <http://www.w3.org/2002/07/owl#Class> .
A <http://example/SubClass> <http://www.w3.org/2000/01/rdf-schema#subClassOf> <http://example/SUPER_CLASS> .
A <http://example/SubClass> <http://www.w3.org/2000/01/rdf-schema#label> "SubClass" .
TC .
Similar to Atomic Commits, these Delta's should have identifiers (URLs), which are denoted in a header.
Delta-LD
http://www.tara.tcd.ie/handle/2262/91407
Spec for classifying and representing state changes between two RDF resources. I wasn't able to find a serialization or an implementation for this.
PatchR
https://www.igi-global.com/article/patchr/135561
An ontology for RDF change requests. Looks very interesting, but I'm not able to find any implementations.
prefix :      <http://example.org/> .
@prefix rdf:  <http://www.w3.org/1999/02/22-rdf-syntax-ns#> .
@prefix rdfs: <http://www.w3.org/2000/01/rdf-schema#> .
@prefix pat:  <http://purl.org/hpi/patchr#> .
@prefix guo:  <http://webr3.org/owl/guo#> .
@prefix prov: <http://purl.org/net/provenance/ns#> .
@prefix xsd:  <http://www.w3.org/2001/XMLSchema#> .
@prefix dbp:  <http://dbpedia.org/resource/> .
@prefix dbo:  <http://dbpedia.org/ontology/> .

:Patch_15 a pat:Patch ;
  pat:appliesTo <http://dbpedia.org/void.ttl#DBpedia_3.5> ;
  pat:status pat:Open ;
  pat:update [
    a guo:UpdateInstruction ;
    guo:target_graph <http://dbpedia.org/> ;
    guo:target_subject dbp:Oregon ;
    guo:delete [dbo:language dbp:De_jure ] ;
    guo:insert [dbo:language dbp:English_language ]
  ] ;
  prov:wasGeneratedBy [a prov:Activity ;
  pat:confidence "0.5"^^xsd:decimal ;
  prov:wasAssociatedWith :WhoKnows ;
  prov:actedOnBehalfOf :WhoKnows#Player_25 ;
  prov:performedAt "..."^^xsd:dateTime ] .
LD-Patch
https://www.w3.org/TR/ldpatch/
This offers quite a few features besides adding and deleting triples, such as updating lists. It's a unique serialization format, inspired by turtle. Some implementations exists, such as one in ruby which is
PATCH /timbl HTTP/1.1
Host: example.org
Content-Length: 478
Content-Type: text/ldpatch
If-Match: "abc123"

@prefix rdf: <http://www.w3.org/1999/02/22-rdf-syntax-ns#> .
@prefix schema: <http://schema.org/> .
@prefix profile: <http://ogp.me/ns/profile#> .
@prefix ex: <http://example.org/vocab#> .

Delete { <#> profile:first_name "Tim" } .
Add {
  <#> profile:first_name "Timothy" ;
    profile:image <https://example.org/timbl.jpg> .
} .

Bind ?workLocation <#> / schema:workLocation .
Cut ?workLocation .

UpdateList <#> ex:preferredLanguages 1..2 ( "fr-CH" ) .

Bind ?event <#> / schema:performerIn [ / schema:url = <https://www.w3.org/2012/ldp/wiki/F2F5> ]  .
Add { ?event rdf:type schema:Event } .

Bind ?ted <http://conferences.ted.com/TED2009/> / ^schema:url ! .
Delete { ?ted schema:startDate "2009-02-04" } .
Add {
  ?ted schema:location [
    schema:name "Long Beach, California" ;
    schema:geo [
      schema:latitude "33.7817" ;
      schema:longitude "-118.2054"
    ]
  ]
} .
Linked-Delta
https://github.com/ontola/linked-delta
An N-Quads serialized delta format. Methods are URLs, which means they are extensible. Does not specify how to bundle lines. Used in production of a web app that we're working on (Argu.co). Designed with simplicity (no new serialization format, simple to parse) and performance in mind by my colleague Thom van Kalkeren.
Initial state:

<http://example.org/resource> <http://example.org/predicate> "Old value 🙈" .

Linked-Delta:

<http://example.org/resource> <http://example.org/predicate> "New value 🐵" <http://purl.org/linked-delta/replace> .

New state:

<http://example.org/resource> <http://example.org/predicate> "New value 🐵" .
JSON-LD-PATCH
https://github.com/digibib/ls.ext/wiki/JSON-LD-PATCH
A JSON denoted patch notation for RDF. Seems similar to the RDF/JSON serialization format. Uses string literals as operators / methods. Conceptually perhaps most similar to linked-delta.
Has a JS implementation.
[
  {
    "op": "add",
    "s": "http://example.org/my/resource",
    "p": "http://example.org/ontology#title",
    "o": {
      "value": "New Title",
      "type": "http://www.w3.org/2001/XMLSchema#string"
    }
  }
]
SPARQL UPDATE
https://www.w3.org/TR/sparql11-update/
SPARQL queries that change data.
PREFIX dc: <http://purl.org/dc/elements/1.1/>
INSERT DATA
{
  <http://example/book1> dc:title "A new book" ;
                         dc:creator "A.N.Other" .
}
Allows for very powerful queries, combined with updates.
E.g. rename all persons named Bill to William:
PREFIX foaf:  <http://xmlns.com/foaf/0.1/>

WITH <http://example/addresses>
DELETE { ?person foaf:givenName 'Bill' }
INSERT { ?person foaf:givenName 'William' }
WHERE
  { ?person foaf:givenName 'Bill'
  }
SPARQL Update is the most powerful of the formats, but also perhaps the most difficult to implement and understand.
JSON-PATCH
A simple way to edit JSON objects:
The original document

{
  "baz": "qux",
  "foo": "bar"
}

The patch

[
  { "op": "replace", "path": "/baz", "value": "boo" },
  { "op": "add", "path": "/hello", "value": ["world"] },
  { "op": "remove", "path": "/foo" }
]

The result

{
  "baz": "boo",
  "hello": ["world"]
}
It uses the JSON-Pointer spec for denoting paths.
It has quite a bunch of implementations, in various languages.
Atomic Commits - how it's different and why it exists
Let's talk about the differences between the concepts above and Atomic Commits.
For starters, Atomic Commits can only work with a specific subset of RDF, namely Atomic Data. RDF allows for blank nodes, does not have subject-predicate uniqueness and offers named graphs - which all make it hard to unambiguously select a single value. Most of the alternative patch / delta models described above had to support these concepts. Atomic Data is more strict and constrained than RDF. It does not support named graphs and blank nodes. This enables a simpler approach to describing state changes, but it also means that Atomic Commits will not work with most existing RDF data.
Secondly, individual Atomic Commits are tightly coupled to specific Resources. A single Commit cannot change multiple resources - and most of the models discussed above to enable this. This is a big constraint, and it does not allow for things like compact migrations in a database. However, this resource-bound constraint opens up some interesting possibilities:
- it becomes easier to combine it with authorization (i.e. check if the person has the correct rights to edit some resource): simply check if the Author has the rights to edit the Subject.
- it makes it easier to find all Commits for a Resource, which is useful when constructing a history / audit log / previous version.
Thirdly, Atomic Commits don't introduce a new serialization format. It's just JSON. This means that it will feel familiar for most developers, and will be supported by many existing environments.
Finally, Atomic Commits use cryptography (hashing) to determine authenticity of commits. This concept is borrowed from git commits, which also uses signatures to prove authorship. As is the case with git, this also allows for verifiable P2P sharing of changes.
WebSockets in Atomic Data
WebSockets are a very fast and efficient way to have a client and server communicate in an asynchronous fashion.
They are used in Atomic Data to allow real-time updates, which makes it possible to create things like collaborative applications and multiplayer games.
These have been implemented in atomic-server and atomic-data-browser (powered by @tomic/lib).
Initializing a WebSocket connection
Send an HTTP GET request to the /ws endpoint of an atomic-server. The Server should update that request to a secure WebSocket (wss) connection.
Use x-atomic authentication headers (read more here) and use ws as a subject when signing.
The WebSocket-Protocol is AtomicData.
Client to server messages
SUBSCRIBE ${subject}tells the Server that you'd like to receive Commits about this Subject.UNSUBSCRIBE ${subject}tells the Server that you'd like to stop receiving Commits about this Subject.GET ${subject}fetch an individual resource.AUTHENTICATE ${authenticationResource}to set a user session for this websocket and allow authorized messages. TheauthenticationResourceis a JSON-AD resource containing the signature and more, see Authentication.
Server to client messages
COMMIT ${CommitBody}an entire Commit for a resource that you're subscribed to.RESOURCE ${Resource}a JSON-AD Resource as a response to aGETmessage. If there is something wrong with this request (e.g. 404), return aErrorResource with the requested subject, similar to how the HTTP protocol server does this.`ERROR ${ErrorBody}an Error resource is sent whenever something goes wrong. TheErrorBodyis a plaintext, typically English description of what went wrong.
Considerations
- For many messages, there is no response to give if things are processed correctly. If a message is unknown or there is a different problem, return an
ERROR.
Example implementations
- Example client implementation in Typescript (@tomic/lib).
- Example server implementation in Rust using Actix-Web
Atomic Endpoints
URL: https://atomicdata.dev/classes/Endpoint
An Endpoint is a resource that accepts parameters in order to generate a response. You can think of it like a function in a programming language, or a API endpoint in an OpenAPI spec. It can be used to perform calculations on the server side, such as filtering data, sorting data, selecting a page in a collection, or performing some calculation. Because Endpoints are resources, they can be defined and read programmatically. This means that it's possible to render Endpoints as forms.
The most important property in an Endpoint is parameters, which is the list of Properties that can be filled in.
You can find a list of Endpoints supported by Atomic-Server on atomicdata.dev/endpoints.
Endpoint Resources are dynamic, because their properties could be calculated server-side.
When a Property tends to be calculated server-side, they will have a isDynamic property set to true, which tells the client that it's probably useless to try to overwrite it.
Incomplete resources
A Server can also send one or more partial Resources for an Endpoint to the client, which means that some properties may be missing.
When this is the case, the Resource will have an incomplete property set to true.
This tells the client that it has to individually fetch the resource from the server to get the full body.
One scenario where this happens, is when fetching Collections that have other Collections as members. If we would not have incomplete resources, the server would have to perform expensive computations even if the data is not needed by the client.
Design Goals
- Familiar API: should look like something that most developers already know
- Auto-generate forms: a front-end app should present Endpoints as forms that non-developers can interact with
Atomic Collections
URL: https://atomicdata.dev/classes/Collection
Sooner or later, developers will have to deal with (long) lists of items. For example, a set of blog posts, activities or users. These lists often need to be paginated, sorted, and filtered. For dealing with these problems, we have Atomic Collections.
An Atomic Collection is a Resource that links to a set of resources.
Note that Collections are designed to be dynamic resources, often (partially) generated at runtime.
Collections are Endpoints, which means that part of their properties are calculated server-side.
Collections have various filters (subject, property, value) that can help to build a useful query.
members: How many items (members) are visible per page.property: Filter results by a property URL.value: Filter results by a Value. Combined withproperty, you can create powerful queries.sort_by: A property URL by which to sort. Defaults to thesubject.sort_desc: Sort descending, instead of ascending. Defaults tofalse.current_page: The number of the current page.page_size: How many items (members) are visible per page.total_pages: How many pages there are for the current collection.total_members: How many items (members) are visible per page.
Persisting Properties vs Query Parameters
Since Atomic Collections are dynamic resources, you can pass query parameters to it. The keys of the query params match the shortnames of the properties of the Collection.
For example, let's take the Properties Collection on atomicdata.dev.
We could limit the page size to 2 by adding the page_size=2 query parameter: https://atomicdata.dev/collections/property?page_size=2.
Or we could sort the list by the description property: https://atomicdata.dev/collections/property?sort_by=https%3A%2F%2Fatomicdata.dev%2Fproperties%2Fdescription.
Note that URLs need to be URL encoded.
These properties of Collections can either be set by passing query parameters, or they can be persisted by the Collection creator / editor.
Uploading, downloading and describing files with Atomic Data
The Atomic Data model (Atomic Schema) is great for describing structured data, but for many types of existing data, we already have a different way to represent them: files. In Atomic Data, files have two URLs. One describes the file and its metadata, and the other is a URL that downloads the file. This allows us to present a better view when a user wants to take a look at some file, and learn about its context before downloading it.
The File class
url: https://atomicdata.dev/classes/File
Files always have a downloadURL.
They often also have a filename, a filesize, a checksum, a mimetype, and an internal ID (more on that later).
They also often have a parent, which can be used to set permissions / rights.
If the file is an image they will also get an imageWidth and imageHeight property.
Uploading a file
In atomic-server, a /upload endpoint exists for uploading a file.
- Decide where you want to add the file in the hierarchy of your server. You can add a file to any resource - your file will refer to this resource as its
parent. Make sure you havewriterights on this parent. - Use that parent to add a query parameter to the server's
/uploadendpoint, e.g./upload?parent=https%3A%2F%2Fatomicdata.dev%2Ffiles. - Send an HTTP
POSTrequest to the server's/uploadendpoint containingmulti-part-form-data. You can upload multiple files in one request. Add authentication headers, and sign the HTTP request with the - The server will check your authentication headers, your permissions, and will persist your uploaded file(s). It will now create File resources.
- The server will reply with an array of created Atomic Data Files
Downloading a file
Simply send an HTTP GET request to the File's download-url (make sure to authenticate this request).
Image compression
AtomicServer can automatically generate compressed versions of images in modern image formats (WebP, AVIF). To do this add one or more of the following query parameters to the download URL:
| Query parameter | Description |
|---|---|
| f | The format of the image. Can be webp or avif. |
| q | The quality used to encode the image. Can be a number between 0 and 100. (Only works when f is set to webp or avif). Default is 75 |
| w | The width of the image. Height will be scaled based on the width to keep the right aspect-ratio |
Example: https://atomicdata.dev/download/files/1668879942069-funny-meme.jpg?f=avif&q=60&w=500
Discussion
- Discussion on specification
- Discussion on Rust server implementation
- Discussion on Typescript client implementation
Interoperability: Relation to other technology
Atomic data is designed to be easy to use in existing projects, and be interoperable with existing formats. This section will discuss how Atomic Data differs from or is similar to various data formats and paradigms, and how it can interoperate.
Upgrade guide
- Upgrade: How to make your existing (server-side) application serve Atomic Data. From easy, to hard.
Data formats
- JSON: Atomic Data is designed to be easily serializable to clean, idiomatic JSON. However, if you want to turn JSON into Atomic Data, you'll have to make sure that all keys in the JSON object are URLs that link to Atomic Properties, and the data itself also has to be available at its Subject URL.
- RDF: Atomic Data is a strict subset of RDF, and can therefore be trivially serialized to all RDF formats (Turtle, N-triples, RDF/XML, JSON-LD, and others). The other way around is more difficult. Turning RDF into Atomic Data requires that all predicates are Atomic Properties, the values must match its properties datatype, the atoms must be available at the subject URL, and the subject-predicate combinations must be unique.
Protocols
- Solid: A set of specifications that has many similarities with Atomic Data
- IPFS: Content-based addressing to prevent 404s and centralization
Database paradigms
- SQL: How Atomic Data differs from and could interact with SQL databases
- Graph: How it differs from some labeled property graphs, such as Neo4j
Atomizing: How to create and publish Atomic Data
We call the process of turning data into Atomic Data Atomizing. During this process, we upgrade the data quality. Our information becomes more valuable. Let's summarize what the advantages are:
- Your data becomes available on the web (publicly, if you want it to)
- It can now link to other data, an become part of a bigger web of data
- It becomes strictly typed, so developers can easily and safely re-use it in their software
- It becomes easier to understand, because people can look at the Properties and see what they mean
- It can be easily converted into many formats (JSON, Turtle, CSV, XML, more...)
How to Atomize data
- Using the Atomic-Server app + GUI (easy, only for direct user input)
- Using one of the libraries
- Using the API (easy, only for direct user input)
- Create an importable JSON-AD file (medium, useful if you want to convert existing data)
- Make your existing service / app host and serialize Atomic Data (hard, if you want to make your entire app be part of the Atomic Web!)
Upgrade your existing application to serve Atomic Data
You don't have to use Atomic-Server and ditch your existing projects or apps, if you want to adhere to Atomic Data specs.
As the Atomic Data spec is modular, you can start out simply and conform to more specs as needed:
- Map your JSON keys to new or existing Atomic Data properties
- Add
@idfields to your resources, make sure these URLs resolve using HTTP - Implement parts of the Extended spec
There's a couple of levels you can go to, when adhering to the Atomic Data spec.
Easy: map your JSON keys to Atomic Data Properties
If you want to make your existing project compatible with Atomic Data, you probably don't have to get rid of your existing storage / DB implementation. The only thing that matters, is how you make the data accessible to others: the serialization. You can keep your existing software and logic, but simply change the last little part of your API.
In short, this is what you'll have to do:
Map all properties of resources to Atomic Properties.
Either use existing ones, or create new ones.
This means: take your JSON objects, and change things like name to https://atomicdata.dev/properties/name.
That's it, you've done the most important step!
Now your data is already more interoperable:
- Every field has a clear semantic meaning and datatype
- Your data can now be easily imported by Atomic Data systems
Medium: add @id URLs that properly resolve
Make sure that when the user requests some URL, that you return that resource as a JSON-AD object (at the very least if the user requests it using an HTTP Accept: application/ad+json header).
- Your data can now be linked to by external data sources, it can become part of a web of data!
Hard: implement Atomic Data Extended protocols
You can go all out, and implement Commits, Hierarchies, Authentication, Collections and more. I'd suggest starting with Commits, as these allow users to modify data whilst maintaining versioning and auditability. Check out the Atomic-Server source code to get inspired on how to do this.
Reach out for help
If you need any help, join our Discord.
Also, share your thoughts on creating Atomic Data in this issue on github.
How does Atomic Data relate to RDF?
RDF (the Resource Description Framework) is a W3C specification from 1999 that describes the original data model for linked data. It is the forerunner of Atomic Data, and is therefore highly similar in its model. Both heavily rely on using URLs, and both have a fundamentally simple and uniform model for data statements. Both view the web as a single, connected graph database. Because of that, Atomic Data is also highly compatible with RDF - all Atomic Data is also valid RDF. Atomic Data can be thought of as a more constrained, type safe version of RDF. However, it does differ in some fundamental ways.
- Atomic calls the three parts of a Triple
subject,propertyandvalue, instead ofsubject,predicate,object. - Atomic does not support having multiple statements with the same
<subject> <predicate>, every combination must be unique. - Atomic does not have
literals,named nodesandblank nodes- these are allvalues, but with different datatypes. - Atomic uses
nested Resourcesandpathsinstead ofblank nodes - Atomic requires URL (not URI) values in its
subjectsandproperties(predicates), which means that they should be resolvable. Properties must resolve to anAtomic Property, which describes its datatype. - Atomic only allows those who control a resource's
subjectURL endpoint to edit the data. This means that you can't add triples about something that you don't control. - Atomic has no separate
datatypefield, but it requires thatProperties(the resources that are shown when you follow apredicatevalue) specify a datatype. However, it is allowed to serialize the datatype explicitly, of course. - Atomic has no separate
languagefield. - Atomic has a native Event (state changes) model (Atomic Commits), which enables communication of state changes
- Atomic has a native Schema model (Atomic Schema), which helps developers to know what data types they can expect (string, integer, link, array)
- Atomic does not support Named Graphs. These should not be needed, because all statements should be retrievable by fetching the Subject of a resource. However, it is allowed to include other resources in a response.
Why these changes?
I have been working with RDF for quite some time now, and absolutely believe in some of the core premises of RDF. I started a company that specializes in Linked Data (Ontola), and we use it extensively in our products and services. Using URIs (and more-so URLs, which are URIs that can be fetched) for everything is a great idea, since it helps with interoperability and enables truly decentralized knowledge graphs. However, some of the characteristics of RDF make it hard to use, and have probably contributed to its relative lack of adoption.
It's too hard to select a specific value (object) in RDF
For example, let's say I want to render someone's birthday:
<example:joep> <schema:birthDate> "1991-01-20"^^xsd:date
Rendering this item might be as simple as fetching the subject URL, filtering by predicate URL, and parsing the object as a date.
However, this is also valid RDF:
<example:joep> <schema:birthDate> "1991-01-20"^^xsd:date <example:someNamedGraph>
<example:joep> <schema:birthDate> <example:birthDateObject> <example:someOtherNamedGraph>
<example:joep> <schema:birthDate> "20th of januari 1991"@en <example:someNamedGraph>
<example:joep> <schema:birthDate> "20 januari 1991"@nl <example:someNamedGraph>
<example:joep> <schema:birthDate> "2000-02-30"^^xsd:date <example:someNamedGraph>
Now things get more complicated if you just want to select the original birthdate value:
- Select the named graph. The triple containing that birthday may exist in some named graph different from the
subjectURL, which means that I first need to identify and fetch that graph. - Select the subject.
- Select the predicate.
- Select the datatype. You probably need a specific datatype (in this case, a Date), so you need to filter the triples to match that specific datatype.
- Select the language. Same could be true for language, too, but that is not necessary in this birthdate example.
- Select the specific triple. Even after all our previous selectors, we still might have multiple values. How do I know which is the triple I'm supposed to use?
To be fair, with a lot of RDF data, only steps 2 and 3 are needed, since there are often no subject-predicate collisions.
And if you control the data of the source, you can set any constraints that you like, inlcluding subject-predicate uniqueness.
But if you're building a system that uses arbitrary RDF, that system also needs to deal with steps 1,4,5 and 6.
That often means writing a lot of conditionals and other client-side logic to get the value that you need.
It also means that serializing to a format like JSON becomes complicated - you can't just map predicates to keys - you might get collisions.
And you can't use key-value stores for storing RDF, at least not in a trivial way.
Every single selected value should be treated as an array of unknown datatypes, and that makes it really difficult to build software.
All this complexity is the direct result of the lack of subject-predicate uniqueness.
As a developer who uses RDF data, I want to be able to do something like this:
// Fetches the resource
const joep = get("https://example.com/person/joep")
// Returns the value of the birthDate atom
console.log(joep.birthDate()) // => Date(1991-01-20)
// Fetches the employer relation at possibly some other domain, checks that resource for a property with the 'name' shortkey
console.log(joep.employer().name()) // => "Ontola.io"
Basically, I'd like to use all knowledge of the world as if it were a big JSON object. Being able to do that, requires using some things that are present in JSON, and using some things that are present in RDF.
- Traverse data on various domains (which is already possible with RDF)
- Have unique
subject-predicatecombinations (which is default in JSON) - Map properties URLs to keys (which often requires local mapping with RDF, e.g. in JSON-LD)
- Link properties to datatypes (which is possible with ontologies like SHACL / SHEX)
Less focus on semantics, more on usability
One of the core ideas of the semantic web, is that anyone should be able to say anything about anything, using semantic triples.
This is one of the reasons why it can be so hard to select a specific value in RDF.
When you want to make all graphs mergeable (which is a great idea), but also want to allow anyone to create any triples about any subject, you get subject-predicate non-uniqueness.
For the Semantic Web, having semantic triples is great.
For linked data, and connecting datasets, having atomic triples (with unique subject-predicate combinations) seems preferable.
Atomic Data chooses a more constrained approach, which makes it easier to use the data, but at the cost of some expressiveness.
Changing the names
RDF's subject, predicate and object terminology can be confusing to newcomers, so Atomic Data uses subject, property, value.
This more closely resembles common CS terminology. (discussion)
Subject + Predicate uniqueness
As discussed above, in RDF, it's very much possible for a graph to contain multiple statements that share both a subject and a predicate.
This is probably because of two reasons:
- RDF graphs must always be mergeable (just like Atomic Data).
- Anyone can make any statement about any subject (unlike Atomic Data, see next section).
However, this introduces a lot extra complexity for data users (see above), which makes it not very attractive to use RDF in any client.
Whereas most languages and datatypes have key-value uniqueness that allow for unambiguous value selection, RDF clients have to deal with the possibility that multiple triples with the same subject-predicate combination might exist.
It also introduces a different problem: How should you interpret a set of subject-predicate combinations?
Does this represent a non-ordered collection, or did something go wrong while setting values?
In the RDF world, I've seen many occurences of both.
Atomic Data requires subject-property uniqueness, which means that these issues are no more.
However, in order to guarantee this, and still retain graph merge-ability, we also need to limit who creates statements about a subject:
Limiting subject usage
RDF allows that anne.com creates and hosts statements about the subject john.com.
In other words, domain A creates statements about domain B.
It allows anyone to say anything about any subject, thus allowing for extending data that is not under your control.
For example, developers at both Ontola and Inrupt (two companies that work a lot with RDF) use this feature to extend the Schema.org ontology with translations. This means they can still use standards from Schema.org, and have their own translations of these concepts.
However, I think this is a flawed approach. In the example above, two companies are adding statements about a subject. In this case, both are adding translations. They're doing the same work twice. And as more and more people will use that same resource, they will be forced to add the same translations, again and again.
I think one of the core perks of linked data, is being able to make your information highly re-usable. When you've created statements about an external thing, these statements are hard to re-use.
This means that someone using RDF data about domain B cannot know that domain B is actually the source of the data. Knowing where data comes from is one of the great things about URIs, but RDF does not require that you can think of subjects as the source of data. Many subjects in RDF don't actually resolve to all the known triples of the statement. It would make the conceptual model way simpler if statements about a subject could only be made from the source of the domain owner of the subject. When triples are created about a resource, in a place other than where the subject is hosted, these triples are hard to share.
The way RDF projects deal with this, is by using named graphs.
As a consequence, all systems that use these triples should keep track of another field for every atom.
To make things worse, it makes subject-predicate uniqueness impossible to guarantee.
That's a high price to pay.
I've asked two RDF developers (who did not know each other) working on RDF about limiting subject usage, and both were critical. Interestingly, they provided the same usecase for using named graphs that would conflict with the limiting subject usage constraint. They both wanted to extend the schema.org ontology by adding properties to these items in a local graph. I don't think even this usecase is appropriate for named graphs. They were actually using an external resource that did not provide them with the things they needed. The things that they would add (the translations) are not re-usable, so in the end they will just keep spreading a URL that doesn't provide people with the things that they will come to expect. The schema.org URL still won't provide the translations that they wrote! I believe a better solution is to copy the resource (in this case a part of the schema.org ontology), and extend it, and host it somewhere else, and use that URL. Or even better: have a system for sharing your change suggestions with the source of the data, and allow for easy collaboration on ontologies.
No more literals / named nodes
In RDF, an object can either be a named node, blank node or literal. A literal has a value, a datatype and an optional language (if the literal is a string).
Although RDF statements are often called triples, a single statement can consist of five fields: subject, predicate, object, language, datatype.
Having five fields is way more than most information systems. Usually we have just key and value.
This difference leads to compatibility issues when using RDF in applications.
In practice, clients have to run a lot of checks before they can use the data - which makes RDF in most contexts harder to use than something like JSON.
Atomic Data drops the named node / literal distinction.
We just have values, and they are interpreted by looking at the datatype, which is defined in the property.
When a value is a URL, we don't call it a named node, but we simply use a URL datatype.
Requiring URLs
A URL (Uniform Resource Locator) is a specific and cooler version of a URI (Uniform Resource Identifier), because a URL tells you where you can find more information about this thing (hence Locator).
RDF allows any type of URIs for subject and predicate value, which means they can be URLs, but don't have to be.
This means they don't always resolve, or even function as locators.
The links don't work, and that restricts how useful the links are.
Atomic Data takes a different approach: these links MUST Resolve. Requiring Properties to resolve is part of what enables the type system of Atomic Schema - they provide the shortname and datatype.
Requiring URLs makes things easier for data users, but makes things a bit more difficult for the data producer. With Atomic Data, the data producer MUST offer the data at the URL of the subject. This is a challenge that requires tooling, which is why I've built Atomic-Server: an easy to use, performant, open source data management sytem.
Making sure that links actually work offer tremendous benefits for data consumers, and that advantage is often worth the extra trouble.
Replace blank nodes with paths
Blank (or anonymous) nodes are RDF resources with identifiers that exist only locally.
In other words, their identifiers are not URLs.
They are sometimes also called anonymous nodes.
They make life easier for data producers, who can easily create (nested) resources without having to mint all the URLs.
In most non-RDF data models, blank nodes are the default.
For example, we nest JSON object without thinking twice.
Unfortunately, blank nodes tend to make things harder for clients. These clients will now need to keep track of where these blank nodes came from, and they need to create internal identifiers that will not collide. Cache invalidation with blank nodes also becomes a challenge. To make this a bit easier, Atomic Data introduces a new way of dealing with names of things that you have not given a URL yet: Atomic Paths.
Since Atomic Data has subject-predicate uniqueness (like JSON does, too), we can use the path of triples as a unique identifier:
https://example.com/john https://schema.org/employer
This prevents collisions and still makes it easy to point to a specific value.
Serialization formats are free to use nesting to denote paths - which means that it is not necessary to include these path strings explicitly in most serialization formats, such as in JSON-AD.
Combining datatype and predicate
Having both a datatype and a predicate value can lead to confusing situations.
For example, the schema:dateCreated Property requires an ISO DateTime string (according to the schema.org definition), but using a value true with an xsd:boolean datatype results in perfectly valid RDF.
This means that client software using triples with a schema:dateCreated predicate cannot safely assume that its value will be a DateTime.
So if the client wants to use schema:dateCreated values, the client must also specify which type of data it expects, check the datatype field of every Atom and provide logic for when these don't match.
Also important combining datatype and predicate fits the model of most programmers and languages better - just look at how every single struct / model / class / shape is defined in programming languages: key: datatype.
This is why Atomic Data requires that a predicate links to a Property which must have a Datatype.
Adding shortnames (slugs / keys) in Properties
Using full URI strings as keys (in RDF predicates) results in a relatively clunky Developer Experience.
Consider the short strings that developers are used to in pretty much all languages and data formats (object.attribute).
Adding a required / tightly integrated key mapping (from long URLs to short, simple strings) in Atomic Properties solves this issue, and provides developers a way to write code like this: someAtomicPerson.bestFriend.name => "Britta".
Although the RDF ecosystem does have some solutions for this (@context objects in JSON-LD, @prefix mappings, the @ontologies library), these prefixes are not defined in Properties themselves and therefore are often defined locally or separate from the ontology, which means that developers have to manually map them most of the time.
This is why Atomic Data introduces a shortname field in Properties, which forces modelers to choose a 'key' that can be used in ORM contexts.
Adding native arrays
RDF lacks a clear solution for dealing with ordered data, resulting in confusion when developers have to create lists of content. Adding an Array data type as a base data type helps solve this. (discussion)
Adding a native state changes standard
There is no integrated standard for communicating state changes. Although linked-delta and rdf-delta do exist, they aren't referred to by the RDF spec. I think developers need guidance when learning a new system such as RDF, and that's why Atomic Commits is included in this book.
Adding a schema language and type safety
A schema language is necessary to constrain and validate instances of data. This is very useful when creating domain-specific standards, which can in turn be used to generate forms or language-specific types / interfaces. Shape validations are already possible in RDF using both SHACL and SHEX, and these are both very powerful and well designed.
However, with Atomic Data, I'm going for simplicity. This also means providing an all-inclusive documentation. I want people who read this book to have a decent grasp of creating, modeling, sharing, versioning and querying data. It should provide all information that most developers (new to linked data) will need to get started quickly. Simply linking to SHACL / SHEX documentation could be intimidating for new developers, who simply want to define a simple shape with a few keys and datatypes.
Also, SHACL requires named graphs (which are not specified in Atomic Data) and SHEX requires a new serialization format, which might limit adoption. Atomic Data has some unique constrains (such as subject-predicate uniqueness) which also might make things more complicated when using SHEX / SHACL.
However, it is not the intention of Atomic Data to create a modeling abstraction that is just as powerful as the ones mentioned above, so perhaps it is better to include a SHACL / SHEX tutorial and come up with a nice integration of both worlds.
A new name, with new docs
Besides the technical reasons described above, I think that there are social reasons to start with a new concept and give it a new name:
- The RDF vocabulary is intimidating. When trying to understand RDF, you're likely to traverse many pages with new concepts:
literal,named node,graph,predicate,named graph,blank node... The core specification provides a formal description of these concepts, but fails to do this in a way that results in quick understanding and workable intuitions. Even experienced RDF developers tend to be confused about the nuances of the core model. - There is a lack of learning resources that provide a clear, complete answer to the lifecycle of RDF data: modeling data, making data, hosting it, fetching it, updating it. Atomic Data aims to provide an opinionated answer to all of these steps. It feels more like a one-stop-shop for questions that developers are likely to encounter, whilst keeping the extendability.
- All Core / Schema URLs should resolve to simple, clear explanations with both examples and machine readable definitions. Especially the Property and Class concepts.
- The Semantic Web community has had a lot of academic attention from formal logic departments, resulting in a highly developed standard for knowledge modeling: the Web Ontology Language (OWL). While this is mostly great, its open-world philosophy and focus on reasoning abilities can confuse developers who are simply looking for a simple way to share models in RDF.
Convert RDF to Atomic Data
- All the
subjectURLs MUST actually resolve, and return all triples about that subject. Allblank nodesshould be converted into URLs. Atomic Data tools might help to achieve this, for example by hosting the data. - All
predicatesSHOULD resolve to Atomic Properties, and these SHOULD have adatatype. You will probably need to change predicate URLs to Atomic Property URLs, or update the things that the predicate points to to include the required Atomic Property items (e.g. having a Datatype and a Shortname). This also means that thedatatypein the original RDF statement can be dropped. - Literals with a
languagetag are converted to TranslationBox resources, which also means their identifiers must be created. Keep in mind that Atomic Data does not allow for blank nodes, so the TranslationBox identifiers must be URLs.
Step by step, it entails:
- Set up some server to make sure the URLs will resolve.
- Create (or find and refer to) Atomic Properties for all the
predicates. Make sure they have a DataType and a Shortname. - If you have triples about a subject that you don't control, change the URL to some that you can control, and refer to that external resource.
Atomic Data will need tooling to facilitate in this process. This tooling should help to create URLs, Properties, and host everything on an easy to use server.
Convert Atomic data to RDF
Since all Atomic Data is also valid RDF, it's trivial to convert / serialize Atoms to RDF.
This is why atomic can serialize Atomic Data to RDF. (For example, try atomic-cli get https://atomicdata.dev/properties/description --as n3)
However, contrary to Atomic Data, RDF has optional Language and Datatype elements in every statement. It is good practice to use these RDF concepts when serializing Atomic Data into Turtle / RDF/XML, or other RDF serialization formats.
- Convert Atoms with linked
TranslationBoxResources to Literals with anxsd:stringdatatype and the corresponding language in the tag. - Convert Atoms with ResourceArrays to Collections that are native to that serialization format.
- Dereference the Property and Datatype from Atomic Properties, and add the URLs in
datatypesin RDF statements.
Atomic Data and Solid
The Solid project is an initiative by the inventor of linked data and the world wide web: sir Tim Berners-Lee. In many ways, it has similar goals to Atomic Data:
- Decentralize the web
- Make things more interoperable
- Give people more control over their data
Technically, both are also similar:
- Usage of personal servers, or PODs (Personal Online Datastores). Both Atomic Data and Solid aim to provide users with a highly personal server where all sorts of data can be stored.
- Usage of linked data. All Atomic Data is valid RDF, which means that all Atomic Data is compatible with Solid. However, the other way around is more difficult. In other words, if you choose to use Atomic Data, you can always put it in your Solid Pod.
But there are some important differences, too, which will be explained in more detail below.
- Atomic Data uses a strict built-in schema to ensure type safety
- Atomic Data standardizes state changes (which also provides version control / history, audit trails)
- Atomic Data is more easily serializable to other formats (like JSON)
- Atomic Data has different models for authentication, authorization and hierarchies
- Atomic Data does not depend on existing semantic web specifications
- Atomic Data is a smaller and younger project, and as of now a one-man show
Disclaimer: I've been quite involved in the development of Solid, and have a lot of respect for all the people who are working on it. Solid and RDF have been important inspirations for the design of Atomic Data. The following is not meant as a critique on Solid, let alone the individuals working on it.
Atomic Data is type-safe, because of its built-in schema
Atomic Data is more strict than Solid - which means that it only accepts data that conforms to a specific shape. In a Solid Pod, you're free to add any shape of data that you like - it is not validated by some schema. Yes, there are some efforts of using SHACL or SHEX to constrain data before putting it in, but as of now it is not part of the spec or any implementation that I know of. A lack of schema strictness can be helpful during prototyping and rapid development, especially if you write data by hand, but it also limits how easy it is to build reliable apps with that data. Atomic Data aims to be very friendly for developers that re-use data, and that's why we take a different approach: all data must be validated by Atomic Schema before it's stored on a server. This means that all Atomic Properties will have to exist on a publicly accessible URL, before the property can be used somewhere.
You can think of Atomic Data more like a (dynamic) SQL database that offers guarantees about its content type, and a Solid Pod more like a document store that takes in all kinds of content. Most of the differences have to do with how Atomic Schema aims to make linked data easier to work with, but that is covered in the previous RDF chapter.
Atomic Data standardizes state changes (event sourcing)
With Solid, you change a Resource by sending a POST request to the URL that you want to change. With Atomic, you change a Resource by sending a signed Commit that contains the requested changes to a Server.
Event sourcing means that all changes are stored (persisted) and used to calculate the current state of things. In practice, this means that users get a couple of nice features for free:
- Versioning for all items by default. Storing events means that these events can be replayed, which means you get to traverse time / undo / redo.
- Edit / audit log for everything. Events contain information about who made which change at which point in time. Can be useful for finding out why things are the way they are.
- Easier to add query options / indexes. Any system can play-back the events, which means that the events can be used as an API to add new query options / fill new indexes. This is especially useful if you want to add things like full-text search, or some geolocation index.
It also means that, compared to Solid, there is a relatively simple and strict API for changing data.
Atomic Data has a uniform write API.
All changes to data are done by posting Commits to the /commits endpoint of a Server.
This removes the need to think about differences between all sorts of HTTP methods like POST / PUT / PATCH, and how servers should reply to that.
EDIT: as of december 2021, Solid has introduced .n3 patch for standardizing state changes. Although this adds a uniform way of describing changes, it still lacks the power of Atomic Commits. It does not specify signatures, mention versioning, or deals with persisting changesets. On top of that, it is quite difficult to read or parse, being .n3.
Atomic Data is more easily serializable to other formats (like JSON)
Atomic Data is designed with the modern (web)developer in mind. One of the things that developers expect, is to be able to traverse (JSON) objects easily. Doing this with RDF is not easily possible, because doing this requires subject-predicate uniqueness. Atomic Data does not have this problem (properties must be unique), which means that traversing objects becomes easy.
Another problem that Atomic Data solves, is dealing with long URLs as property keys.
Atomic Data uses shortnames to map properties to short, human-readable strings.
For more information about these differences, see the previous RDF chapter.
Authentication
Both Solid an Atomic Data use URLs to refer to individuals / users / Agents.
Solid's identity system is called WebID. There are multiple supported authentication protocols, the most common being WebID-OIDC.
Atomic Data's authentication model is more similar to how SSH works. Atomic Data identities (Agents) are a combination of HTTP based, and cryptography (public / private key) based. In Atomic, all actions (from GET requests to Commits) are signed using the private key of the Agent. This makes Atomic Data a bit more unconventional, but also makes its auth mechanism very decentralized and lightweight.
Hierarchy and authorization
Atomic Data uses parent-child hierarchies to model data structures and perform authorization checks.
This closely resembles how filesystems work (including things like Google Drive).
Per resource, write and read rights can be defined, which both contain lists of Agents.
Solid is working on the Shape Trees spec, which also describes hierarchies. It uses SHEX to perform shape validation, similar to how Atomic Schema does.
No dependency on existing semantic web specifications
The Solid specification (although still in draft) builds on a 20+ year legacy of committee meetings on semantic web standards such as RDF, SPARQL, OWL and XML. I think the process of designing specifications in various (fragmented) committees has led to a set of specifications that lack simplicity and consistency. Many of these specifications have been written long before there were actual implementations. Much of the effort was spent on creating highly formal and abstract descriptions of common concepts, but too little was spent on making specs that are easy to use and solve actual problems for developers.
Aaron Scharz (co-founder or reddit, inventor of RSS and Markdown) wrote this in his unfinished book 'A Programmable Web':
Instead of the “let’s just build something that works” attitude that made the Web (and the Internet) such a roaring success, they brought the formalizing mindset of mathematicians and the institutional structures of academics and defense contractors. They formed committees to form working groups to write drafts of ontologies that carefully listed (in 100-page Word documents) all possible things in the universe and the various properties they could have, and they spent hours in Talmudic debates over whether a washing machine was a kitchen appliance or a household cleaning device.
(The book is a great read on this topic, by the way!)
So, in a nutshell, I think this legacy makes Solid unnecessarily hard to use for developers, for the following reasons:
- RDF Quirks: Solid has to deal with all the complexities of the RDF data model, such as blank nodes, named graphs, subject-predicate duplication.
- Multiple (uncommon) serialization formats need to be understood, such as
n3,shexand potentially all the various RDF serialization formats. These will feel foreign to most (even very experienced) developers and can have a high degree of complexity. - A heritage of broken URLs. Although a lot if RDF data exists, only a small part of it is actually resolvable as machine-readable RDF. The large majority won't give you the data when sending a HTTP GET request with the correct
Acceptheaders to the subject's URL. Much of it is stored in documents on a different URL (named graphs), or behind some SPARQL endpoint that you will first need to find. Solid builds on a lot of standards that have these problems. - Confusing specifications. Reading up on RDF, Solid, and the Semantic Web can be a daunting (yet adventurous) task. I've seen many people traverse a similar path as I did: read the RDF specs, dive into OWL, install protege, create ontologies, try doing things that OWL doesn't do (validate data), read more complicated specs that don't help to clear things, become frustrated... It's a bit of a rabbit hole, and I'd like to prevent people from falling into it. There's a lot of interesting ideas there, but it is not a pragmatic framework to develop interoperable apps with.
Atomic Data and Solid server implementations
Both Atomic Data and Solid are specifications that have different implementations. Some open source Solid implementations are the Node Solid Server, the Community Solid Server (also nodejs based) and the DexPod (Ruby on Rails based).
Atomic-Server is a database + server written in the Rust programming language, that can be considered an alternative to Solid Pod implementations. It was definitely built to be one, at least. It implements every part of the Atomic Data specification. I believe that as of today (february 2022), Atomic-Server has quite a few advantages over existing Solid implementations:
- Dynamic schema validation / type checking using Atomic Schema, combining the best of RDF, JSON and type safety.
- Fast (1ms responses on my laptop)
- Lightweight (8MB download, no runtime dependencies)
- HTTPS + HTTP2 support with Built-in LetsEncrypt handshake.
- Browser GUI included powered by atomic-data-browser. Features dynamic forms, tables, authentication, theming and more. Easy to use!
- Event-sourced versioning / history powered by Atomic Commits
- Many serialization options: to JSON, JSON-AD, and various Linked Data / RDF formats (RDF/XML, N-Triples / Turtle / JSON-LD).
- Full-text search with fuzzy search and various operators, often <3ms responses.
- Pagination, sorting and filtering using Atomic Collections
- Invite and sharing system with Atomic Invites
- Desktop app Easy desktop installation, with status bar icon, powered by tauri.
- MIT licensed So fully open-source and free forever!
Things that Atomic Data misses, but Solid has
Atomic Data is not even two years old, and although progress has been fast, it does lack some specifications. Here's a list of things missing in Atomic Data, with links to their open issues and links to their existing Solid counterpart.
- No inbox or notifications yet (issue)
- No OIDC support yet. (issue)
- No support from a big community, a well-funded business or the inventor of the world wide web.
How does Atomic Data relate to JSON?
Because JSON is so popular, Atomic Data is designed with JSON in mind.
Atomic Data is often (by default) serialized to JSON-AD, which itself uses JSON. JSON-AD uses URLs as keys, which is what gives Atomic Data many of its perks, but using these long strings as keys is not very easy to use in many contexts. That's why you can serialize Atomic Data to simple, clean JSON.
From Atomic Data to plain JSON
The JSON keys are then derived from the shortnames of properties.
For example, we could convert this JSON-AD:
{
  "@id": "https://atomicdata.dev/properties/description",
  "https://atomicdata.dev/properties/datatype": "https://atomicdata.dev/datatypes/markdown",
  "https://atomicdata.dev/properties/description": "A textual description of something. When making a description, make sure that the first few words tell the most important part. Give examples. Since the text supports markdown, you're free to use links and more.",
  "https://atomicdata.dev/properties/isA": [
    "https://atomicdata.dev/classes/Property"
  ],
  "https://atomicdata.dev/properties/shortname": "description"
}
... into this plain JSON:
{
  "@id": "https://atomicdata.dev/properties/description",
  "datatype": "https://atomicdata.dev/datatypes/markdown",
  "description": "A textual description of something. When making a description, make sure that the first few words tell the most important part. Give examples. Since the text supports markdown, you're free to use links and more.",
  "is-a": [
    "https://atomicdata.dev/classes/Property"
  ],
  "shortname": "description"
}
Note that when you serialize Atomic Data to plain JSON, some information is lost: the URLs are no longer there.
This means that it is no longer possible to find out what the datatype of a single value is - we now only know if it's a string, but not if it actually represents a markdown string or something else.
Most Atomic Data systems will therefore not use this plain JSON serialization, but for some clients (e.g. a front-end app), it might be easier to use the plain JSON, as the keys are easier to write than the long URLs that JSON-AD uses.
From JSON to JSON-AD
Atomic Data requires a bit more information about pieces of data than JSON tends to contain. Let's take a look at a regular JSON example:
{
  "name": "John",
  "birthDate": "1991-01-20"
}
We need more information to convert this JSON into Atomic Data. The following things are missing:
- What is the Subject URL of the resource being described?
- What is the Property URL of the keys being used? (
nameandbirthDate), and consequentially, how should the values be parsed? What are their DataTypes?
In order to make this conversion work, we need to link to three URLs that resolve to atomic data resources.
The @id subject should resolve to the Resource itself, returning the JSON-AD from below.
The Property keys (e.g. "https://example.com/properties/name") need to resolve to Atomic Properties.
{
  "@id": "https://example.com/people/john",
  "https://example.com/properties/name": "John",
  "https://example.com/properties/birthDate": "1991-01-20"
}
In practice, the easiest approach to make this conversion, is to create the data and host it using software like Atomic Server.
From Atomic Data to JSON-LD
Atomic Data is a strict subset of RDF, and the most popular serialization of RDF for JSON data is JSON-LD.
Since Atomic Schema requires the presence of a key slug in Properties, converting Atomic Data to JSON results in dev-friendly objects with nice shorthands.
{
  "@id": "https://example.com/people/John",
  "https://example.com/properties/lastname": "John",
  "https://example.com/properties/bestFriend": "https://example.com/sarah",
}
Can be automatically converted to:
{
  "@context": {
    "@id": "https://example.com/people/John",
    "name": "https://example.com/properties/lastname",
    "bestFriend": "https://example.com/properties/bestFriend",
  },
  "name": "John",
  "bestFriend": {
    "@id": "https://example.com/sarah"
  },
}
The @context object provides a mapping to the original URLs.
JSON-AD and JSON-LD are very similar by design, but there are some important differences:
- JSON-AD is designed just for atomic data, and is therefore easier and more performant to parse / serialize.
- JSON-LD uses
@contextto map keys to URLs. Any type of mapping is valid. JSON-AD, on the other hand, doesn't map anything - all keys are URLs. - JSON-LD uses nested objects for links and sequences, such as
@list. JSON-AD does not. - Arrays in JSON-LD do not indicate ordered data - they indicate that for some subject-predicate combination, multiple values exist. This is a result of how RDF works.
JSON-LD Requirements for valid Atomic Data
- Make sure the URLs used in the
@contextresolve to Atomic Properties.
- Convert JSON-LD arrays into ResourceArrays
- Creating nested JSON objects is possible (by resolving the identifiers from
@idrelations), but it is up to the serializer to decide how deep this object nesting should happen.
Note that as of now, there are no JSON-LD parsers for Atomic Data.
Atomic Data and IPFS
What is IPFS
IPFS (the InterPlanetary File System) is a standard that enables decentralized file storage and retrieval using content-based identifiers.
Instead of using an HTTP URL like http://example.com/helloworld, it uses the IPFS scheme, such as ipfs:QmX6j9DHcPhgBcBtZsuRkfmk2v7G5mzb11vU9ve9i8vDsL.
IPFS identifies things based on their unique content hash (the long, seemingly random string) using a thing called a Merkle DAG (this great article explains it nicely).
This is called a CID, or Content ID.
This simple idea (plus some not so simple network protocols) allows for decentralized, temper-proof storage of data.
This fixes some issues with HTTP that are related to its centralized philosophy: no more 404s!
Why is IPFS interesting for Atomic Data
Atomic Data is highly dependent on the availability of Resources, especially Properties and Datatypes. These resources are meant to be re-used a lot, and when these go offline or change (for whatever reason), it could cause issues and confusion. IPFS guarantees that these resources are entirely static, which means that they cannot change. This is useful when dealing with Properties, as a change in datatype could break things. IPFS also allows for location-independent fetching, which means that resources can be retrieved from any location, as long as it's online. This Peer-to-peer functionality is a very fundamental advantage of IPFS over HTTP, especially when the resources are very likely to be re-use, which is especially the case for Atomic Data Properties.
Considerations using IPFS URLs
IPFS URLs are static, which means that their contents can never change. This is great for some types of data, but not so much for others. If you're describing a time-dependent thing (such as a person's job), you'll probably want to know what the current value is, and that is not possible when you only have an IPFS identifier. This can be fixed by including an HTTP URL in IPFS bodies.
IPFS data is also hard to remove, as it tends to be replicated across machines. If you're describing personal, private information, it can therefore be a bad idea to use IPFS.
And finally, its performance is typically not as good as HTTP. If you know the IPFS gateway that hosts the IPFS resource that you're looking for, things improve drastically. Luckily for Atomic Data, this is often the case, as we know the HTTP url of the server and could try whether that server has an IPFS gateway.
Atomic Data and IPLD
IPLD (not IPFS) stands for InterPlanetary Linked Data, but is not related to RDF. The scope seems fundamentally different from RDF, too, but I have to read more about this.
Share your thoughts
Discuss on this issue.
Atomic Data and SQL
Atomic Data has some characteristics that make it similar and different from SQL.
- Atomic Data has a dynamic schema. Any Resource could have different properties, so you can add new properties to your data without performing any migrations. However, the properties themselves are still validated (contrary to most NoSQL solutions)
- Atomic Data uses HTTP URLs in its data, which means it's easy to share and reuse.
- Atomic Data separates reading and writing, whereas SQL has one language for both.
- Atomic Data has a standardized way of storing changes (Commits)
Tables and Rows vs. Classes and Properties
At its core, SQL is a query language based around tables and rows.
The tables in SQL are similar to Classes in Atomic Data: they both define a set of properties which an item could have.
Every single item in a table is called a row in SQL, and a Resource in Atomic Data.
One difference is that in Atomic Data, you can add new properties to resources, without making changes to any tables (migrations).
Dynamic vs static schema
In SQL, the schema of the database defines which shape the data can have, which properties are required, what datatypes they have. In Atomic Data, the schema exists as a Resource on the web, which means that they can be retrieved using HTTP. An Atomic Database (such as Atomic-Server) uses a dynamic schema, which means that any Resource can have different properties, and the properties themselves can be validated, even when the server is not aware of these properties beforehand. In SQL, you'd have to manually adjust the schema of your database to add a new property. Atomic Data is a decentralized, open system, which can read new schema data from other sources. SQL is a centralized, closed system, which relies on the DB manager to define the schema.
Identifiers: numbers vs. URLs
In SQL, rows have numbers as identifiers, whereas in Atomic Data, every resource has a resolvable HTTP URL as an identifier. URLs are great identifiers, because you can open them and get more information about something. This means that with Atomic Data, other systems can re-use your data by referencing to it, and you can re-use data from other systems, too. With Atomic Data, you're making your data part of a bigger web of data, which opens up a lot of possibilities.
Atomic Server combines server and database
If you're building an App with SQL, you will always need some server that connects to your database. If you're building an App with Atomic Server, the database can function as your server, too. It deals with authentication, authorization, and more.
Querying
The SQL query language is for both reading and writing data. In Atomic Data a distinction is made between Query and Command - getting and setting (Command Query Responsibility Segregation, CQRS). The Query side is handled using Subject Fetching (sending a GET request to a URL, to get a single resource) and Collections (filtering and sorting data). The Command side is typically done using Atomic Commits, although you're free not to use it.
SQL is way more powerful, as a query language. In SQL, the one creating the query basically defines the shape of a table that is requested, and the database returns that shape. Atomic Data does not offer such functionality. So if you need to create custom tables at runtime, you might be better off using SQL, or move your Atomic Data to a query system.
Convert an SQL database to Atomic Data
If you want to make your existing SQL project serve Atomic Data, you can keep your existing SQL database, see the upgrade guide. It basically boils down to mapping the rows (properties) in your SQL tables to Atomic Data Properties.
When you want to import arbitrary Atomic Data, though, it might be easier to use atomic-server.
If you want to store arbitrary Atomic Data in a SQL database, you might be best off by creating a Resources table with a subject and a propertyValues column, or create both a properties table and a resources one.
Limitations of Atomic Data
- SQL is far more common, many people will know how to use it.
- SQL databases are battle-tested and has been powering countless of products for tens of years, whereas Atomic Server is at this moment in beta.
- SQL databases have a more powerful and expressive query language, where you can define tables in your query and combine resources.
- Atomic Data doesn't have a mutli-node / distributed option
FAQ
Is Atomic Data NOSQL or SQL?
Generally, Atomic Data apps do not use SQL - so they are NOSQL. Atomic-server, for example, internally uses a key-value store (sled) for persistence.
Like most NOSQL systems, Atomic Data does not limit data entries to a specific table shape, so you can add any property that you like to a resource. However, unlike most NOSQL systems, Atomic Data does perform validations on each value. So in a way, Atomic Data tries to combine best of both worlds: the extendibility and flexibility of NOSQL, with the type safety of SQL.
Is Atomic Data transactional / ACID?
Yes, if you use Atomic-Server, then you can only write to the server by using Atomic Commits, which are in fact transactions. This means that if part of the transaction fails, it is reverted - transactions are only applied when they are 100% OK. This prevents inconsistent DB states.
How does Atomic Server build indexes for its resources if the schema is not known in advance
It creates indexed collections when users perform queries. This means that the first time your perform some type of query (that sorts and filters by some properties), it will be slow, but the next time you perform a similar query, it will be fast.
Atomic Data and Graph Databases
Atomic Data is fundamentally a graph data model. We can think of Atomic Resources as nodes, and links to other resources through properties as edges.
In the first section, we'll take a look at Atomic-Server as a Graph Database. After that, we'll explore how Atomic Data relates to some graph technologies.
Atomic-Server as a database
- Built-in REST. Everything is done over HTTP, there's no new query language or serialization to learn. It's all JSON.
- All resources have HTTP URLs. This means that every single thing is identified by where it can be be found. Makes it easy to share data, if you want to!
- Sharable and re-usable data models. Atomic Schema helps you share and re-use data models by simply pointing to URLs.
- Authorization built-in. Managing rights in a hierarchy (similar to how tools like Google Drive or filesystems work) enable you to have a high degree of control over read / write rights.
- Built-in easy to use GUI. Managing content on Atomic-Server can be done by anyone, as its GUI is extremely easy to use and has a ton of features.
- Dynamic indexing. Indexes are created by performing Queries, resulting in great performance - without needing to manually configure indexing.
- Synchronization over WebSockets. All changes (called Commits) can be synchronized over WebSockets, allowing you to build realtime collaborative tools.
- Event-sourced. All changes are stored and reversible, giving you a full versioned history.
- Open source. All code is MIT-licensed.
Comparing Atomic Data to Neo4j
Neo4j is a popular graph database that supports multiple query languages. The first difference is that Atomic Data is not a single piece of software but a specification. However, we can compare Neo4j as a product with the open source Atomic-Server. Atomic-Server is fully open source and free (MIT licensed), whereas Neo4j is partially open source and GPL licensed.
Labeled Property Graph
The data model of Neo4j features a labeled property graph, which means that edges (relationships between nodes) can have their own properties.
This can be useful when adding data to relationship between nodes.
For example: in the john - (knows) -> mary relationship, you might want to specify for how long they have known each other.
In Neo4j, we can add this data to the labeled property graph.
In Atomic Data, we'd have to make a new resource to describe the relation between the two, if we wanted to add information about the relationship itself. This is called reification. This process can be time consuming, especially in Atomic Data, as this means that you'll have to specify the Class of this relationship and its properties. However, one benefit of this approach, is that the relationship itself becomes clearly defined and re-usable. Another benefit is that the simpler model of Atomic Data maps perfectly to datamodels like JSON, which makes things very convenient and familiar for developers.
Query language vs REST
Neo4j supports multiple query languages, but its mainly known for Cypher. It is used for doing practically everything: reading, writing, modelling, and more.
Atomic Data on the other hand does not have a query language. It uses a RESTful HTTP + JSON-AD approach for everything. Atomic Data uses Endpoints for specific goals that you'd do in a query language:
- Collections (which can filter by Property or Value, and sort by any Property) to generate lists of resources
- Paths for traversing graphs by property
And finally, data is written using Commits. Commits are very strict, as each one describes modifications to individual resources, and every Commits has to be signed. This means that with Atomic Data, we get versioning + audit trails for all data, but at the cost of more storage requirements and a bit more expensive write process.
Schema language and type safety
In Neo4j, constraints can be added to the database by Atomic Data uses Atomic Schema for validating datatypes and required properties in Classes.
Other differences
- Atomic Data has an Authentication model and Hierarchy model for authorization. Neo4j uses roles.
- Neo4j is actually used in production by many big organizations
Various Use Cases for Atomic Data
Most of this book is either abstract or technical, but this section aims to be different. In this section, we'll present concrete examples of things that can be built with Atomic Data. Although you could use Atomic Data for pretty much any type of application, it is especially valuable where data re-use, standardization, and data ownership are important.
- As a Headless CMS
- In a React project
- Personal Data Store
- Artificial Intelligence
- E-commerce & marketplaces
- Surveys
- Verifiable Credentials
- Data Catalog
- Education
- Food labels
Using Atomic-Server as an open source headless CMS
Why people are switching to Headless CMS
Traditionally, content management systems were responsible for both managing the content as well as producing the actual HTML views that the user saw. This approach has some issues regarding performance and flexibility that headless CMS tools solve.
- Great performance. We want pages to load in milliseconds, not seconds. Headless CMS tools + JAMSTACK style architectures are designed to give both performant initial page loads, as well as consecutive / dynamic loads.
- High flexibility. Designs change, and front-end developers want to use the tools that they know and love to create these designs effectively. With a headless CMS, you can build the front-end with the tools that you want, and make it look exactly like you want.
- Easier content management. Not every CMS is as fun and easy to use, as an admin, as others. Headless CMS tools focus on the admin side of things, so the front-end devs don't have to work on the back-end as well.
Atomic Server
The Atomic-Server project may be the right choice for you if you're looking for a Headless CMS:
- Free and open source. MIT licensed, no strings attached.
- Easy to use API. Atomic-Server is built using the Atomic Data specification. It is well-documented, and uses conventions that most web developers are already familiar with.
- Typescript & React libraries. Use the existing react hooks to make your own fully editable, live-reloaded web application.
- Fast. 1ms responses on my laptop. It's written in Rust, so it squeezes out every cycle of your server.
- Lightweight. It's a single 8MB binary, no external dependencies needed.
- Easy to setup. Just run the binary and open the address. Even HTTPS support is built-in.
- Clean, powerful admin GUI. The Atomic-Data-Browser front-end gives you a very easy interface to manage your content.
- Share your data models. Atomic Data is designed to achieve a more decentralized web. You can easily re-use existing data models, or share the ones you built.
- Files / Attachments. Upload and preview files.
- Pagination / sorting / filtering. Query your data.
- Versioning. Built-in history, where each transaction is saved.
- Websockets. If you need live updates and highly interactive apps (collaborative documents and chatrooms), we've got your back.
- Full-text search. No need for a big elasticsearch server - atomic-server has one built-in.
Limitations
- No support for image resizing, as of now
- No GraphQL support (see issue)
Setting up the server
- One-liners:
cargo install atomic-serverordocker run -p 80:80 -v atomic-storage:/atomic-storage joepmeneer/atomic-server - Check out the readme!
Using the data in your (React / NextJS) app
The @tomic/lib and @tomic/react typescript NPM libraries can be used in any JS project.
In the next section, we'll discuss how to use Atomic-Server in your React project.
Compared to alternative open source headless CMS software
- Strapi: Atomic-Server doesn't need an external database, is easier to setup, has live synchronization support and is way faster. However, Strapi has a plugin system, is more polished, and has GraphQL support.
Atomic Data for personal data stores
A Personal Data Store (or personal data service) is a place where you store all sorts of personal information.
For example a list of contacts, todo items, pictures, or your profile data.
Not that long ago, the default for this was the my Documents folder on your hard drive.
But as web applications became better, we started moving our data to the cloud.
More and more of our personal information is stored by large corporations who use the information to build profiles to show us ads.
And as cloud consumers, we often don't have the luxury of moving our personal data to a place to where we want it to be.
Many services don't even provide export functionality, and even if they do, the exports often lack information or are not interoperable with other apps.
Atomic Data could help to re-introduce data ownership. Because the specification helps to standardize information, it becomes easier to make data interoperable. And even more important: Apps don't need their own back-end - they can use the same personal data store: an Atomic Server (such as this one).
Realizing this goal requires quite a bit of work, though. This specification needs to mature, and we need reliable implementations. We also need proper tutorials, libraries and tools that convince developers to use atomic data to power their applications.
Atomic Data & Artificial Intelligence
Recent developments in machine learning (and specifically deep neural networks) have shown how powerful and versatile AI can be. Both Atomic Data and AI can be used to store and query knowledge, but we think of these technologies as complementary due to their unique characteristics:
- Artificial Intelligence can make sense of (unstructured) data, so you can feed it any type of data. However, AIs often produce unpredictable and sometimes incorrect results.
- Atomic Data helps to make data interoperable, reliable and predictable. However, it requires very strict inputs.
There are two ways in which Atomic Data and AI can help each other:
- AI can help to make creating Atomic Data easier.
- Atomic Data can help train AIs.
- Atomic Data can provide AIs with reliable, machine readable data for answering questions.
Make it easier to create Atomic Data using AI
While writing text, an AI might help make suggestions to disambiguate whatever it is you're writing about.
For example, you may mention John and your knowledge graph editor (like atomic-server) could suggest John Wayne or John Cena.
When making your selection, a link will be created which helps to make your knowledge graph more easily browsable.
AI could help make these suggestions through context-aware entity recognition.
Train AIs with Atomic Data
During training, you could feed Atomic Data to your AI to help it construct a reliable, consistent model of the knowledge relevant to your organization or domain.
You could use atomic-server as the knowledge store, and iterate over your resources and let your AI parse them.
Provide AI with query access to answer questions
Instead of training your AI, you might provide your AI with an interface to perform queries.
Note that at this moment, I'm not aware of any AIs that can actually construct and execute queries, but because of recent advancements (e.g. ChatGPT), we know that there now exist AIs that can create SQL queries based on human text.
In the future, you might let your AI query your atomic-server to find reliable and up-to-date answers to your questions.
Atomic Data for e-commerce & marketplaces
Buying good and services on the internet is currently responsible for about 15% of all commerce, and is steadily climbing. The internet makes it easier to find products, compare prices, get information and reviews, and finally order something. But the current e-commerce situation is far from perfect, as large corporations tend to monopolize, which means that we have less competition which ultimately harms prices and quality for consumers. Atomic Data can help empower smaller businesses, make searching for specific things way easier and ultimately make things cheaper for everyone.
Decentralize platform / sharing economy service marketplaces
Platforms like Uber, AirBNB and SnapCar are virtual marketplaces that help people share and find services. These platforms are responsible for:
- providing an interface for managing offers (e.g. describe your car, add specifications and pricing)
- hosting the data of the offers themselves (make the data available on the internet)
- providing a search interface (which means indexing the data from all the existing offers)
- facilitating the transaction / payments
- provide trust through reviews and warranties (e.g. refunds if the seller fails to deliver)
The fact that these responsibilities are almost always combined in a single platforms leads to vendor lock-in and an uncompetitive landscape, which ultimately harms consumers. Currently, if you want to manage your listing / offer on various platforms, you need to manually adjust it on all these various platforms. Some companies even prohibit offering on multiple platforms (which is a legal problem, not a technical one). This means that the biggest (most known) platforms have the most listings, so if you're looking for a house / car / rental / meal, you're likely to go for the biggest business - because that's the one that has the biggest assortment.
Compare this to how the web works: every browser should support every type of webpage, and it does not matter where the webpage is hosted. I can browse a webpage written on a mac on my windows machine, and I can read a webpage hosted by amazon on an google device. It does not matter, because the web is standardized and open, instead of being centralized and managed by one single company as proprietary data. This openness of the web means that we get search engines like Google and Bing that scrape the web and add it to their index. This results in a dynamic where those who want to sell their stuff will need to share their stuff using an open standard (for webpages things like HTML and sometimes a bit of metadata), so crawlers can properly index the webpages. We could do the same thing for structured data instead of pages, and that's what Atomic Data is all about.
Let's discuss a more practical example of what this could mean. Consider a restaurant owner who currently uses UberEats as their delivery platform. Using Atomic Data, they could define their menu on their own website. The Atomic Schema specification makes it easy to standardize how the data of a menu item looks like (e.g. price, image, title, allergens, vegan...). Several platforms (potentially modern variants of platforms like JustEat / UberEats) could then crawl this standardized Atomic Data, index it, and make it easily searchable. The customer would use one (or multiple) of these platforms, that would probably have the exact same offers. Where these platforms might differ, is in their own service offering, such as delivery speed or price. This would result in a more competitive and free market, where customers would be able to pick a platform based on their service price and quality, instead of their list of offerings. It would empower the small business owner to be far more flexible in which service they will do business with.
Highly personalized and customizable search
Searching for products on the internet is mostly limited to text search. If we want to buy a jacket, we see tonnes of jackets that are not even available in our own size. Every single website has their own way of searching and filtering.
Imagine making a search query in one application, and sending that to multiple suppliers, after you'll receive a fully personalized and optimized list of products. Browsing in an application that you like to use, not bound to any one specific store, that doesn't track you, and doesn't show advertisements. It is a tool that helps you to find what you need, and it is the job of producers to accurately describe their products in a format that your product browser can understand.
How do we get there?
Well, for starters, producers and suppliers will need to reach a consensus on how to describe their articles. This is not new; for many products, we already have a common language. Shoes have a shoe size, televisions have a screen size in diagonal inches, brightness is measured in nits, etc. Describing this in a machine-readable and predictable format as data is the next logical step. This is, of course, where Atomic Schema could help. Atomic-server could be the connected, open source database that suppliers use to describe their products as data.
Then we'll also need to build a search interface that performs federated queries, and product-dependent filter options.
Product lifecycle & supply chain insights
Imagine buying a product, and being able to see where each part came from. The car that you buy might contain a list of all the maintenance moments, and every replaced part. The raw materials used could be traced back to their origins.
This requires a high degree of coordination from each step in the supply chain. This is exactly where Atomic Data shines, though, as it provides a highly standardized way of structuring, querying, authenticating an authorizing data.
Before we get to this point, we'll need to:
- Describe domain-specific product Classes using Atomic Schema, and their Properties.
Product specific updates after purchase
Imagine buying an external battery pack with a production error. All units with a serial number between 1561168 and 1561468 have a serious error, where overcharging could lead to spontaneous combustion. This is something that you'd like to know. But how would the manufacturer of that resource know where to find you? Well, if your Atomic Server would have a list of all the things that you've bought, it could automatically subscribe to safety updates from all manufacturers. When any of these manufacturers would publish a safety warning about a product that you possess, you'll get an alert.
Before we have this, well need to:
- Build notifications support (see issue)
Atomic Data for Surveys
Surveys and Questionnaires haven't been evolving that much over the past few years. However, Atomic Data has a couple of unique characteristics that would make it especially suitable for surveys. It could help make surveys easier to fill in, easier to analyze, easier to create, and more privacy friendly.
- Re-useable survey responses which enable pre-filled form fields which can save the respondent a lot of time. They also make it possible for users to use their own responses to gather insights, for example into their own health.
- Question standardization which helps researchers to re-use (validated) questions, which saves time for the researcher
- Privacy friendly, yet highly personalized invites as a researcher, send profile descriptions to servers, and let the servers tell if the question is relevant.
Re-useable survey responses
Since many surveys describe personal information, it makes sense, as a respondent, to have a way of storing the information you filled in in a place that you control. Making this possible enables a few nice use cases.
- Auto-fill forms. Previously entered response data could be usable while filling in new surveys. This could result in a UX similar to auto-filling forms, but far more powerful and rich than browsers currently support.
- Analyze your own personal data. Standardized survey responses could also be used to gather insights into your own personal information. For example, filling in a survey about how your shortness of breath linked to air pollution has been today could be used in a different app to make a graph that visualizes how your shortness of breath has progressed over the months for personal insight.
Achieving something like this requires a high degree of standardization in both the surveys and the responses. The survey and its questions should provide information about:
- The question. This is required in all survey questions, of course.
- The required datatype of the response, such as 'string', or 'datetime' or some 'enumeration'.
- A (link to a) semantic definition of the property being described. This is a bit more obscure: all pieces of linked data use links, instead of keys, to describe the relation between some resource and its property. For example, a normal resource might have a 'birthdate', while in linked data, we'd use 'https://schema.org/birthDate'. This semantic definition makes things easier to share, because it prevents misinterpretation. Links remove ambiguity.
- A query description. This is even more obscure, but perhaps the most interesting. A query description means describing how a piece of information can be retrieved. Perhaps a question in a survey will want to know what your payment pointer is. If a piece of software wants to auto-fill this field, it needs to know where it can find your payment pointer.
Question Standardization
We can think of Questions as Resources that have a URL, and can be shared. Sharing questions like that can make it easier to use the same questions across surveys, which in turn can make it easier to interpret data. Some fields (e.g. medical) have highly standardized questions, which have been validated by studies. These Question resources should contain information about:
- The question itself and its translations
- The datatype of the response (e.g.
date,string,enum), denoted by the Property of the response. - The path of the data, relative to the user. For example, a user's
birthdatecan be found by going to/ profile birthdate
Atomic Schema and Atomic Paths can be of value here.
Privacy friendly invites with client-side filtering
Currently, a researcher needs to either build their own panel, or use a service that has a lot of respondents. Sometimes, researchers will need a very specific target audience, like a specific age group, nationality, gender, or owners of specific types of devices. Targeting these individuals is generally done by having a large database of personal information from many individuals. But there is another way of doing this: client-side filtering Instead of asking for the users data, and storing it centralized, we could send queries to decentralized personal data stores. There queries basically contain the targeting information and an invitation. The query is executed on the personal data store, and if the user characteristics align with the desired participants profile, the user receives an invite. The user only sees invitations that are highly relevant, without sharing any information with the researcher.
The Atomic Data specification solves at least part of this problem. Paths are used to describe the queries that researchers make. AtomicServer can be used as the personal online data store.
However, we still need to specify the process of sending a request to an individual (probably by introducing an inbox)
Atomic Data and Verifiable Credentials / SSI
What are Verifiable Credentials / Self-Sovereign Identity
Verifiable Credentials are pieces of information that have cryptographic proof by some reliable third party. For example, you could have a credential that proves your degree, signed by your education. These credentials an enable privacy-friendly transactions where a credential owner can prove being part of some group, without needing to actually identify themselves. For example, you could prove that you're over 18 by showing a credential issued by your government, without actually having to show your ID card with your birthdate. Verifiable Credentials are still not that widely used, but various projects exists that have had moderate success in implementing it.
What makes Atomic Data suitable for this
Firstly, Atomic Commit are already verifiable using signatures that contain all the needed information. Secondly, Atomic Schema can be used for standardizing Credential Schemas.
Every Atomic Commit is a Verifiable Credential
Every time an Agent updates a Resource, an Atomic Commit is made. This Commit is cryptographically signed by an Agent, just like how Verfifiable Credentials are signed. In essence, this means that all atomic data created through commits is fully verifiable.
How could this verification work?
- Find the Commit that has created / edited the value that you want to verify. This can be made easier with a specialized Endpoint that takes a
resource,propertyandsignerand returns the associated Commit(s). - Check the signer of the Commit. Is that an Agent that you trust?
- Verify the signature of the Commit using the public key of the Agent.
Sometimes, credentials need to be revoked. How could revocation work?
- Find the Commit (see above)
- Get the signer (see above)
- Find the
/isRevokedEndpoint of that signer, send a Request there to make sure the linked Commit is still valid and not revoked.
Use Atomic Schema for standardizing Credentials
If you are a Verifier who wants to check someone's birthdate, you'll probably expect a certain datatype in return, such as a date that is formatted in some specific way. Atomic Schema makes it possible to express which properties are required in a certain Class, and it also makes it possible to describe which datatype is linked to a specific Property. Combined, they allow for fine-grained descriptions of models / classes / schemas.
Using Atomic-Server as a Data Catalog
A data catalog is a system that collects metadata - data about data. They are inventories of datasets.
They are often used to:
- Increase data-reuse of (open) datasets. By making descriptions of datasets, you increase their discoverability.
- Manage data quality. The more datasets you have, the more you'll want to make sure they are usable. This could mean settings serialization requirements or schema compliance.
- Manage compliance with privacy laws. If you have datasets that contain GDPR-relevant data (personal data), you're legally required to maintain a list of where that data is stored, what you need it for and what you're doing with it.
Why Atomic Server could be great for Data Catalogs
Atomic-Server is a powerful Database that can be used as a modern, powerful data catalog. It has a few advantages over others:
- Free & open source. MIT licensed!
- Many built-in features, like full-text search, history, live synchronization and rights management.
- Great performance. Requests take nanoseconds to milliseconds.
- Very easy to setup. One single binary, no weird runtime dependencies.
- Everything is linked data. Not just datasets (which you might), but also everything around them (users, comments, implementations).
- Powerful CMS capabilities. With built in support for Tables and Documents, you can easily create webpages with articles or other types of resources using Atomic Server.
- Atomic Schema can be used to describe the shape of your datasets: the properties you use, which fields are required - things like that. Because Atomic Schema uses URLs, we can easily re-use properties and class definitions. This helps to make your datasets highly interoperable.
When Atomic-Server is used for hosting the data, too
Most datacatalogs only have metadata. However, if you convert your existing CSV / JSON / XML / ... datasets to Atomic Data, you can host them on Atomic-Server as well. This has a few advantages:
- Data previews in the browser, users can navigate through the data without leaving the catalog.
- Data itself becomes browseable, too, which means you can traverse a graph by clicking on link values.
- Standardized Querying means you can easily, from the data catalog, can filter and sort the data.
- Cross-dataset search. Search queries can be performed over multiple Atomic Data servers at once, enabling searching over multiple datasets. This is also called federated search.
Atomic Server compared to CKAN
- Atomic-Server is MIT licensed - which is more permissive than CKAN's AGPL license.
- Whereas CKAN needs an external database, a python runtime, solrd and a HTTPS server, Atomic-Server has all of these built-in!
- CKAN uses plain RDF, which has some very important drawbacks.
- But... Atomic-Server still misses a few essentials right now:
What we should add to Atomic-Server before it's a decent Data Catalog
- Add a model for datasets. This is absolutely essential. It could be based on (and link to) DCAT, but needs to be described using Atomic Schema. This step means we can generate forms for Datasets and we can validate their fields.
- Add views for datasets. Atomic-Server already renders decent views for unknown resources, but a specific view should be created for Datasets. Add a PR if you have a React view!
Atomic Data for Education - standardized, modular e-learning
The Atomic Data specification can help make online educational content more modular. This has two direct benefits:
- Separate learning goals from how they are achieved. Some might prefer watching a video, others may want to read. Both can describe the same topic, and share the same test.
- Improve discoverability. Create links between topics so students know which knowledge is needed to advance to the next topic.
Modular educational content - a model
We can think of Knowledge as being building blocks that we need to do certain things. And we can think of Lessons as teaching certain pieces of knowledge, while at the same time requiring other pieces of knowledge. For example, an algebra class might require that you already know how to multiply, add, etc. We can think of Test as verifying if a piece of knowledge is properly understood.
Now there's also a relationship between the Student and all of these things. A student is following a bunch Lessons in which they've made some progress, has done some Tests which resulted in Scores.
Describing our educational content in this fashion has a bunch of advantages. For students, this means they can know in advance if they can get started with a course, or if they need to learn something else first. Conversely, they can also discover new topics that depend on their previous piece of knowledge. For teachers, this means they can re-use existing lessons for the courses.
What makes Atomic-Server a great tool for creating online courseware
- Powerful built-in document editor
- Drag & drop file support
- Versioning
- Open source, so no vendor lock-in, and full customizability
- Real-time updates, great for collaboration
- Online by default, so no extra hassle with putting courses on the internet
However, there is still a lot to do!
- Turn the model described above into an actual Atomic Schema data model
- Build the GUI for the application
- Add plugins / extenders for things like doing tests (without giving the answer to students!)
- Create educational content
Atomic Data for food label standardization
In most countries, food producers are required to provide nutritional information on the packages of products, which helps citizens to make informed decisions about what to eat. But how about we upgrade these labels to machine-readable, atomic data? We could describe products using Atomic Data, and put their identifiers (Subject URLs) as QR codes on packages. Imagine these scenarios:
Scan labels to get detailed, reliable, interactive information
You want to know more about some new cereal you've just bought.
You scan the QR code on the package.
A web app opens that shows detailed, yet highly visual information about its nutritional value.
The screen is no longer limited to what realistically fits on a package.
The elements are interactive, and provide explanations.
Everything is translated to the user's language.
If the food is (soon to be) expired, the app will clearly and visually alert you.
Click on the question mark next to granulated sugars, and you get an explanation of what this means to your health.
E-numbers are clickable, too, and help you instantly understand far more about what they represent.
When AR glasses become technologically feasible, you could even help people make better decisions while doing grocery shopping.
Using links instead of names helps to guide consumers to trustworthy pages that communicate clearly. The alternative is that they use search engines, and maybe end up reading misinformation.
Provide nutritional advice based on shopping behavior
You order a bunch of products on your favorite groceries delivery app. When going to the payment screen, you are shown a nutritional overview of your order. You see that with this diet, you might have a deficit of the Lysene amino acid. The shopping cart suggest adding egg, dairy or soy to your diet. This can be done, because the groceries app can easily check detailed information about the food in your shopping cart, and reason about your dietary intake.
How to achieve all this
- The governing body (e.g. the European Commision) should set up an Atomic Server and host it on some recognizable domain.
- Create the Class for a food product, containing the same (or more) information that is shown on food packages.
- Create the Class for Ingredient.
- Create instances for various Ingredients. Start with the E-numbers, work your way up to all kinds of used ingredients. Add Translations.
- Give instructions to Producers on how to describe their Products. Give them to option to host their own Server and control their own data, and give them the option to use some EU server.
Acknowledgements
Authors:
Special thanks to:
- Thom van Kalkeren (my colleague, friend and programming mentor who came up with many great ideas on how to work with RDF, such as HexTuples and linked-delta)
- Tim Berners-Lee (for everything he did for linked data and the web)
- Ruben Verborgh (for doing great work with RDF, such as the TPF spec)
- Pat McBennett (for lots of valuable feedback on initial Atomic Data docs)
- Manu Sporny (for his work on JSON-LD, which was an important inspiration for JSON-AD)
- Jonas Smedegaard (for the various interesting talks we had and the feedback he provided)
- Arthur Dingemans (for sharing his thoughts, providing feedback and his valuable suggestions)
- Anja Koopman (for all her support, even when this project ate away days and nights of our time together)
- Alex Mikhalev (for sharing many inspiring project and ideas)
- Daniel Lutrha (for inspiring me to be more ambitious and for providing lots of technical ideas)
- All the other people who contributed to linked data related standards
Subscribe to the Atomic Data newsletter
We'll send you an update (max once per month) when there's something relevant to share, such as
- Major changes to the specification
- Major new releases (with new features)
- Use-cases, implementations
- Tutorials, blog posts
- Organizational / funding news
Click here to sign up to the Atomic Data Newsletter
Get involved
Atomic Data is an open specification, and that means that you're very welcome to share your thoughts and help make this standard as good as possible.
Things you can do:
- Join the Discord server for voice / text chat
- Start playing with / contributing to the implementations
- Drop an issue on Github to share your suggestions or criticism of this book / spec
- Subscribe to the newsletter
- Join our W3C Community Group
<widgetbot server="723588174747533393" channel="723588175351513152" width="800" height="600"