Tables
Tables are a way to create and group large amounts of structured data.
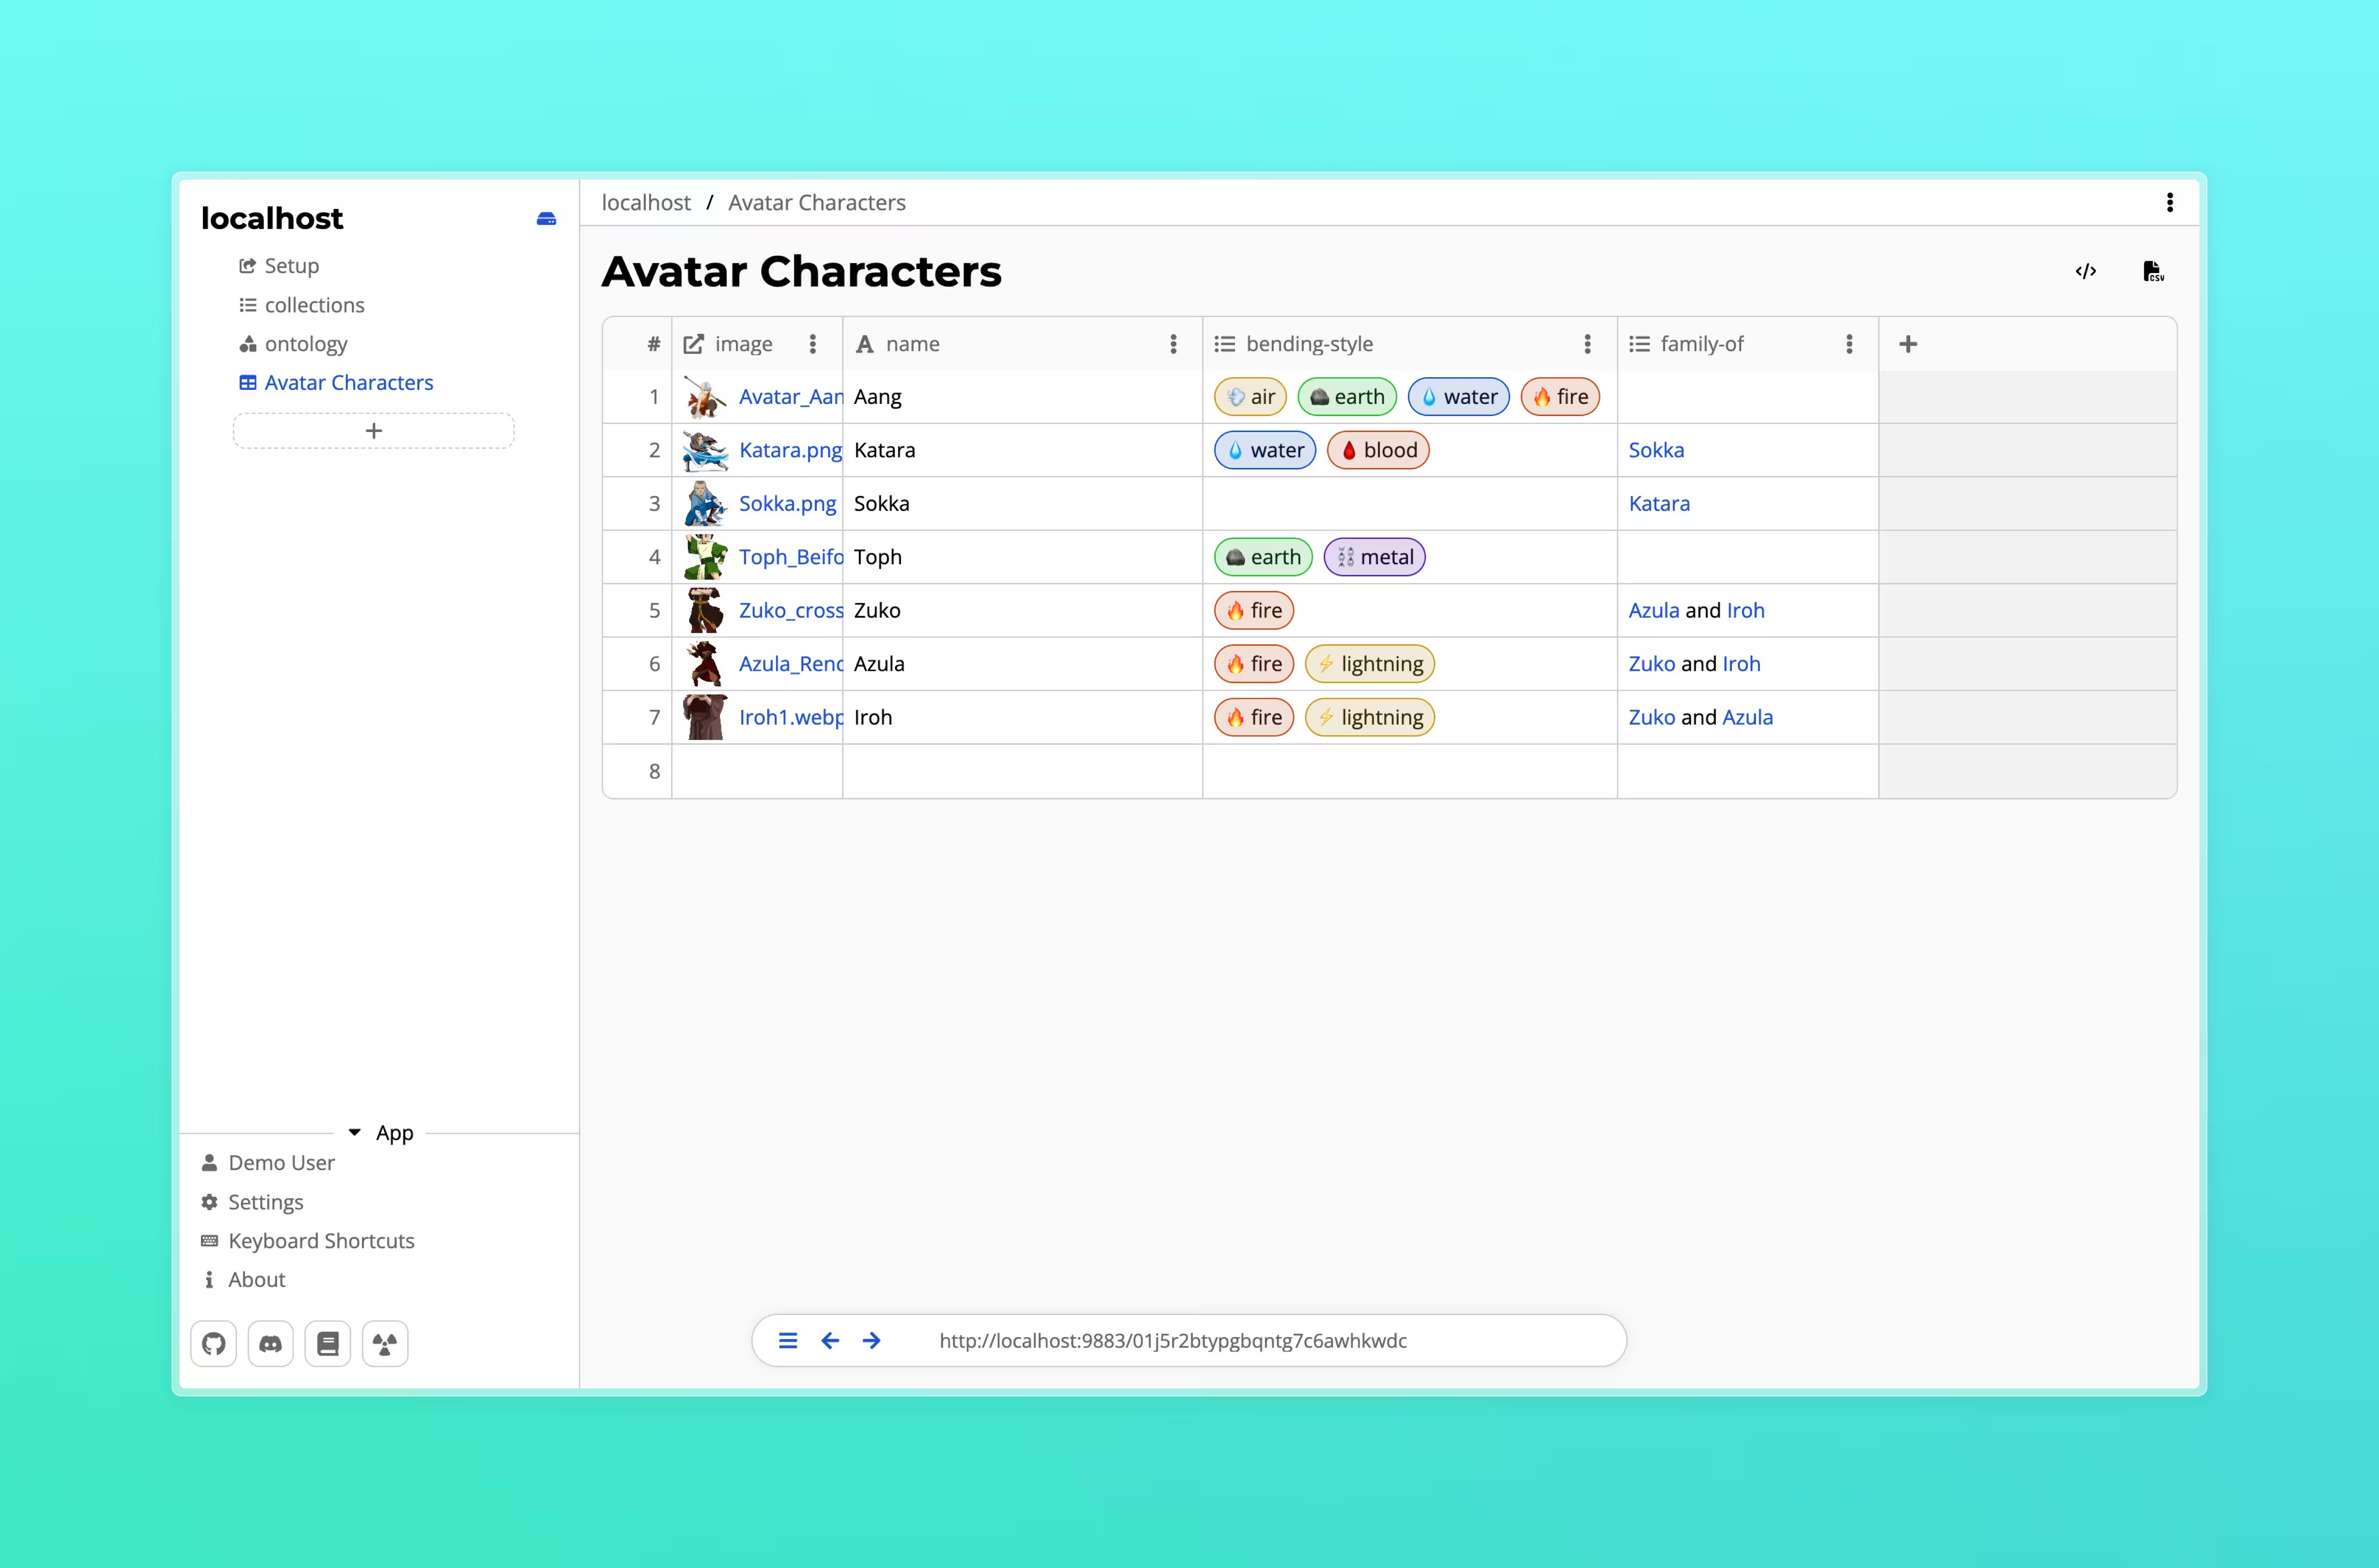
Tables consist of rows of resources that share the same parent and class. The properties of that class are represented as columns in the table. This means that each column is type-safe, a number column can not contain text data for example.
Creating a table
To create a table, click the “+” button in the sidebar or a folder and select “Table”.
A dialog will appear prompting you to enter a name.
This name will be used as the title of the table as well as the name for the underlying class of the rows.
This new class will already have a name property. Using the name property as titles on your resources is a best practice as it helps with compatibility between other tools and makes your resources findable by AtomicServer’s search functionality.
If you do not want to use the name property, you can remove it by clicking on the three dots in the column header and selecting “Remove”.
While creating a new table you can also choose to use an existing class by selecting “Use existing class” in the dialog and selecting the desired class from the dropdown.
Classes created by tables are automatically added to the default ontology of the drive. Same goes for the columns of the table. If you chose to use an existing class, any columns created will be added to the ontology containing that class.
Features
- Rearange columns: You can drag and drop columns to rearrange them.
- Resize columns: You can resize columns by dragging the edges of the column header.
- Sort rows: Click on a column header to sort the rows by that column.
- Fast keyboard navigation: Use the arrow keys to navigate the table with hotkeys similar to Excel.
- Copy & paste multiple cells: You can copy and paste multiple cells by selecting them and using
Ctrl/Cmd + CandCtrl/Cmd + V. Pasting also works across different tables and even different applications that support HTML Table data (Most spreadsheet applications). - Export data to CSV: You can export the data of a table to a CSV file by clicking the “Export” button in the top right.