Creating a basic data model
Atomic data is strictly typed meaning we need to define the data model first. To do this we’ll make an ontology.
NOTE:
You’ll likely have some stuff in your atomic data browser sidebar that you won’t see in these screenshots. This is because I created a new drive for the purpose of this guide (you can visit the drive yourself to see what the end result will look like here)
To create an ontology click on the plus icon in the top left of the page. From the list of classes pick ‘Ontology’.
A dialog will pop up prompting you to pick a name. I’m going to call it my-portfolio but you can choose something else like ‘epic-pencil-sharpening-enjoyers-blog’ (try to keep it short though because the CLI will use this when generating the typescript types).
Click ‘Create’, you should now see the new ontology. Click ‘Edit’ to start editing.
Let’s start by creating a class with the name homepage.
For now, we’ll give our homepage the required properties: name, heading, sub-heading, body-text and header-image.
For the name property, we can use the existing atomic property name.
NOTE:
If a class has a title or name that describes the instance, e.g. books and movies have a title and a person has a name, you should always use the existing name property. This makes it more easy to share data between applications and implementations.
Click on the + icon under ‘Requires’ and type ‘name’.
The existing name property should be the first option in the list (If it’s not in the list you might have to start Atomic Server with the --initialize flag once to make sure all pre-existing resources are known to the server).
The name property will serve as the name of our homepage resource and we’ll use it as the html title of the website.
Once you click on ‘name’ you’ll see that the property is added to the list but is greyed out, this is because it is an external resource not defined in the ontology and you do not have edit rights for it. Because you do have read rights though you can still add it to the list.
The next few props don’t already exist so we’ll have to create them.
Click the + button again and type: “heading”. An option with Create: heading should be visible.
Click it and give it a description like “Heading text displayed in the header”.
The datatype should be STRING which is selected by default.
Do the same for subheading.
Next, create a property called body-text but change the datatype to MARKDOWN.
The last property we’ll add is header-image. The datatype should be Resource, this means it will reference another resource.
Since we want this to always be a file and not some other random class we are going to give it a classtype.
To do this click on the configure button next to the datatype selector.
A dialog should appear with additional settings for the property.
In the ‘Classtype’ field search for file.
An option with the text file - A single binary file should appear, select it and close the dialog.
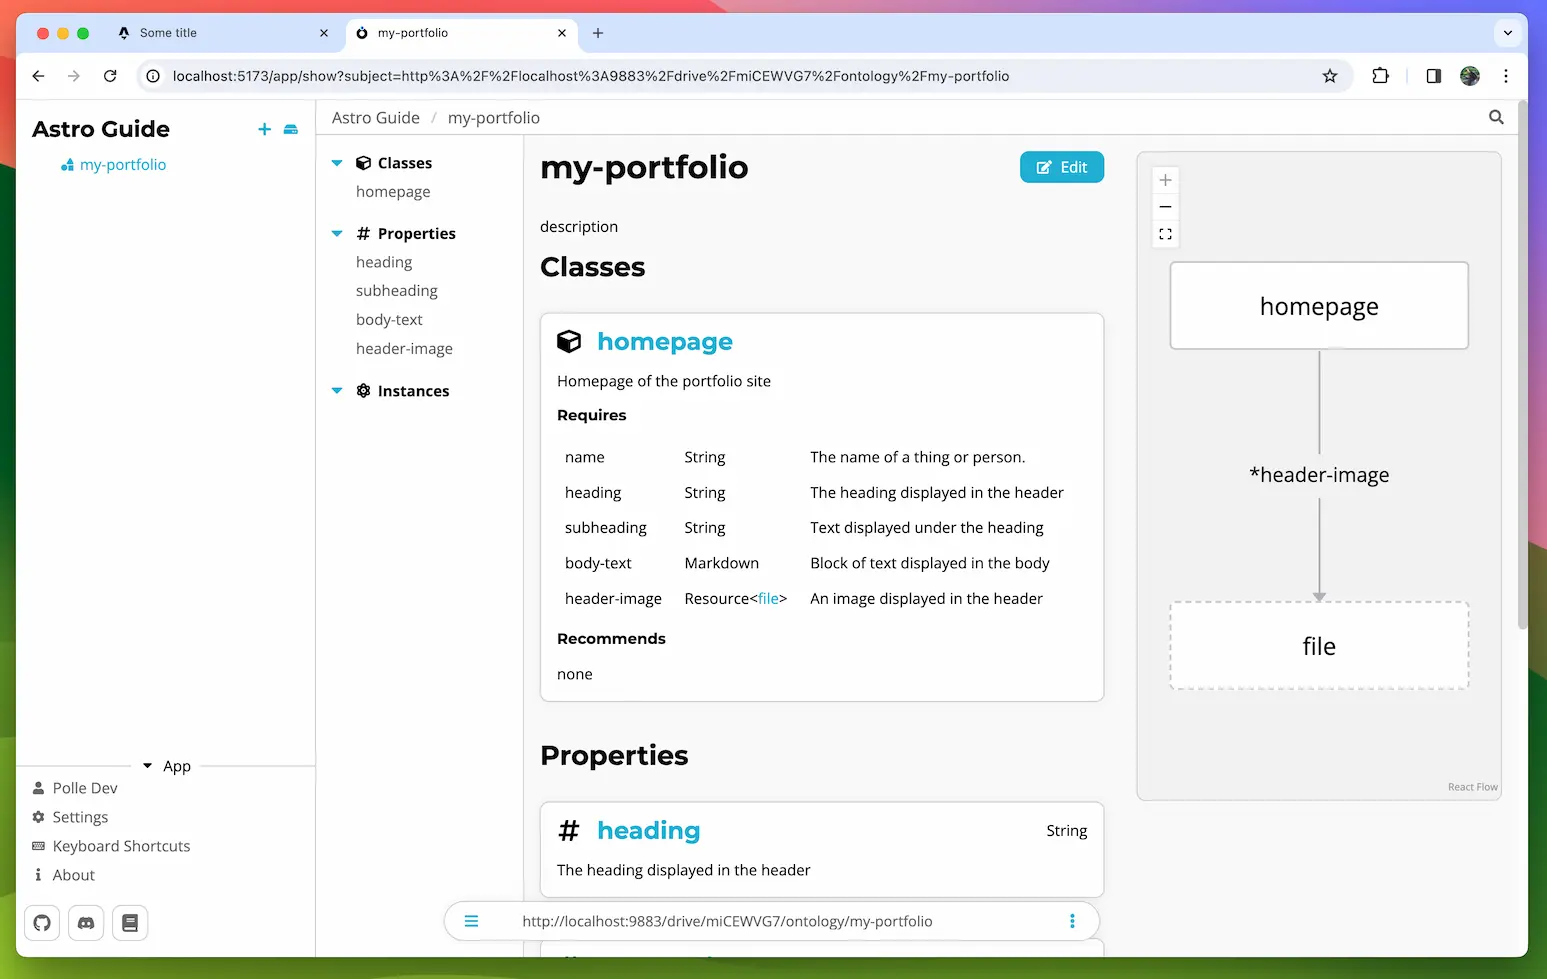
Your ontology should look something like this now
Alright, our model is done for now, let’s create the actual homepage resource and then we’ll move on to generating types and fetching the data in the frontend.